Presenter's guideline - WS0 : From simulation to Real world
| Site: | NiryoAcademy |
| Course: | Robotics Outreach & Summer Camps: Guide |
| Book: | Presenter's guideline - WS0 : From simulation to Real world |
| Printed by: | Guest user |
| Date: | Friday, 12 June 2026, 2:33 PM |
Description
🎯Build a complete vision pick and place inside the simulation then Participants transfer the code to the real robot.
⏱️3 hours
Setup
We recommend using the recommended setup for Workshop 0.
If you are using the program provided by Niryo, pay close attention to the Vision Pick blocks, as the workspaces are not pre-selected.
To get familiar with the simulation before starting this workshop we recommend following this tutorial: NiryoStudio Simulation Quickstart
Step 1: Getting Started with the Simulation
Action:
-
Click “Launch Simulation” from NiryoStutio
-
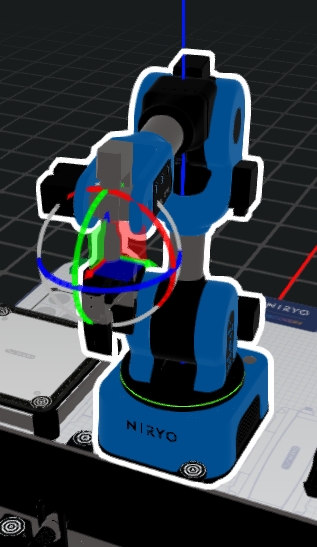
Click on the robot in the simulation — a gizmo will appear on the end effector.
-
Use this gizmo to move the robot:
-
Drag a single axis arrow to move linearly along that axis.
-
Drag a plane to move the robot along the corresponding XY plane.
Speaker notes:
“In the simulation, we can manually move the robot using the gizmo. Selecting an axis moves the robot straight along that direction, while selecting a plane allows us to slide it smoothly across two dimensions.”
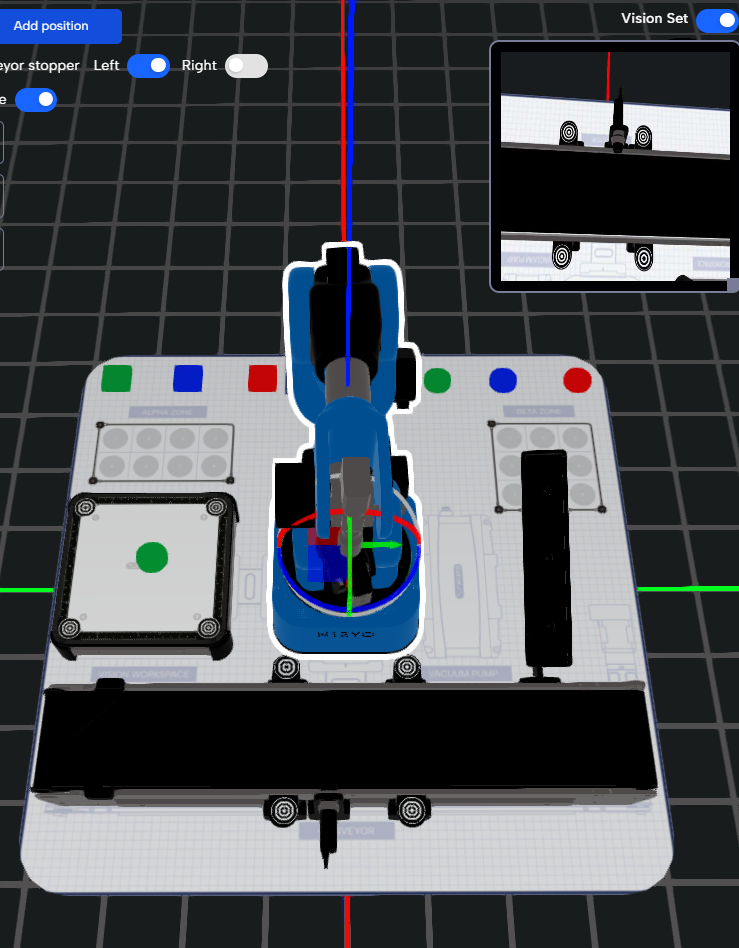
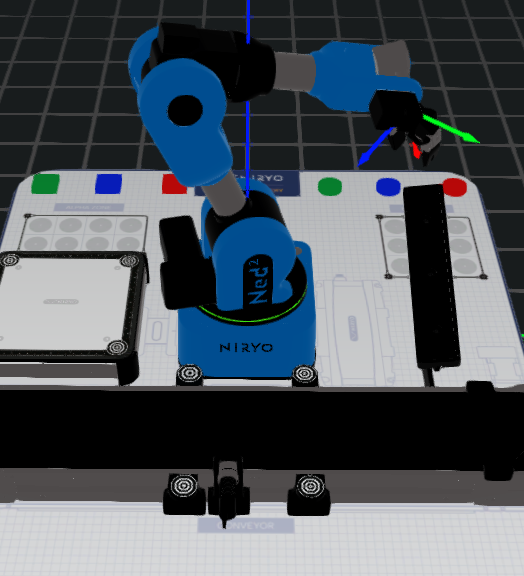
Step 2: Quick Move on Top of Objects
Action:
-
Double-click any object in the simulation to move the robot above it.
-
If the object is a vision workspace, the robot automatically moves to a suitable observation pose.
Speaker notes:
“Double-clicking is an easy way to bring the robot to a specific object. When double-clicking a vision workspace, the robot moves to an ideal observation pose — where all four workspace landmarks are visible.”
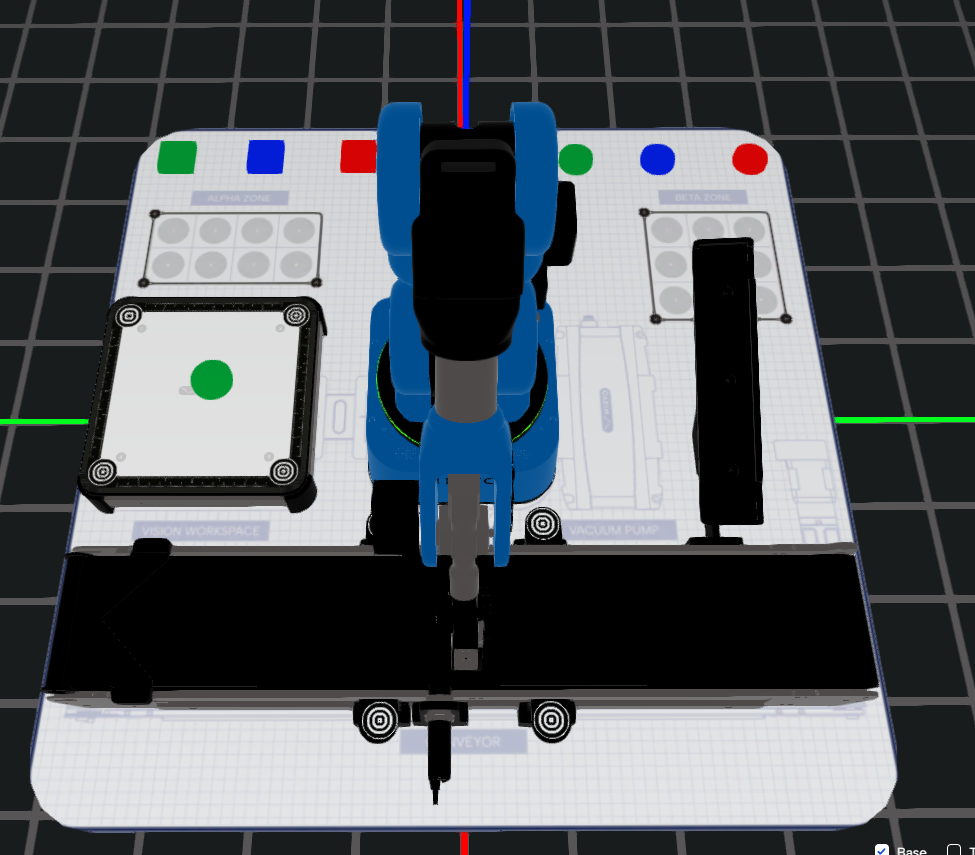
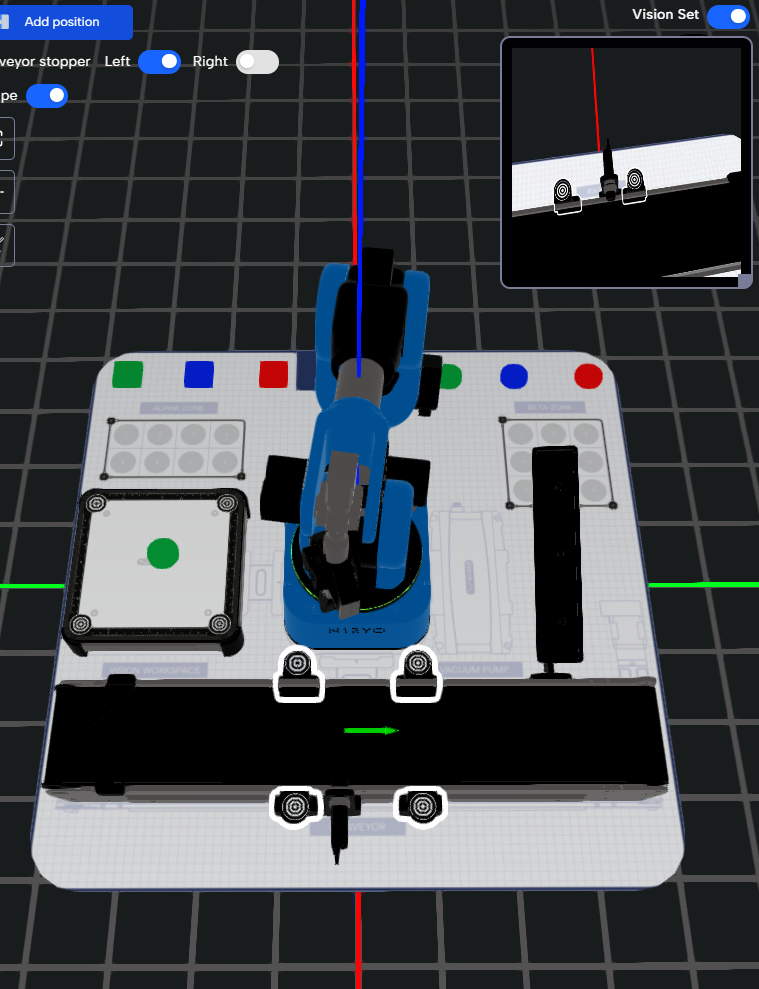
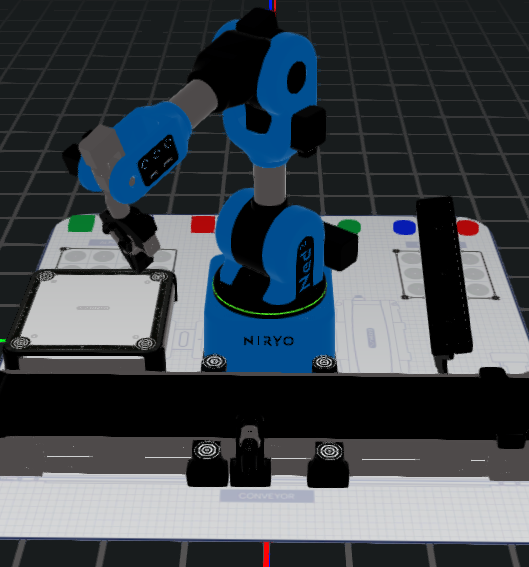
Step 3: Prepare the Scene
Action:
Set up the conveyor workspace, and the IR sensor as shown in the reference picture.
Speaker notes:
“This setup recreates a real inspection line:
-
the conveyor workspace is where the camera inspects objects,
-
the IR sensor detects incoming objects.”
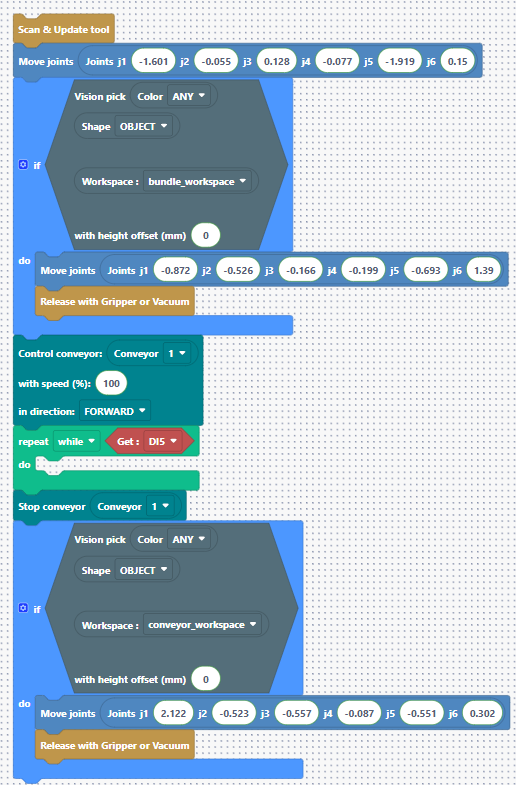
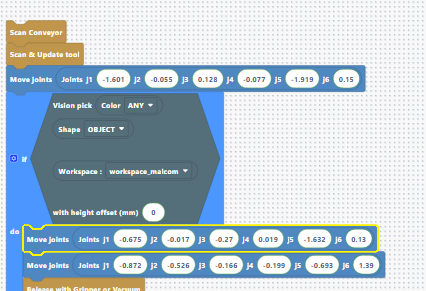
Step 4: Create Your First Program in Simulation
Action:
-
Manually pick a circle from the storage area and place it on the vision plate.
-
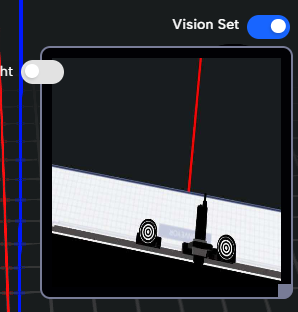
Open the camera feed by clicking Vision Set (top right).
-
Double-click the vision plate and save the current observation pose using Add position.
Advice: Be sure to use save mode ‘Joints’.
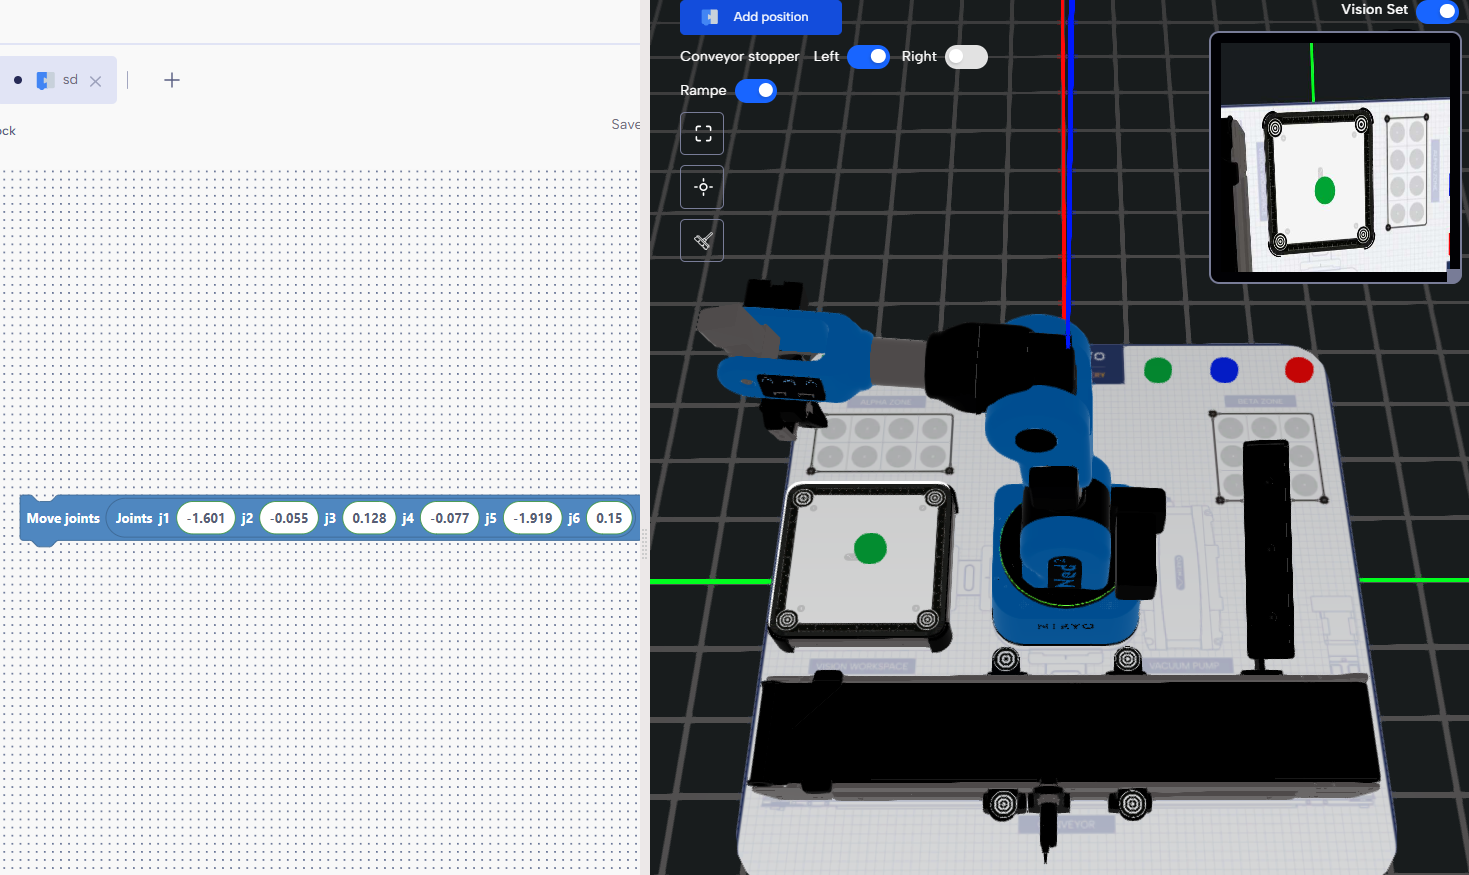
-
Add an If block containing the Vision Pick template, and select the correct workspace: bundle_workspace.
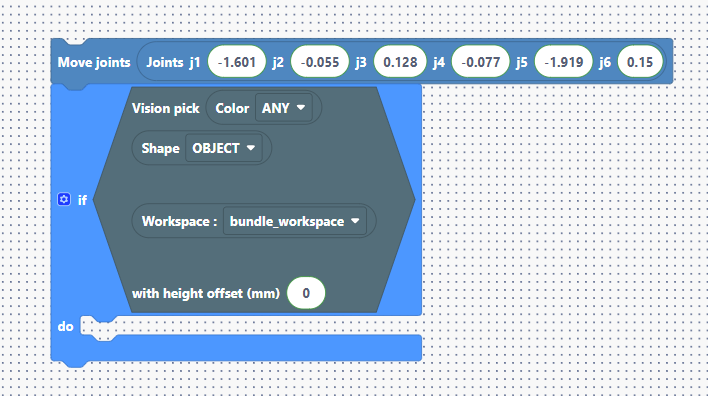
-
Move the robot above the left side of the conveyor, Save this as your place position, and add a Release with Tool block.
Put the 2 blocks in the “do” of the “if” block
Since you are using the gripper, add a Scan Tool block at the top of your program to ensure the robot detects the tool.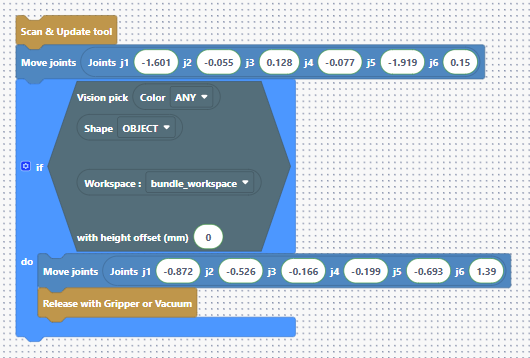
Add Conveyor Logic
We want the conveyor to run until the object enters the conveyor workspace.
-
Add a Run Conveyor block. Put the speed to 50%.
Since you are using the conveyor, add a use conveyor block at the top of your program to ensure the robot detects the conveyor. -
Add the logic for the IR sensor:
-
Reminder: the IR sensor is plugged into DI5.
-
DI5 = HIGH (True) → no object detected
-
DI5 = LOW (False) → object detected
-
Add:
-
While Get DI5 → do nothing (wait).
After the While, stopping condition is reached → stop the conveyor.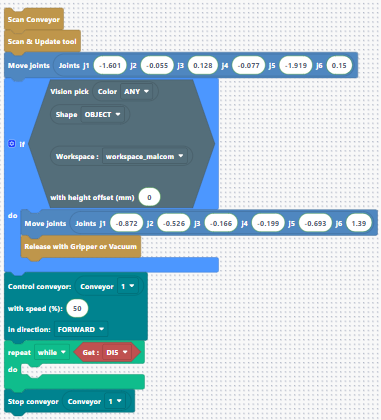
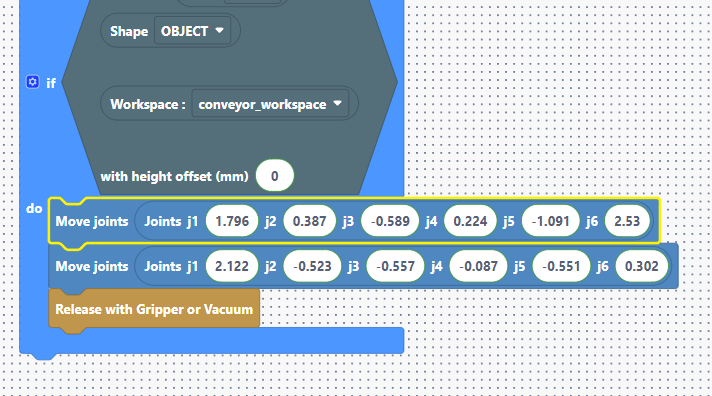
Vision Pick on the Conveyor Workspace
-
Move the robot to the correct observation pose for the conveyor workspace.
-
Warning: the conveyor workspace is movable, so the double-click may not be accurate.
-
Adjust the pose manually if needed.
-
Create a Vision Pick exactly as you did for the vision plate, but using the conveyor workspace.
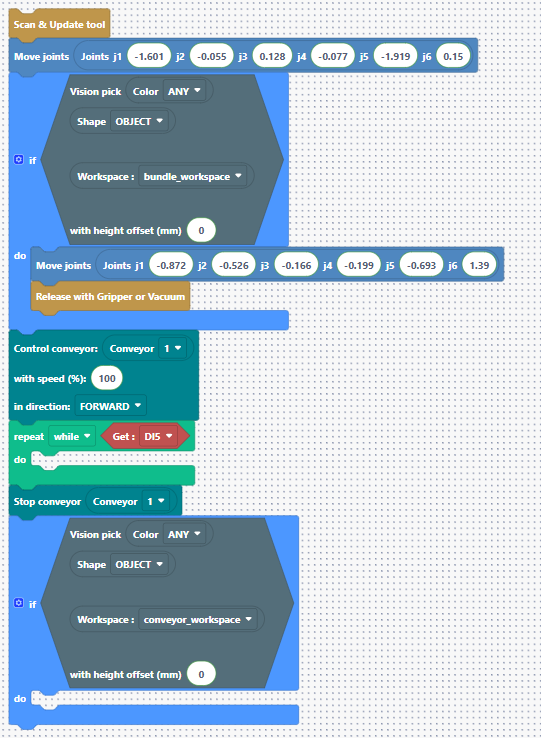
-
Move the robot manually above the Beta zone frame, save this position, and add a Release with Tool block.
Step 5: Improve the Code Before Switching to the Real Robot
You can now run the program and observe the simulation.
The program works — but you may notice the robot passes through obstacles like the conveyor.
In the real world, this is not acceptable.
To safely transfer the program to the physical robot, we must add intermediate positions:
-
After the Vision Pick on the Vision Plate:
-
Move to a position between the vision plate and the conveyor to ensure clearance before moving toward the conveyor.
-
After the Vision Pick on the Conveyor:
-
Move to a position high above the conveyor before traveling toward the Beta zone placement position.
Speaker notes:
“Even if the simulation shows correct movements, the real robot may collide with tools or the conveyor. Adding intermediate positions creates safe trajectories that avoid obstacles.”
Step 6: Transition to the Physical World
Action:
If your setup is not already prepared, do the following:
-
Mount the bundle as shown in the reference picture.
-
Connect to the real robot and perform a calibration.
-
Create the workspaces for the vision plate and the conveyor.
-
To match the simulation, name them:
-
bundle_workspace (vision plate)
-
conveyor_workspace (conveyor)
Disconnect from the simulation and reconnect to the real robot.
Since the simulation and physical setup may not match perfectly, the observation poses may be inaccurate in the real world.
Run your program and observe the movements. If a pose needs correction:
-
Open a new program,
-
Copy-paste your Blockly code,
-
Adjust only the positions in the new program (to avoid breaking the simulation version).
Finally, place an object on the vision plate and run the program.
Speaker notes:
“This step bridges simulation and reality. By keeping the same workspace names and logic, the transition is smooth — we only adjust poses if needed.”
Result:
✅ Your program built in simulation now works with the real robot!