Presenter's guideline - WS1 Pick & Place Basics
| Site: | NiryoAcademy |
| Course: | Robotics Outreach & Summer Camps: Guide |
| Book: | Presenter's guideline - WS1 Pick & Place Basics |
| Printed by: | Guest user |
| Date: | Friday, 12 June 2026, 2:32 PM |
Description
🎯Introduce participants to the core of industrial automation. They will learn how to program a simple pick & place task with Blockly, using the NED2’s Learning Mode.
⏱️1 hour
Table of contents
- Setup
- Step 1: Power On and Introduce the Robot
- Step 2: Demonstrate Manual Movement of Each Axis Using FreeMotion
- Step 3: Connect to the Robot via NiryoStudio and Calibrate
- Step 4: Open a Blockly Program
- Step 5: Explain the Three Buttons on the End Effector
- Step 6: Record Pick and Place Positions
- Step 7: Add Gripper Actions in Blockly
- Step 8: Run the Pick & Place Program and Practice
Setup
We recommend using the recommended setup for the Workshop 1 and:
-
Place the token on the sloped section of the conveyor belt. This will provide a consistent position for performing pick & place operations repeatedly.
Step 1: Power On and Introduce the Robot
Action:
-
Plug in and turn on the Ned2 robot.
Speaker notes:
“Welcome everyone! Let’s start by powering on our Ned2 robot. Make sure it’s plugged in securely and press the power button.”
“This robot is a collaborative robot, or ‘cobot’, designed to work safely alongside people. Today, we’ll learn how to move it manually, program a simple pick and place, and understand the main controls.”
Step 2: Demonstrate Manual Movement of Each Axis Using FreeMotion
Action:
-
Press and hold the FreeMotion button on the end effector.
-
Manually move each of the 6 robot joints one by one.
Speaker notes:
“The robot is a 6-axis robotic arm. Here is the first axis.” (Show rotation of joint 1.)
“Here is the second axis.” (Show rotation of joint 2.)
“Here is the third axis.” (Show rotation of joint 3.)
“Here is the fourth axis.” (Show rotation of joint 4.)
“Here is the fifth axis.” (Show rotation of joint 5.)
“And here is the sixth axis.” (Show rotation of joint 6.)
Step 3: Connect to the Robot via NiryoStudio and Calibrate
Action:
-
Open NiryoStudio on your computer or tablet.
-
Connect to the Ned2 robot (Direct Ethernet recommended).
-
Run the calibration procedure.
Speaker notes:
“NiryoStudio is the software developed by Niryo to control the robots and allows us to program them visually.”
“Once the software is open, I connect to the robot. Depending on your setup, this can be via Wi-Fi, Hotspot, or Ethernet.”
“Before programming, it’s important to calibrate the robot. Calibration tells the robot where its ‘home’ position is and ensures all joint angles are correctly zeroed.”
Step 4: Open a Blockly Program
Action:
-
Open a new Blockly Program on NiryoStudio.
Speaker notes:
“With the robot ready, we’ll now open a Blockly program. Blockly is a visual programming language where we build robot instructions by snapping together blocks : it’s very intuitive!”
“The most basic way to program with the Ned2 is by moving the robot manually and using Blockly. This is what we will see now.”
Step 5: Explain the Three Buttons on the End Effector
Action:
-
Show on the end effector the 3 buttons: FreeMotion, Save, and Custom.
-
Demonstrate each button’s function.
Speaker notes:
“Let’s take a closer look at the 3 buttons on the robot’s gripper. These are our main controls during the workshop.”
“First is FreeMotion. When pressed, it releases the motors so you can move the arm by hand.” (Press FreeMotion and move the arm.)
“Next is Save. When you press once Save, the robot records the current position of the arm and adds it directly into the Blockly program.” (Show by moving arm and pressing Save once.)
“If you press and hold the Save button, the entire trajectory will be recorded instead of just a single position.” (Press and hold the button, move the arm along a small trajectory, name the trajectory, and then press Play to run it.)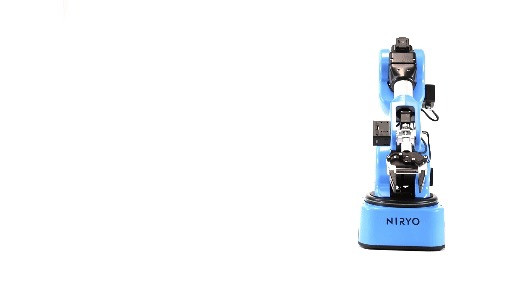
“Finally, the Custom button controls the gripper. It opens or closes the gripper or activates the vacuum pump. Note that Custom doesn’t save the action in Blockly — it just triggers the gripper action.” (Press Custom to open/close gripper.)
The first press on the button scans the tools. You may need to press it multiple times if the tool has not been scanned yet.
Remove the block you created to have an empty program
Step 6: Record Pick and Place Positions
Action:
-
Check if the gripper is open or press custom to open the gripper
-
Using FreeMotion, position the arm in the following sequence, pressing Save at each:
-
Above the object (safe position)
-
At the object (grasp position)
-
Above the object (after grasp)
-
Place position (where the object will be released)
Speaker notes:
“Now, let’s program the positions for our pick and place task. I’ll move the arm using FreeMotion to a position just above the object — this is a safe spot to approach from.”
“Press Save to record this first position.” (Demonstrate.)
“Next, I’ll lower the arm to the object itself — where we want to pick it up — and press Save.”
“After grasping, we return to the safe position above the object and save it again.”
“Finally, move the arm to the place position — where the object will be released — and press Save.”
“By saving these positions, the robot will know exactly where to move during the program.”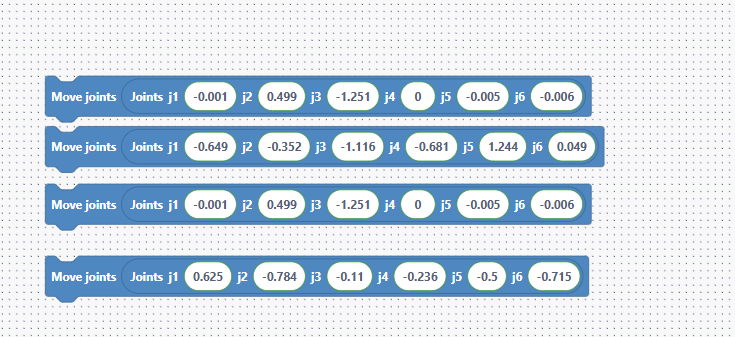
Step 7: Add Gripper Actions in Blockly
Action:
-
In the Blockly program, add:
-
A Grasp action after the second position (object grasp)
-
A Release action after the last position (place)
-
A Release action at the very start of the program to ensure the gripper is open
Speaker notes:
“With all positions saved, we need to tell the robot when to close and open the gripper.”
“Right after the position where the robot grabs the object, I add a Grasp block — this closes the gripper.”
“After the final position, I add a Release block to open the gripper and drop the object.”
“I also add a Release at the start of the program — this makes sure the gripper is open before we begin, preventing any surprises.”
“Now, our program is complete and ready to run!”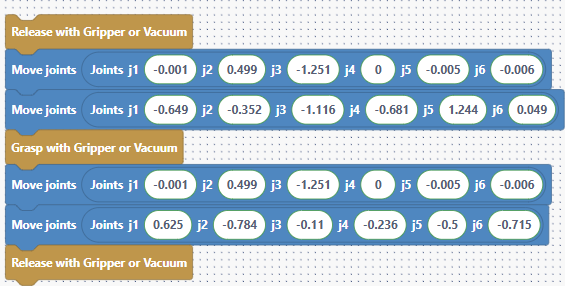
Step 8: Run the Pick & Place Program and Practice
Action:
-
Run the Blockly program on the robot.
-
Observe the pick and place cycle.
Speaker notes:
“Let’s run the program and watch the robot pick up the object and place it where we told it to.”
“If anything doesn’t work as expected, we can always stop, adjust positions, and try again.”
“Now it’s your turn! Try moving the robot, saving positions, and programming your own pick and place sequence.”