Presenter's guideline - WS5 : Loop functions integration
| Site: | NiryoAcademy |
| Course: | Robotics Outreach & Summer Camps: Guide |
| Book: | Presenter's guideline - WS5 : Loop functions integration |
| Printed by: | Guest user |
| Date: | Friday, 12 June 2026, 1:24 PM |
Setup
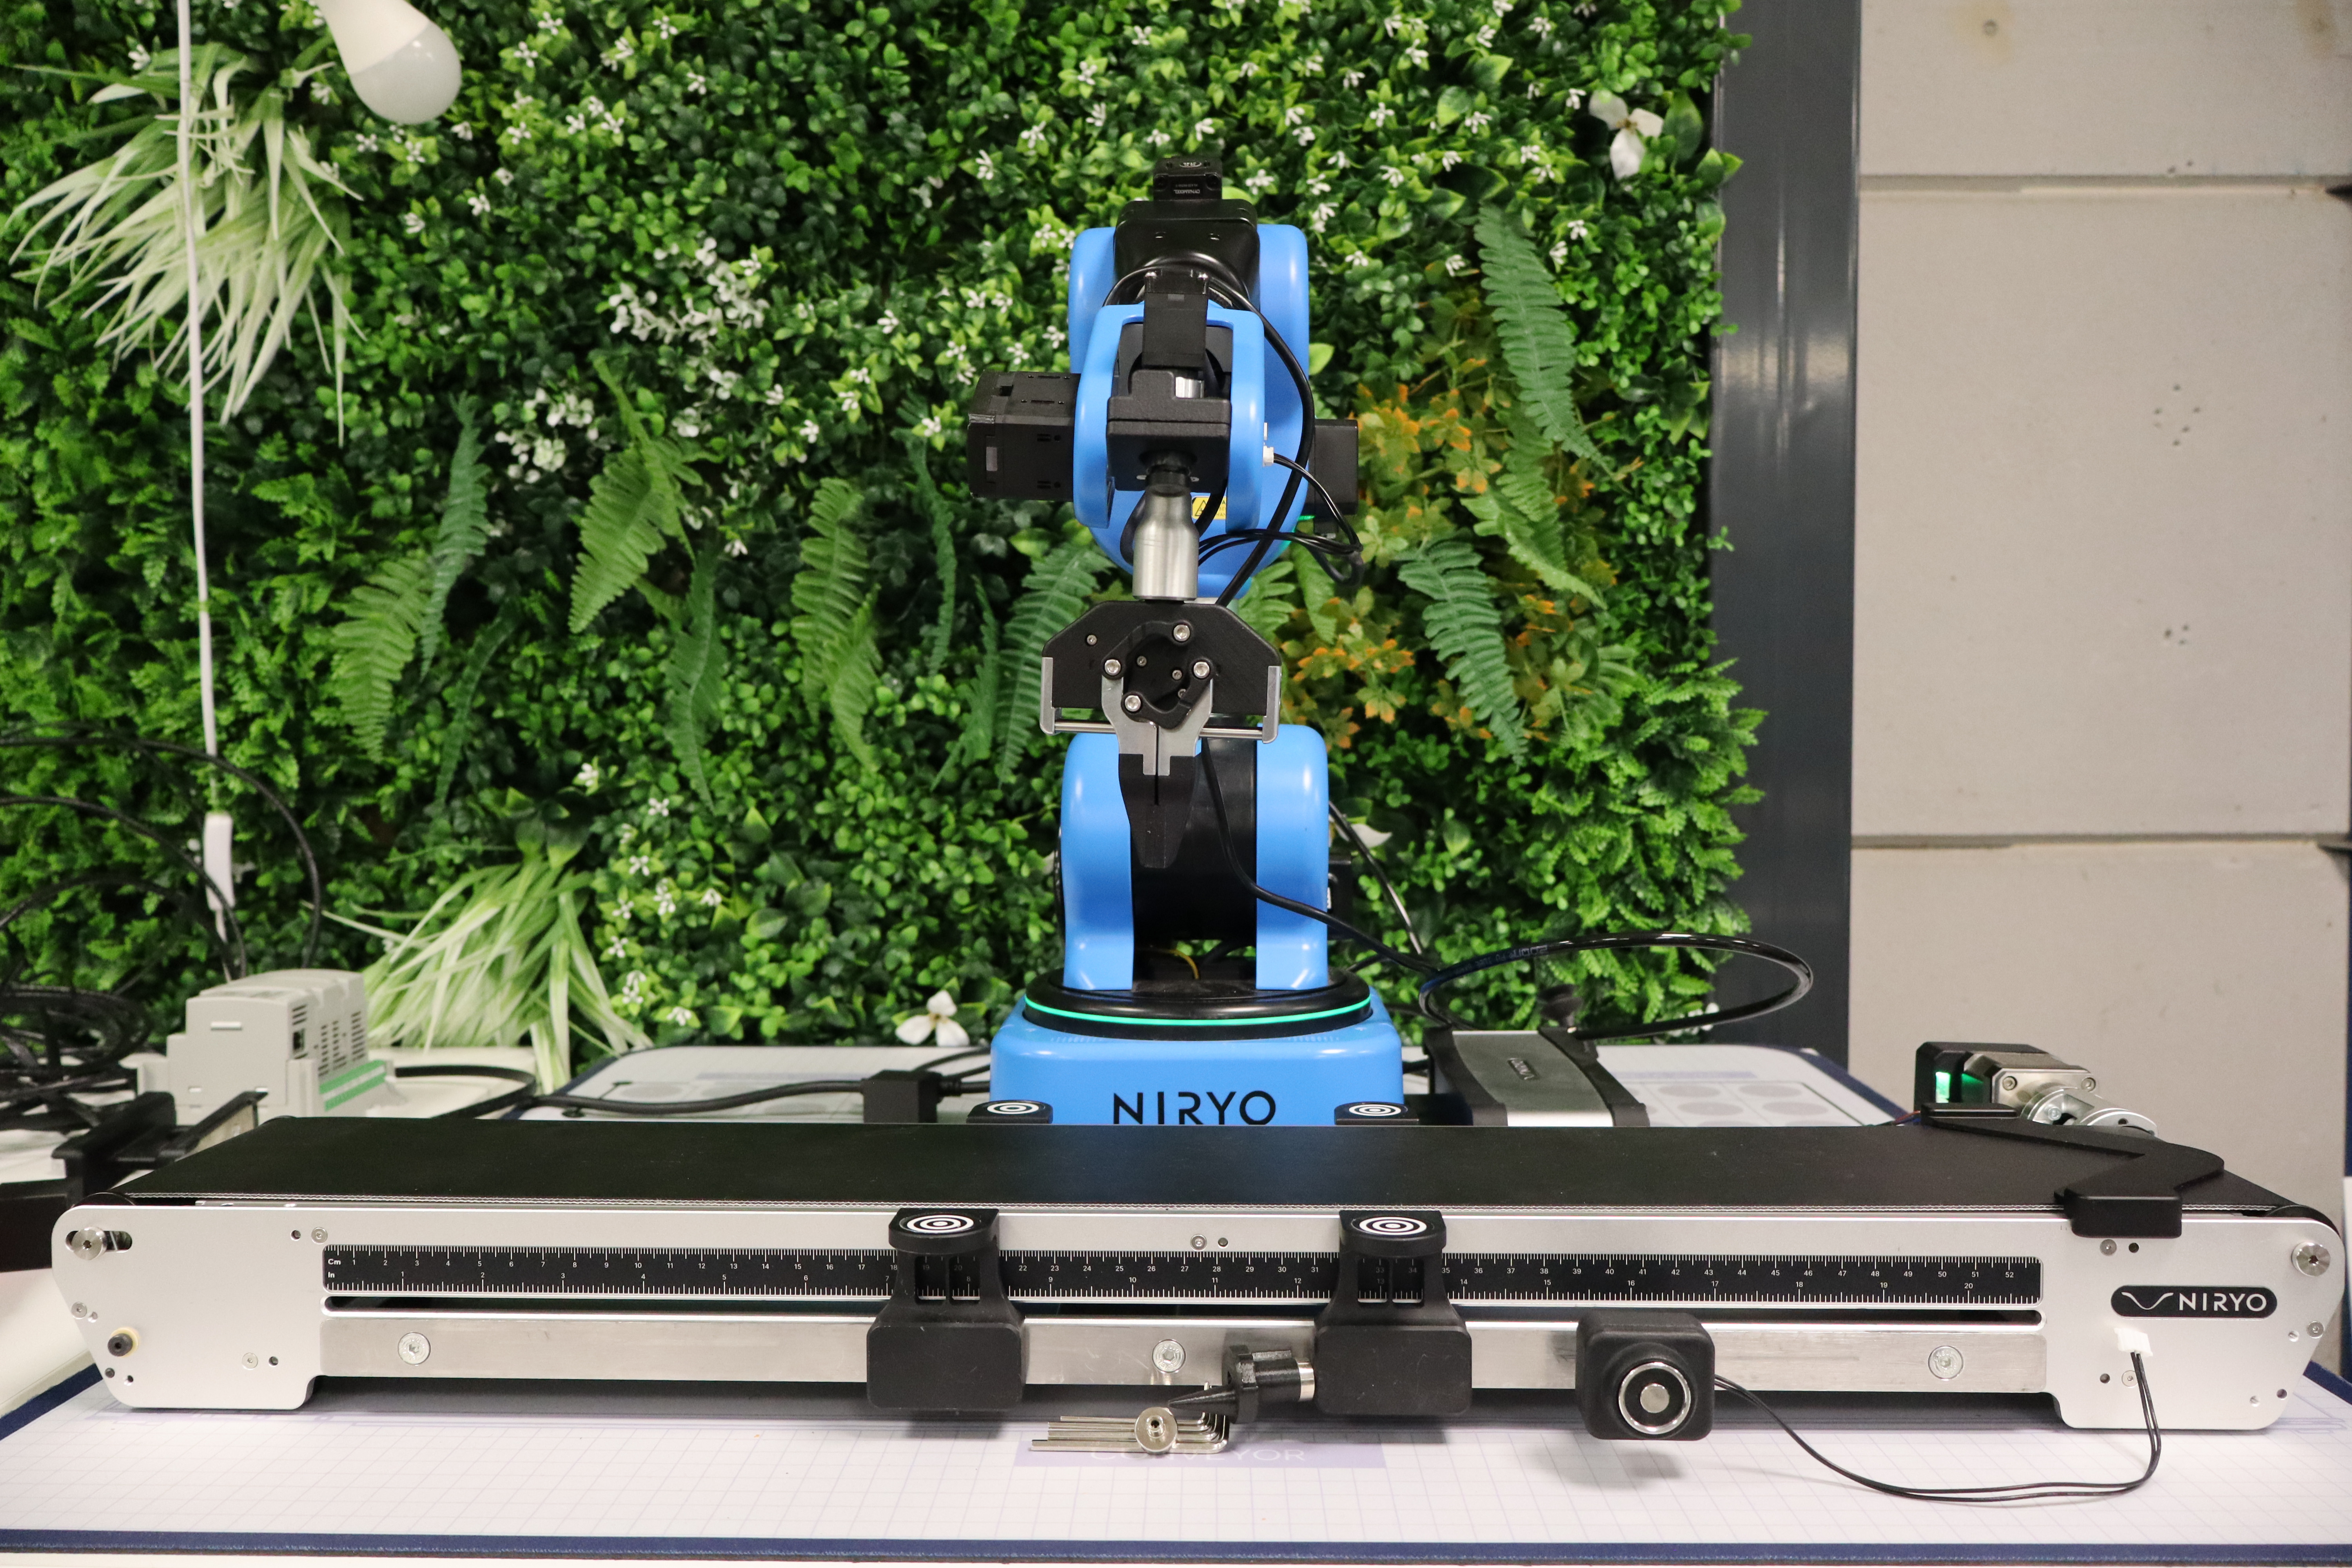
We recommend using the recommended setup for the Workshop 5 including :
- Ned2
- Conveyor
- Vacuum pump
- IR sensor
- Tokens
Step 1: The Concept of Loops
Action:
- Use the "Watering Glasses" analogy from the doc.
Speaker Notes:
"Welcome back! Today we’re tackling one of the most powerful concepts in robotics: Loops. Imagine you have to fill 10 glasses of water. Would you rather write 'fill glass' 10 times, or just say 'repeat this 10 times'? In programming, loops are our way of telling the robot: 'Do this task until I tell you to stop or until the job is done.' It saves time and prevents errors that happen when we copy-paste code."
Step 2:The "Repeat N Times" Block
Action:
- Show the block and explain the "Fixed Count" logic.
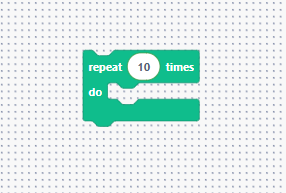

Speaker Notes:
"The first block is the 'Repeat N times'. Use this when you know exactly how many times a task needs to happen—like picking up exactly 4 blocks. It’s a 'blind' loop; it doesn't check any sensors, it just counts down from N to zero. It’s perfect for simple, predictable tasks."
Step 3: Conditional Loops (While & Until)
Action:
- Compare 'Repeat While' vs. 'Repeat Until'.

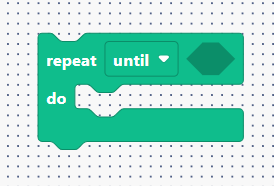

Speaker Notes:
"Sometimes, we don't know how many items there are. We use Repeat While to keep going as long as a condition is true (e.g., 'while the sensor sees an object'). Repeat Until is the opposite: it stops the moment something becomes true (e.g., 'until the emergency button is pressed'). These loops make your robot 'smart' and reactive."
Step 4: Advanced Loops (Count With & For Each)
Action:
- Explain the 'Counter' (i) and 'List' logic.
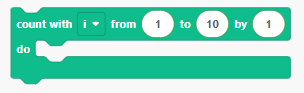

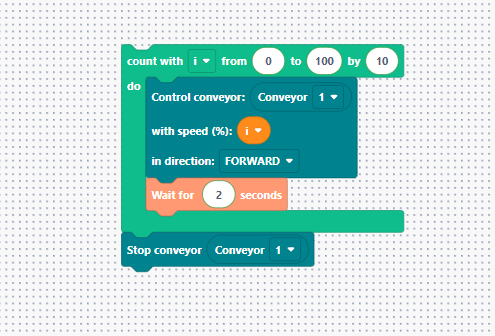
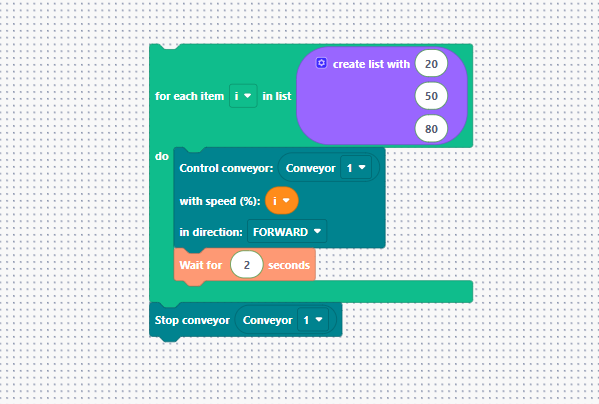
Speaker Notes:
"For more control, we have the Count with block. This creates a temporary variable (usually called 'i') that changes every time the loop runs. Think of it like a staircase: you start at step A, go to step B, and decide how big each step is. We also have For Each, which is amazing for lists. If you have a list of different speeds or positions, the robot will go through them one by one automatically."
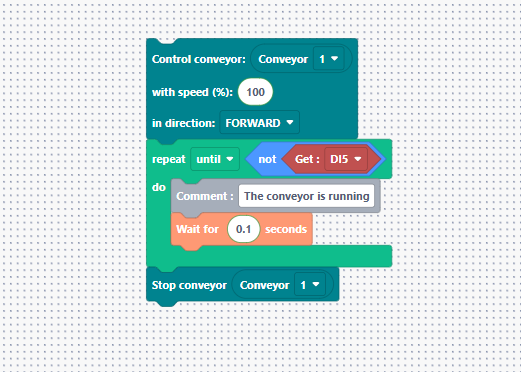
Step 5: Full Example – The Automated Conveyor
Action:
- Walk through the logic: Repeat While Digital Input 5 is HIGH.
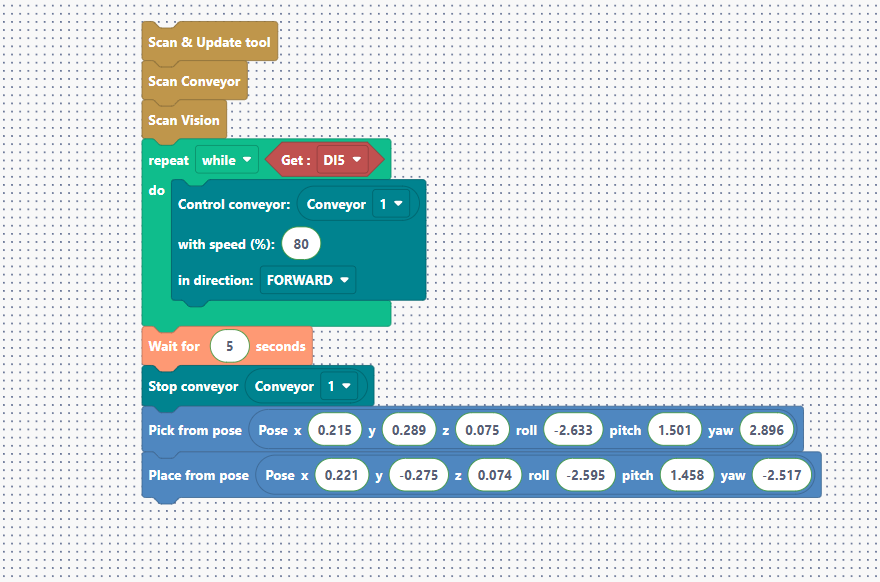
Speaker Notes:
"Let’s look at a full example. We want the conveyor to run and the robot to pick items only when they arrive at the end stopper. We use a Repeat While block linked to a sensor. Inside, we have our conveyor block. Once the sensor detects the token, a 5-second delay is applied to ensure the token is properly seated against the end stop.
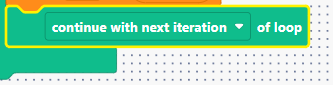
Step 6: Breaking Out & Skipping (Break/Continue)
Action:
- Explain the 'Break' and 'Continue' blocks.

Speaker Notes:
"What if something goes wrong during a loop? The Break block is your 'Emergency Exit'—it stops the loop immediately. The Continue block is different: it’s like saying 'skip this one and move to the next'. For example, if a sensor detects a defective part, we can 'continue' to the next item without picking the bad one."