Presenter's guideline - WS4 : Variables management
| Site: | NiryoAcademy |
| Course: | Robotics Outreach & Summer Camps: Guide |
| Book: | Presenter's guideline - WS4 : Variables management |
| Printed by: | Guest user |
| Date: | Friday, 12 June 2026, 1:27 PM |
Table of contents
- Setup
- Step 1: Explain the Goal & The Everyday Analogy
- Step 2: Why Robotics Needs Variables
- Step 3: Open the Variables Palette
- Step 4: Creating & Naming a Variable
- Step 5: Right-Click Menu & Safety
- Step 6: The Three Variable Blocks
- Step 7: Pick and Place Block Reference
- Step 8: Full Example – Robot Shelf Placement
Setup
We recommend using the recommended setup for the Workshop 4 including :
- Ned2
- Few tokens
- Slope
- Vacuum Pump
- Conveyor

Step 1: Explain the Goal & The Everyday Analogy
Action:
-
Introduce the learning objectives: creating, updating, and using variables.
-
Present the "Labeled Box" analogy to the class.
Speaker Notes:
"Welcome! Today we are learning about variables, the 'memory' of our robot. Think of a variable as a labeled box in your room. You write 'score' on it and put the number 10 inside. Later, you can look inside, change the number, or use it. Without these boxes, our robot wouldn't know how many items it has moved or where to go next."
Step 2: Why Robotics Needs Variables
Action:
- Describe a scenario where a robot must place 4 items on a conveyor.
- Compare "Hardcoding" (editing 4 separate blocks by hand) vs. "Variables" (changing one value).
Speaker Notes:
"Imagine placing 4 objects on a conveyor. Without variables, if you want to change the spacing by just 5cm, you have to edit every single coordinate block manually. But with a variable called y, we just change the offset once in a loop. It makes our code dynamic and much faster to adjust."
Step 3: Open the Variables Palette
Action:
- Show students how to scroll to the Advanced section.
- Click on the Variables category (highlighted in orange).
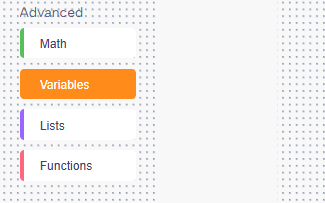
Speaker Notes:
"Let’s open NiryoStudio. On the left, scroll down to 'Advanced' and click 'Variables'. Notice it looks empty—only one orange button says 'Create variable...'. The workspace stays clean until you decide which 'boxes' your robot needs."
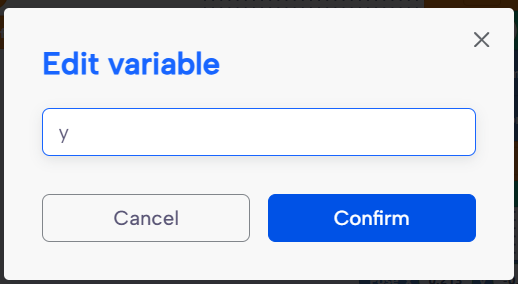
Step 4: Creating & Naming a Variable
Action:
- Click "Create variable..." and type a name (e.g., x).
- Explain naming rules: lowercase, no spaces, and case sensitivity.
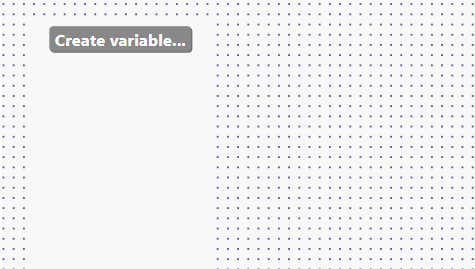
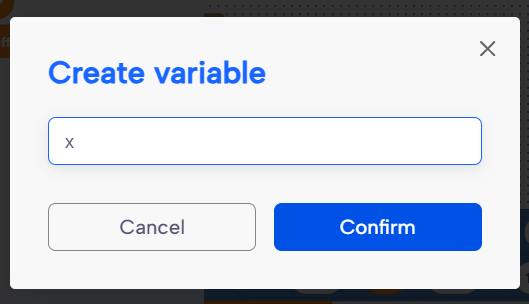
Speaker Notes:
"Click the button and name your variable 'x'. Pro tip: keep names short and meaningful. Use lowercase and underscores, like y_offset. Be careful—the robot sees lowercase 'x' and uppercase 'X' as two completely different boxes! "
Step 5: Right-Click Menu & Safety
Action:
- Show the right-click menu options: Delete, Rename, Help.
- Issue the Warning about deleting variables.
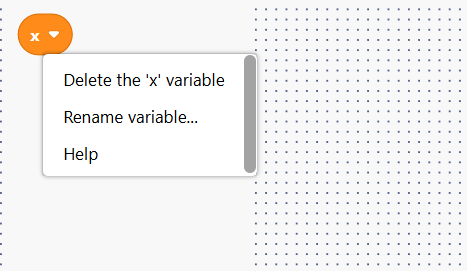
Speaker Notes:
"If you make a mistake, right-click the variable block. You can rename it, and it will update everywhere automatically. But be careful: if you delete a variable that is used in your movement blocks, those blocks will disappear too! Always double-check before you delete."
Step 6: The Three Variable Blocks
Action:
- Demonstrate the Set block (replaces the value).
- Demonstrate the Change block (adds/subtracts from current value).
- Demonstrate the Value Reporter (the oval token).

Speaker Notes:
"Now you see three blocks. The Set block is like erasing a sticky note and writing a new number—it replaces everything. The Change block is for math—it adds to what is already there. To subtract, just use a negative number. Finally, the Oval is a 'token'—you drop it into any other blocks so the robot can 'read' the current value of the variable."
Step 7: Pick and Place Block Reference
Action:
- Show the Pick from pose and Place from pose blocks.
- Explain the parameters: X, Y, Z (meters) and Roll, Pitch, Yaw (radians).
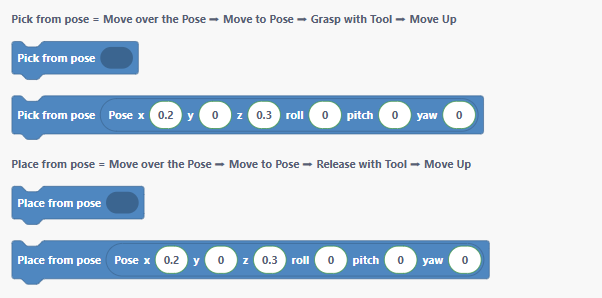
Speaker Notes:
"Before we build the full program, remember how these blocks work. Pick from pose moves the robot over the object, grabs it, and moves up. Place from pose does the opposite. In our next step, we won't type a number for the Y coordinate; we will use our variable 'y' instead."
Step 8: Full Example – Robot Shelf Placement
Action:
- Walk through the initialization of y and y_offset (-0.1).
- Show how the y variable is plugged into the Place block.
- Explain the logic of change y by y_offset at the end of the loop.
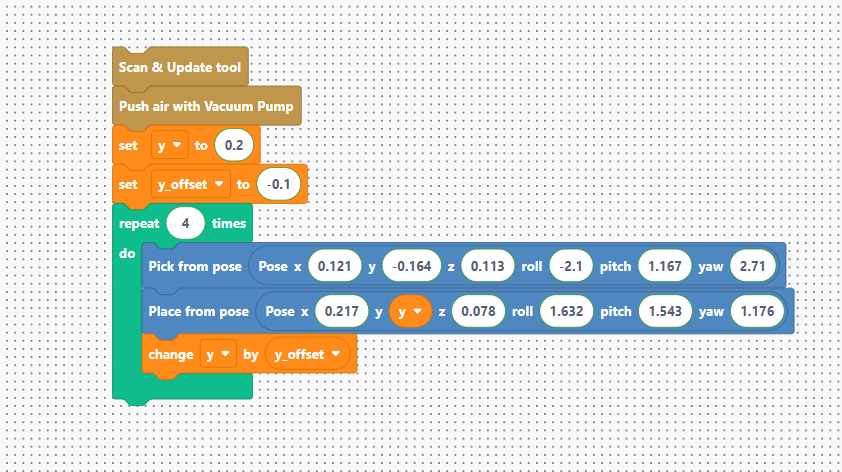
Speaker Notes:
"Let’s look at the master program. We start by setting our starting position at 0.2 (or custom valid position) and our gap at -0.1. Inside the loop, the robot picks an item. Then, it places it at whatever value is inside the 'y' box. Before the loop repeats, it changes 'y' by the offset, shifting the next placement by 10 cm. One block now handles four different positions dynamically! "