Rules
| Site: | NiryoAcademy |
| Course: | Robotics Outreach & Summer Camps: Guide |
| Book: | Rules |
| Printed by: | Guest user |
| Date: | Friday, 12 June 2026, 12:27 PM |
Introduction
Challenge Factory Tower: A Game That Will Keep You on the Edge
Welcome to the Factory Tower challenge. More than just a simple construction task, this challenge plunges you into the heart of an automated production line where technical precision meets industrial strategy.
The mission: Build a tower with a target height of 10 units in record time.
- Standard Package: 1 unit.
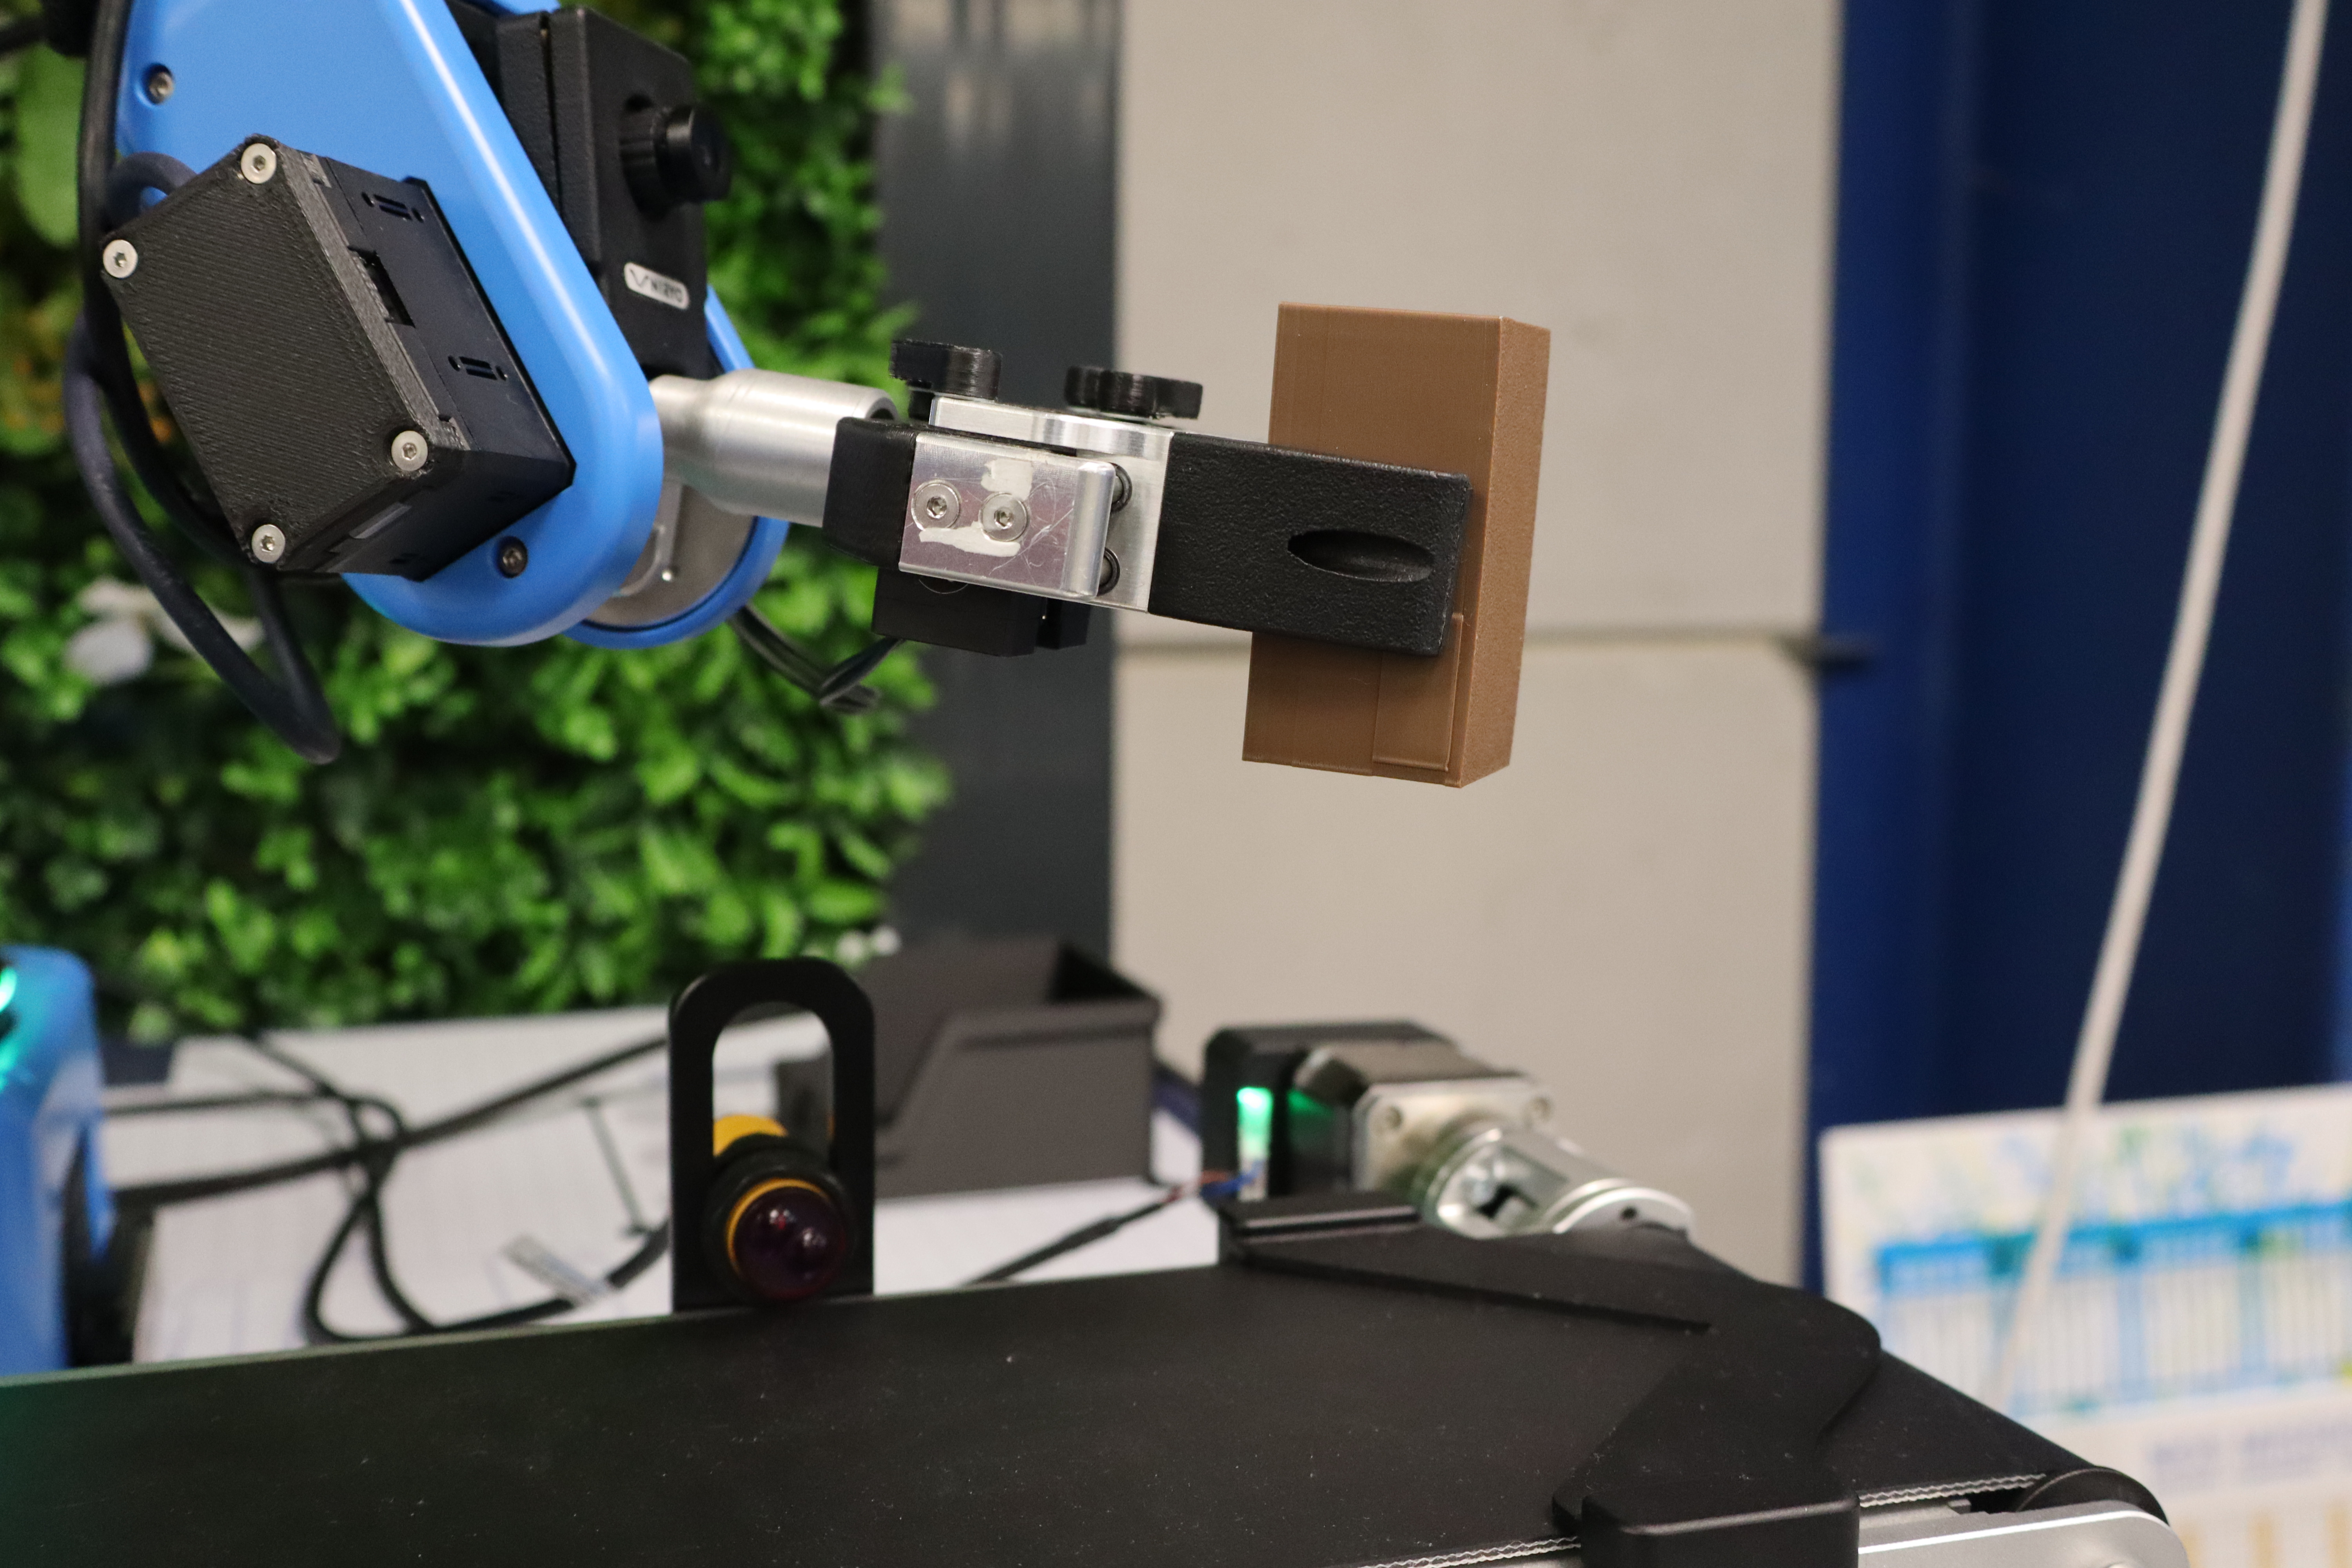
- Large Package: 2 units (if positioned vertically).
- Special Constraint: Integrate a unique "critical piece" within the structure without compromising its stability.
To win the challenge, the group of students must balance speed and technical mastery through five fundamental pillars:
- Total Quality (Zero Defects): Quality control is uncompromising. Integrating a reject (non-compliant part) into the tower's construction will result in an immediate penalty. Upstream detection is key to avoiding these penalties.
- Yield and Flow: Increasing the pace reduces cycle time but saturates the sensors. Excessive speed generates "noise" during detection and increases the error rate. It is up to the participants to find the "Optimal Point."
- Process Reliability and Safety: Rapid production is useless if it is unstable. It is essential to guarantee the structural stability of the tower. Any collision or collapse is synonymous with a line stop and therefore a delay in the mission.
- Configuration Strategy (Placement Logistics): Each choice has a direct impact on your robotic trajectory: on one hand, horizontal placement potentially allows for a gain in cycle time and simplified gripping, but requires more components to reach the target height. On the other hand, vertical placement allows for height optimization per piece but requires fine and more complex management of the robot's trajectories.
- Human-Machine Collaboration: At the center of this challenge, the student positioned facing the production line as the operator becomes the guarantor of the production line's fluidity. Success relies on perfect collaboration between the human and the automated system: the operator must ensure Pick & Place optimization by positioning packages with an orientation adapted to the package type, guaranteeing immediate and precise picking by the robot. Finally, temporal synchronization is the key factor: the timing between manual loading on the conveyor and the retrieval of parts by the robotic arm must be perfectly orchestrated, thus avoiding bottlenecks and ensuring an optimal production rate. All of this to complete the challenge in the shortest time possible.
Setup
Equipment
Here are the various elements to be used to complete this challenge:
- Robot: 1x Ned2 with Custom Gripper.
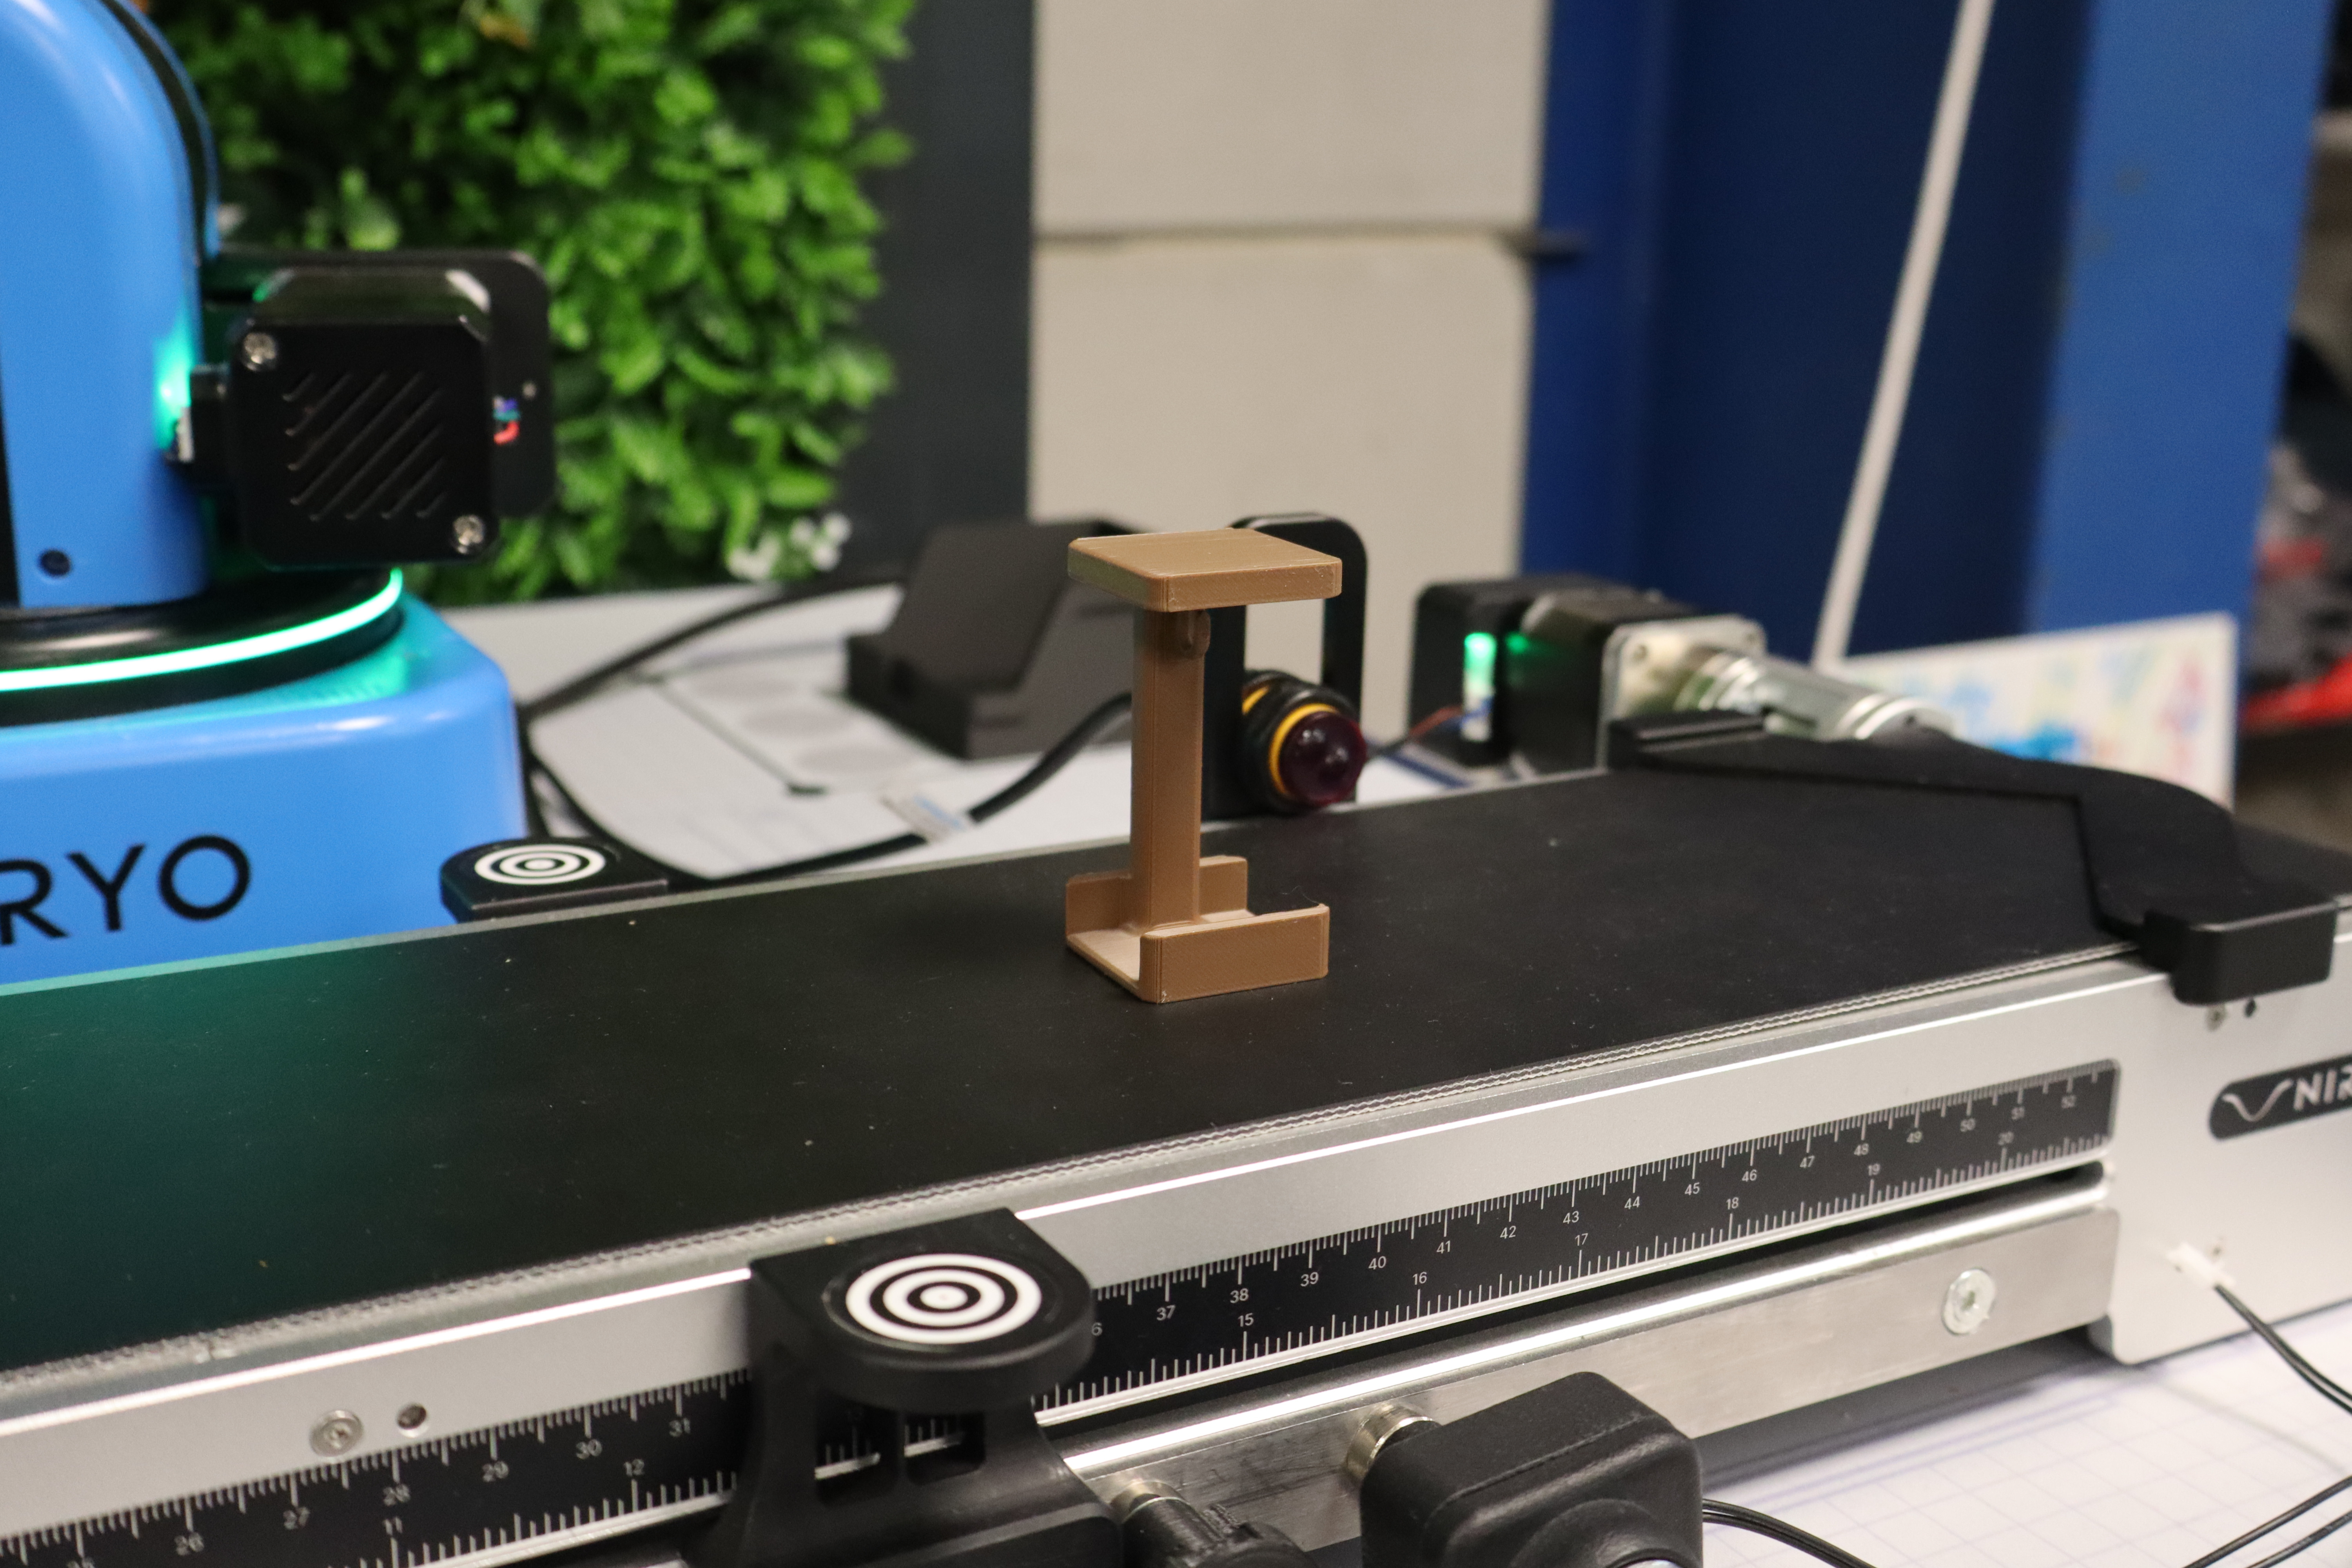
- Vision & Sensors: Vision Kit, IR Sensor, End Stopper (physical limit).
- Transport: Niryo conveyor and mat.
- Software: Niryo Studio (installed and functional).
- Parts in Play: The different parts to be printed, with indicated quantities and 3D files available here.
| Shape | Color | Quantity | |
| Standard package | Square | Blue | 6 |
| Large package | Rectangle | Green | 4 |
| Reject | Square | Red | 2 |
| Special piece | Unique | Blue | 1 |
| Reject bin | Unique | - | 1 |
Setup
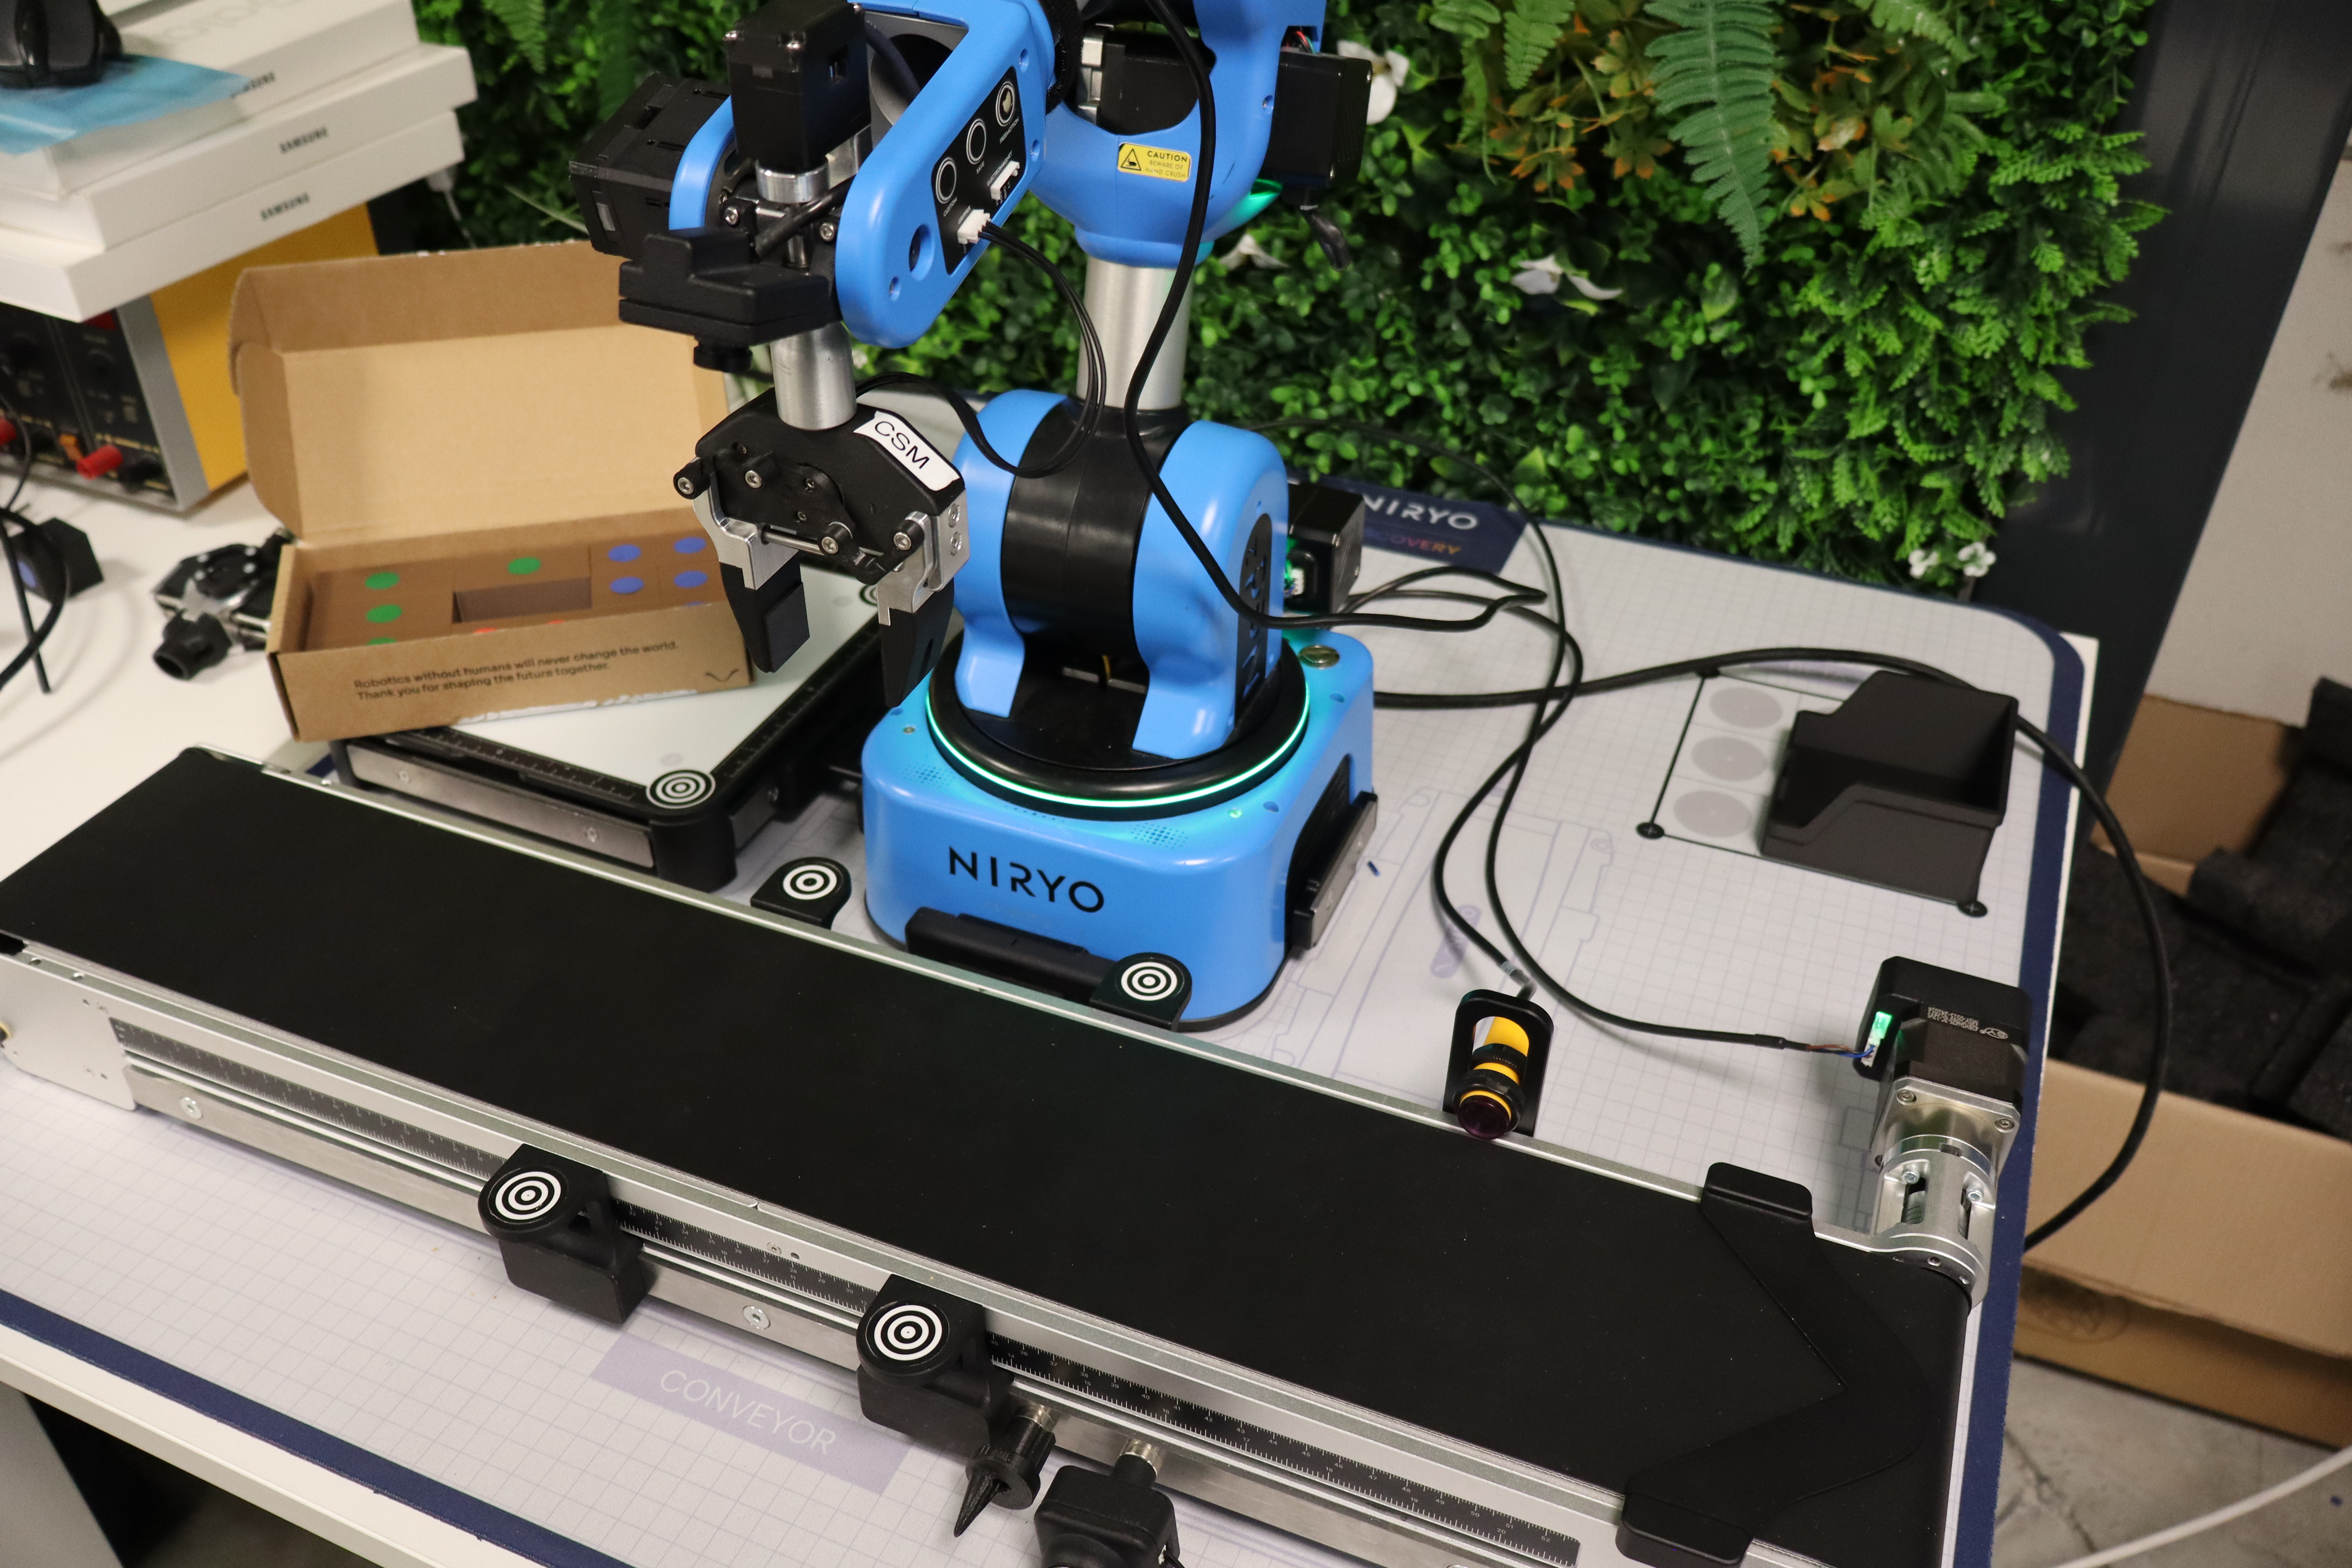
For the installation, please follow these steps:
- Place the Niryo mat on a flat and stable surface.
- Arrange the robot, the Vision Set, and the conveyor in their designated spots, having previously fixed the snap links.
- Install the gripper on the robot head and connect it to the arm.
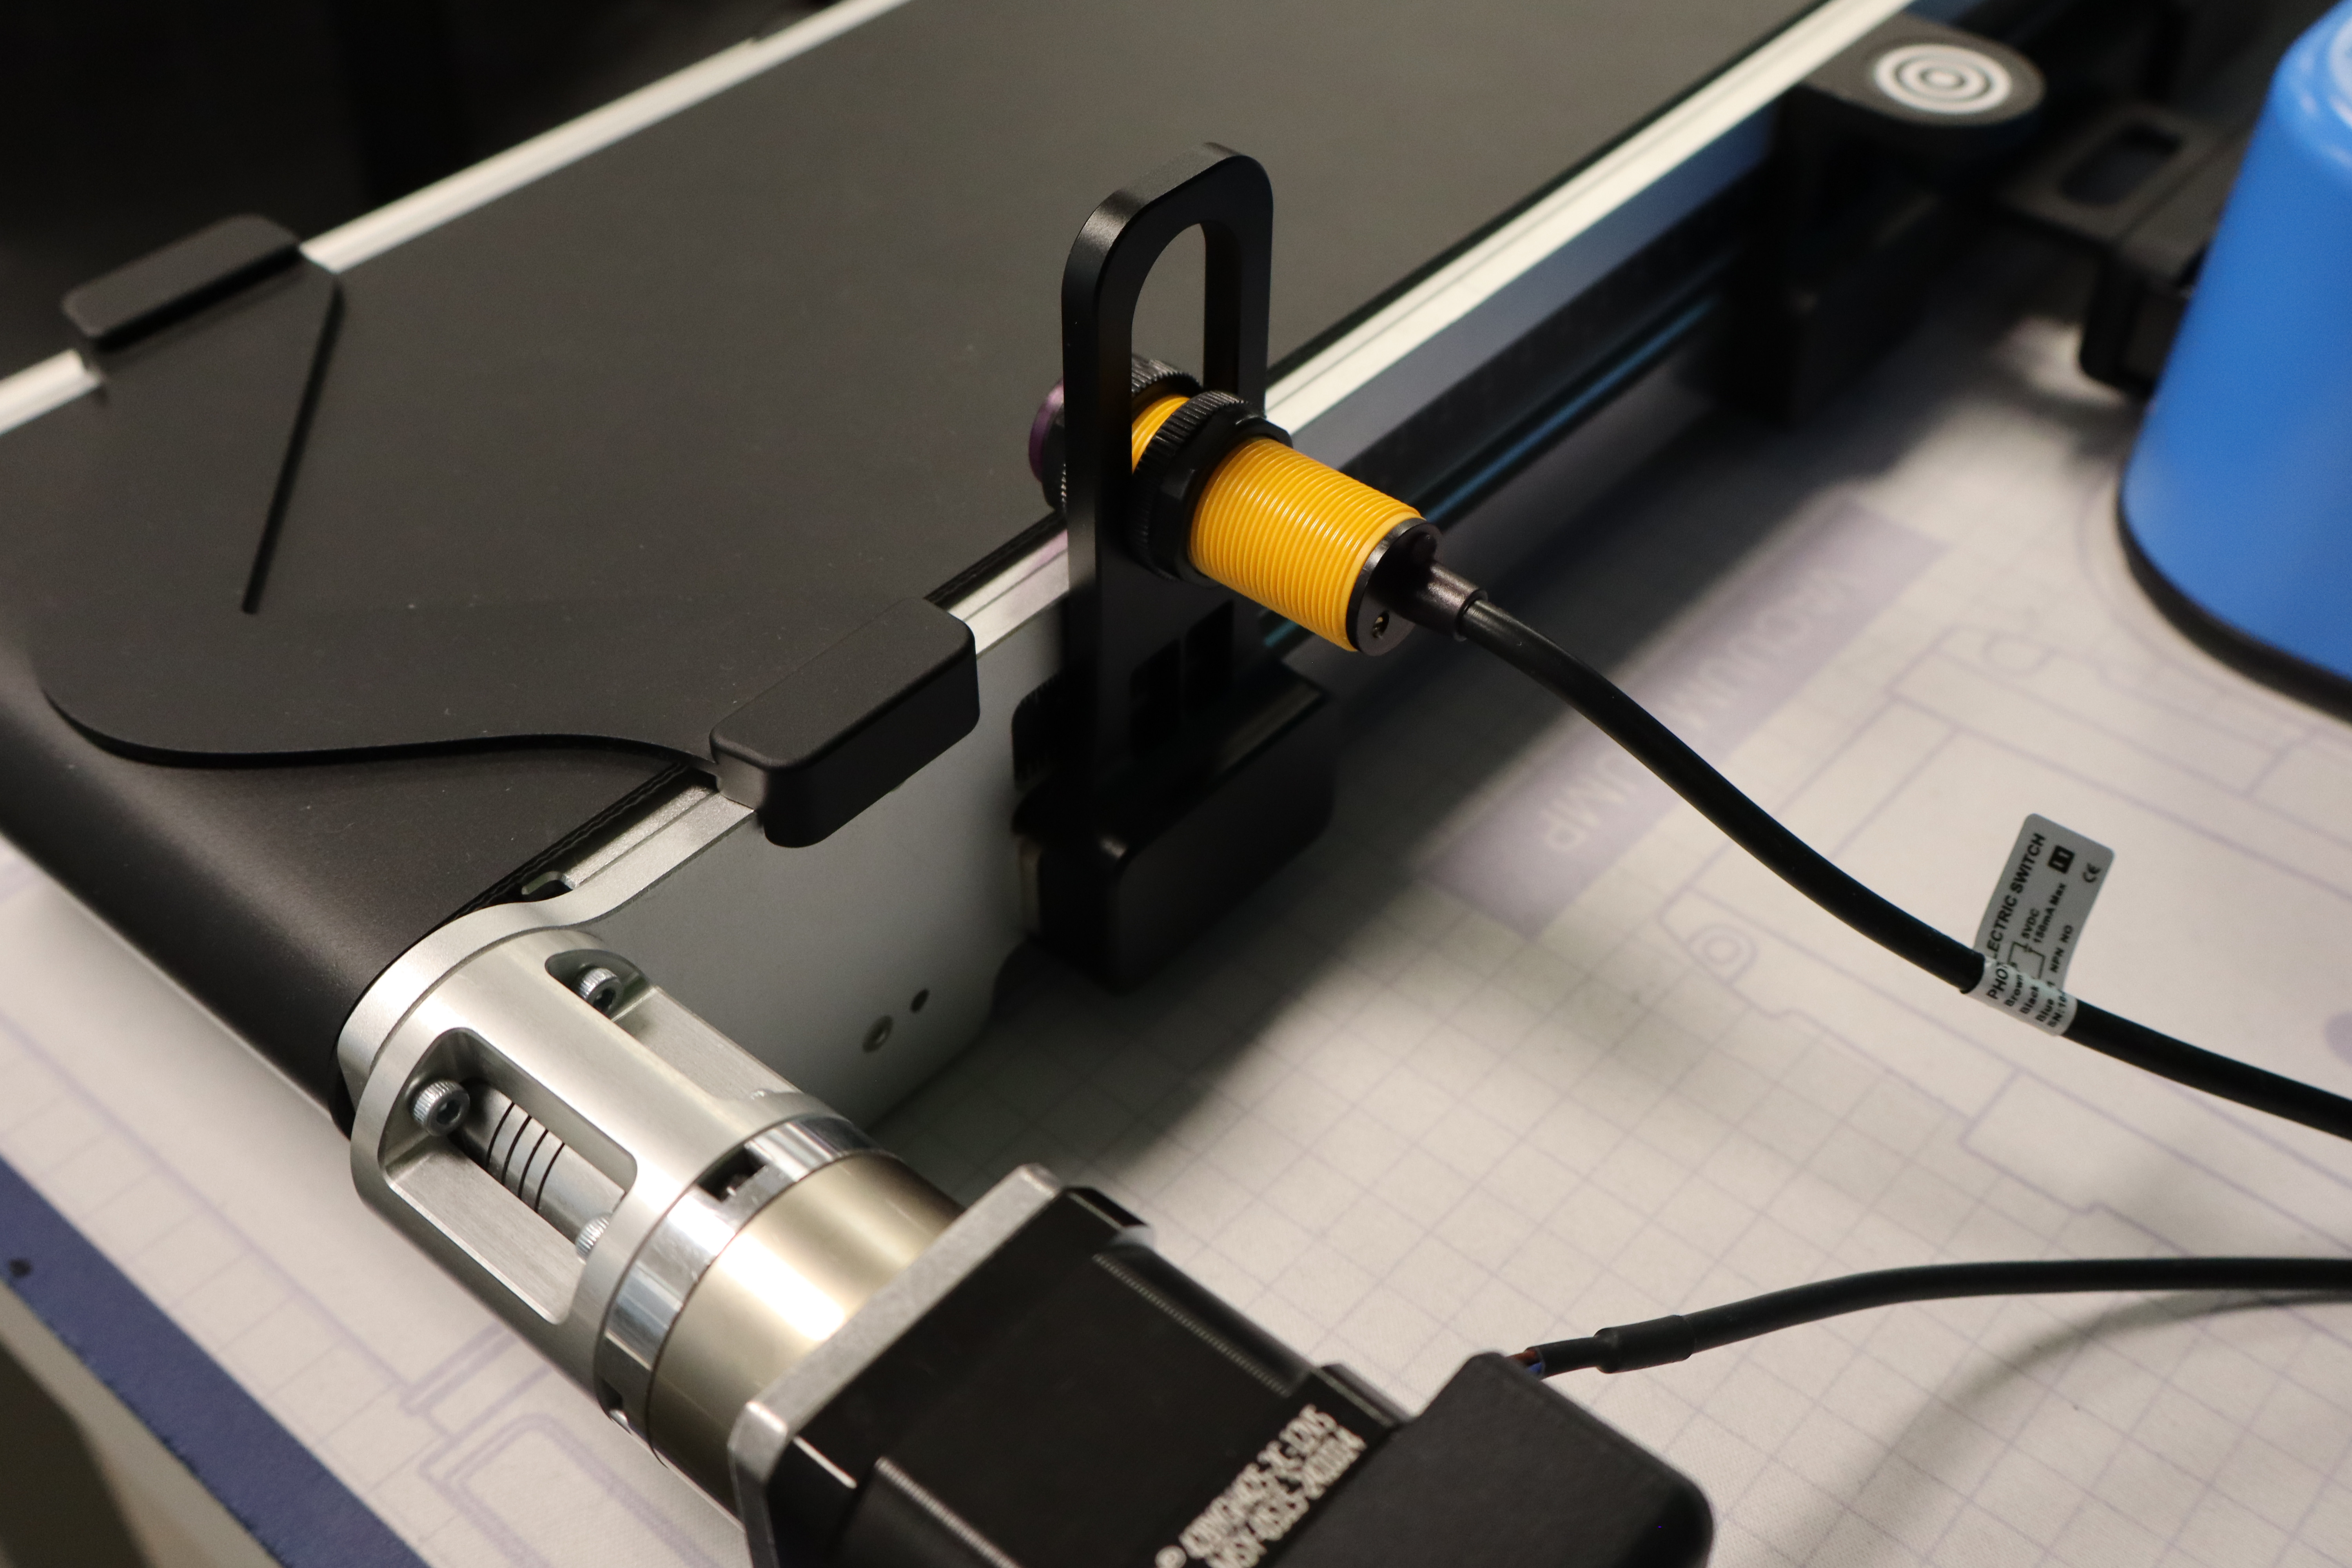
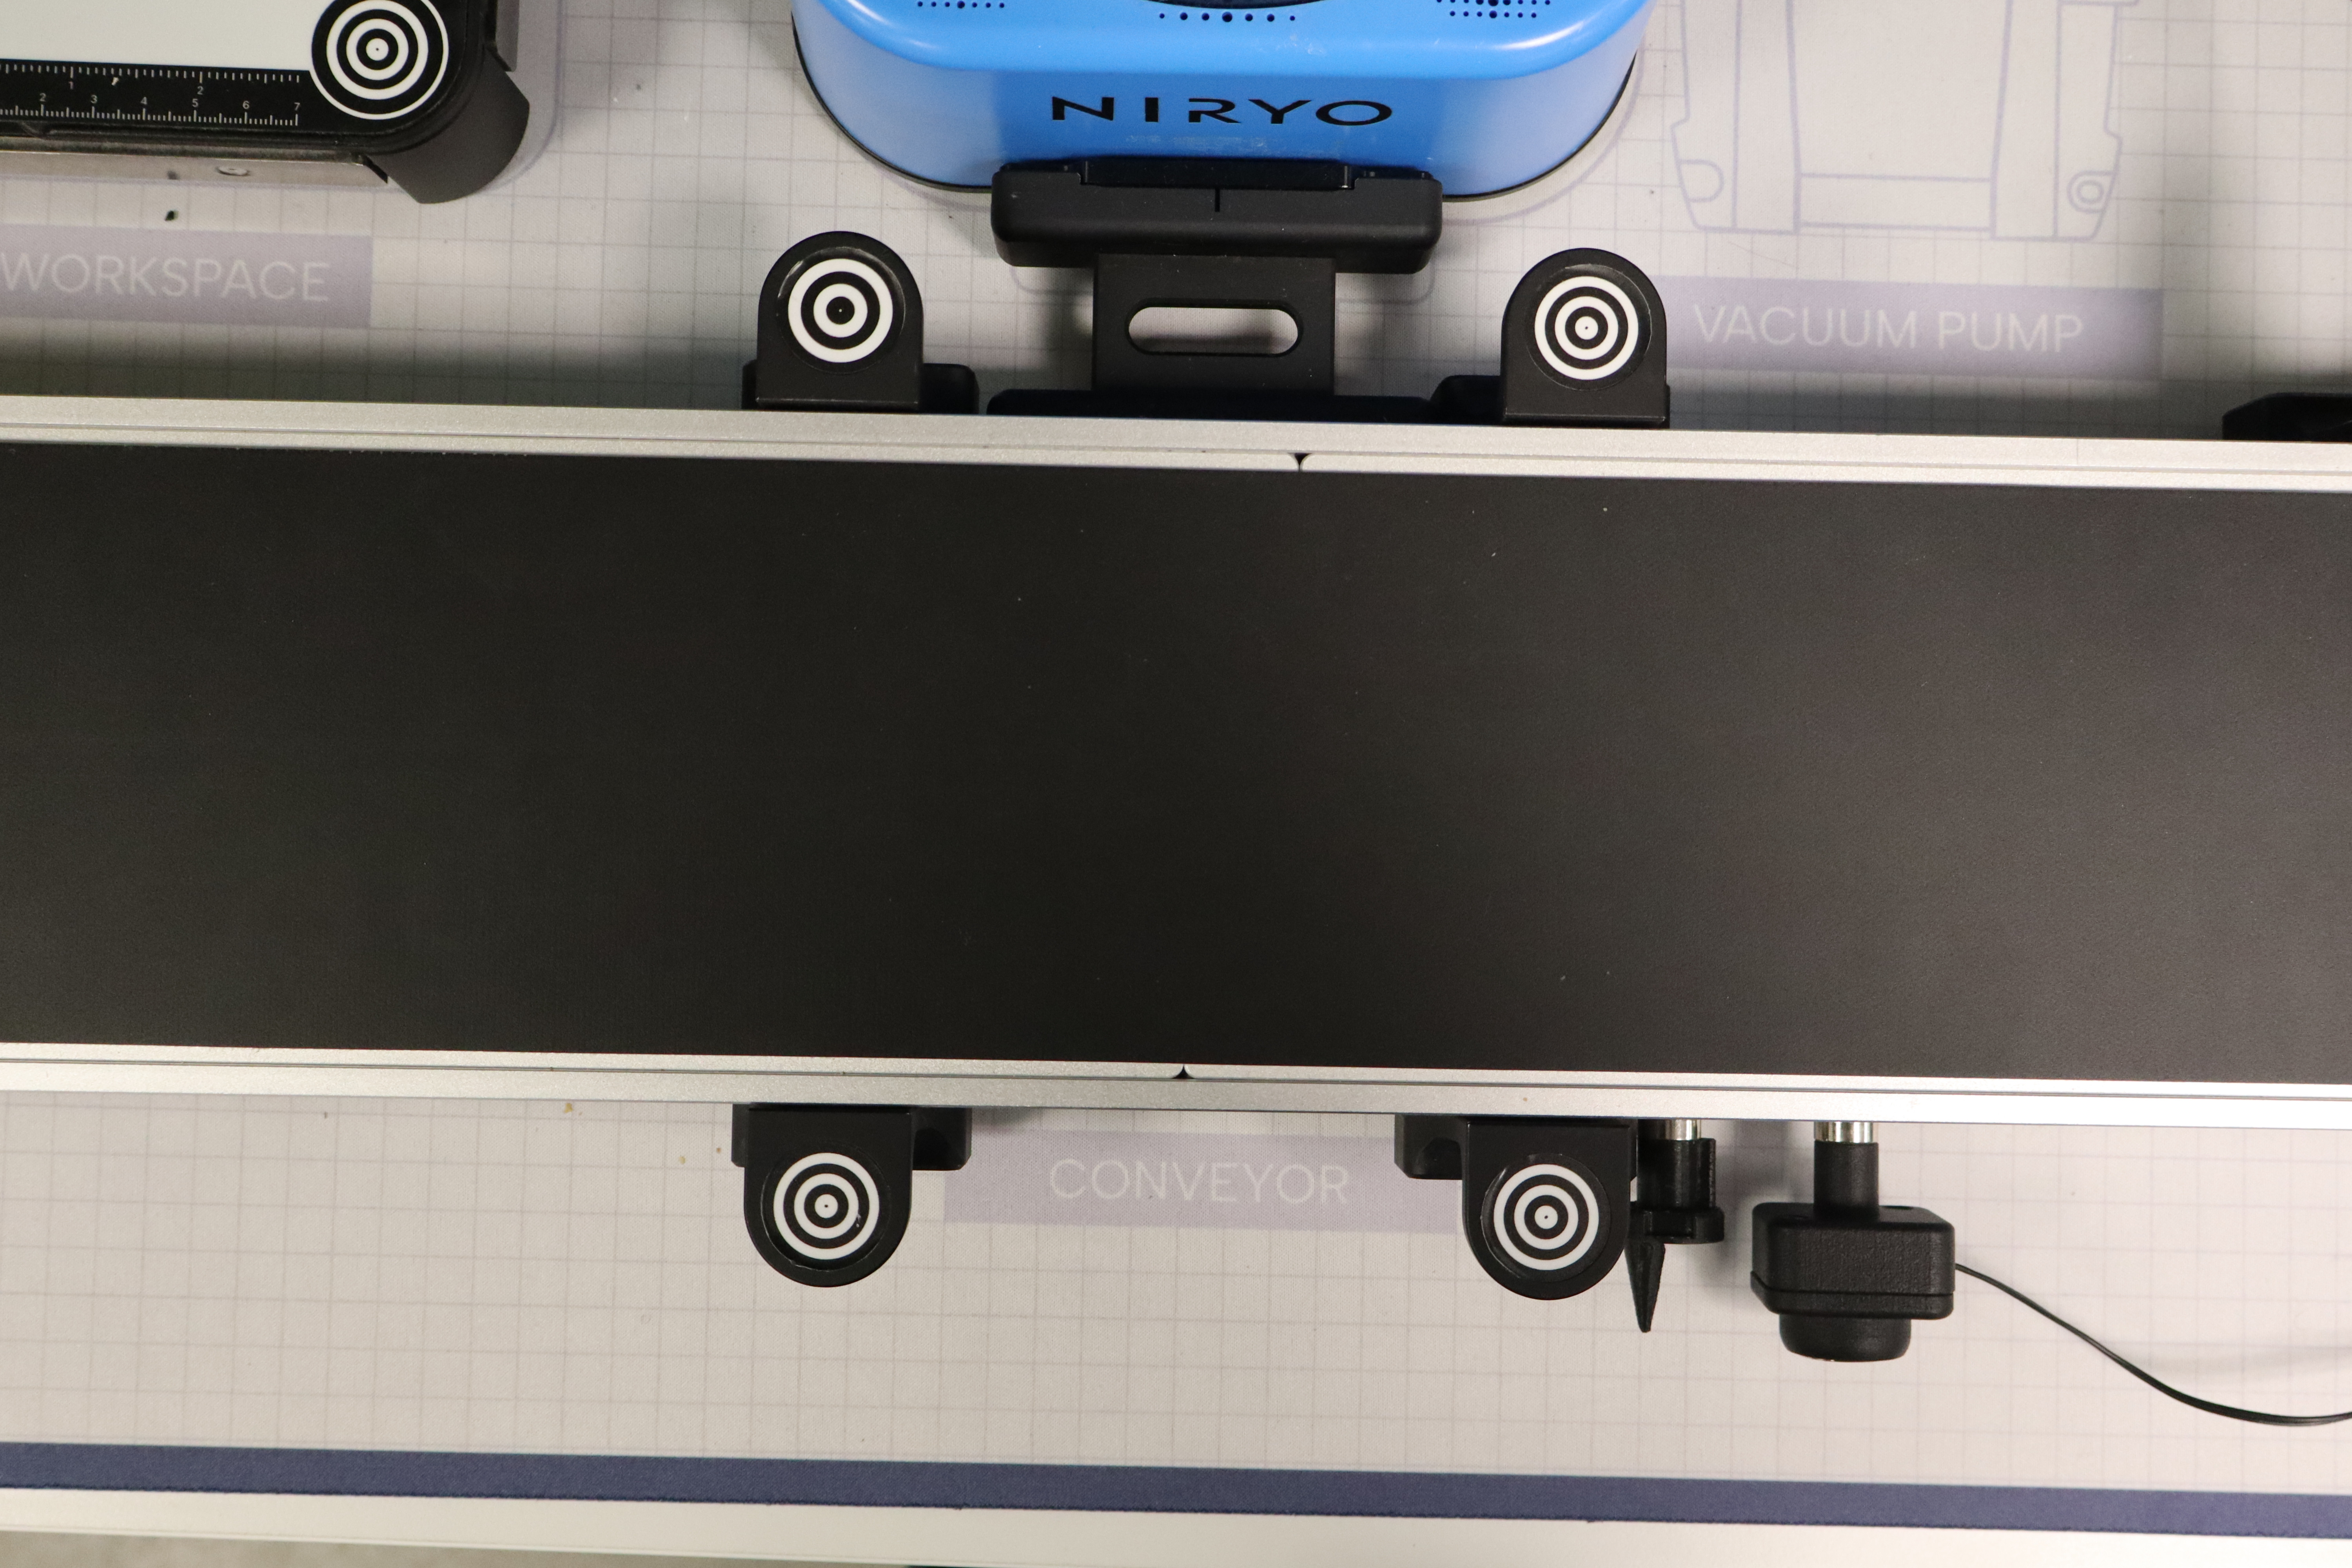
- Place the end-stopper at the end of the conveyor and the IR sensor at the stopper level.
- Also, place the 4 workspace landmarks on the conveyor.
- Place the reject bin in the Beta zone.
Once the setup is finished, it must remain fixed throughout the challenge. Indeed, teams must not change the equipment's location under any circumstances. Only the robot and the packages can be manipulated to work on the challenge.
Game launch
In turn, each group member becomes the line operator responsible for placing the packages on the conveyor. The operator stands facing the robot. As soon as the code is launched in NiryoStudio, they must wait for the conveyor to start before activating the stopwatch nearby. If it is activated before the conveyor starts, a 5-second penalty is given. After that, they can deposit the first package. During the challenge, all groups must follow an identical command sheet, which specifies the order in which the packages must be deposited.
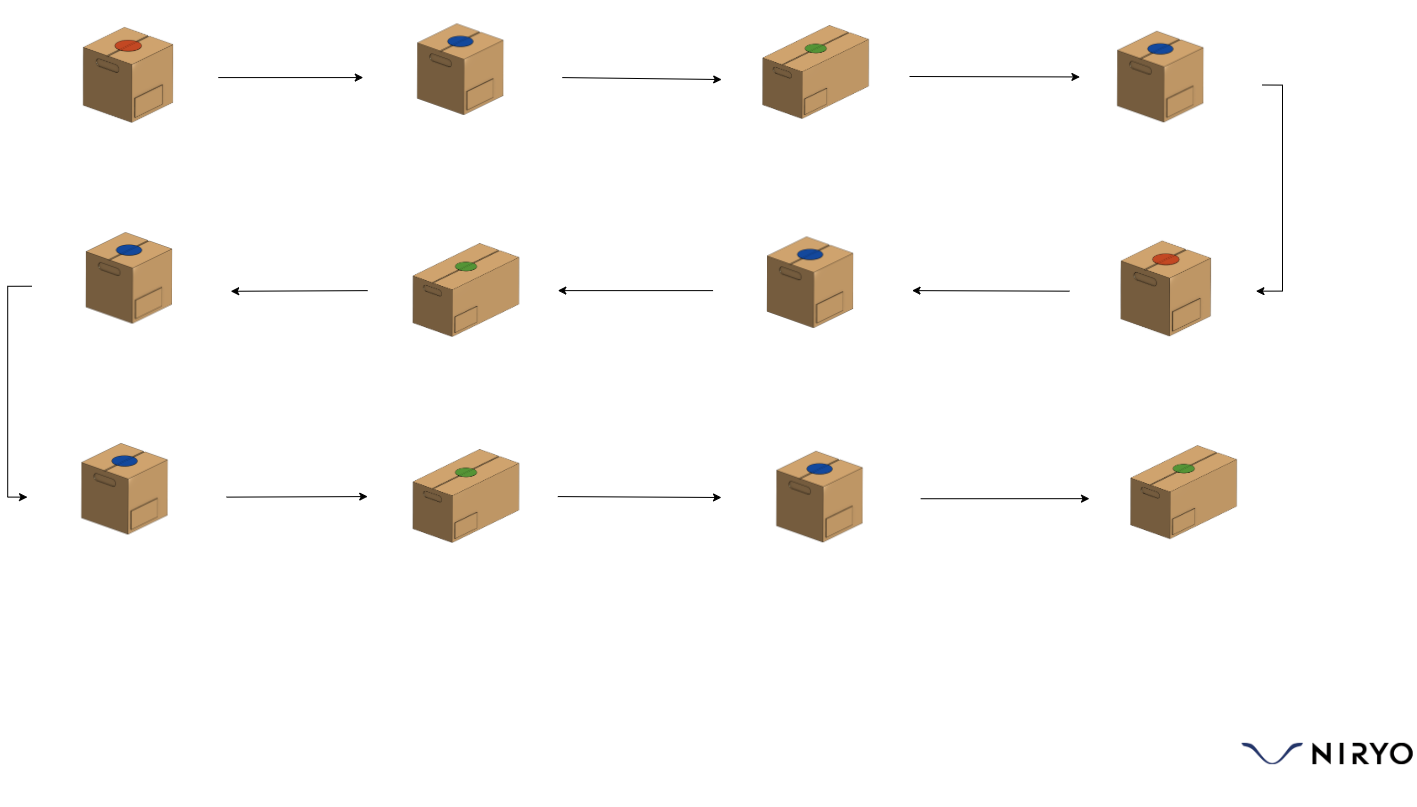
It is entirely possible for the organizer to customize this order; however, it must be the same for all groups and must not be known in advance before the challenges begin. If the operator makes a mistake in the package order, a 3-second penalty is given each time it happens.
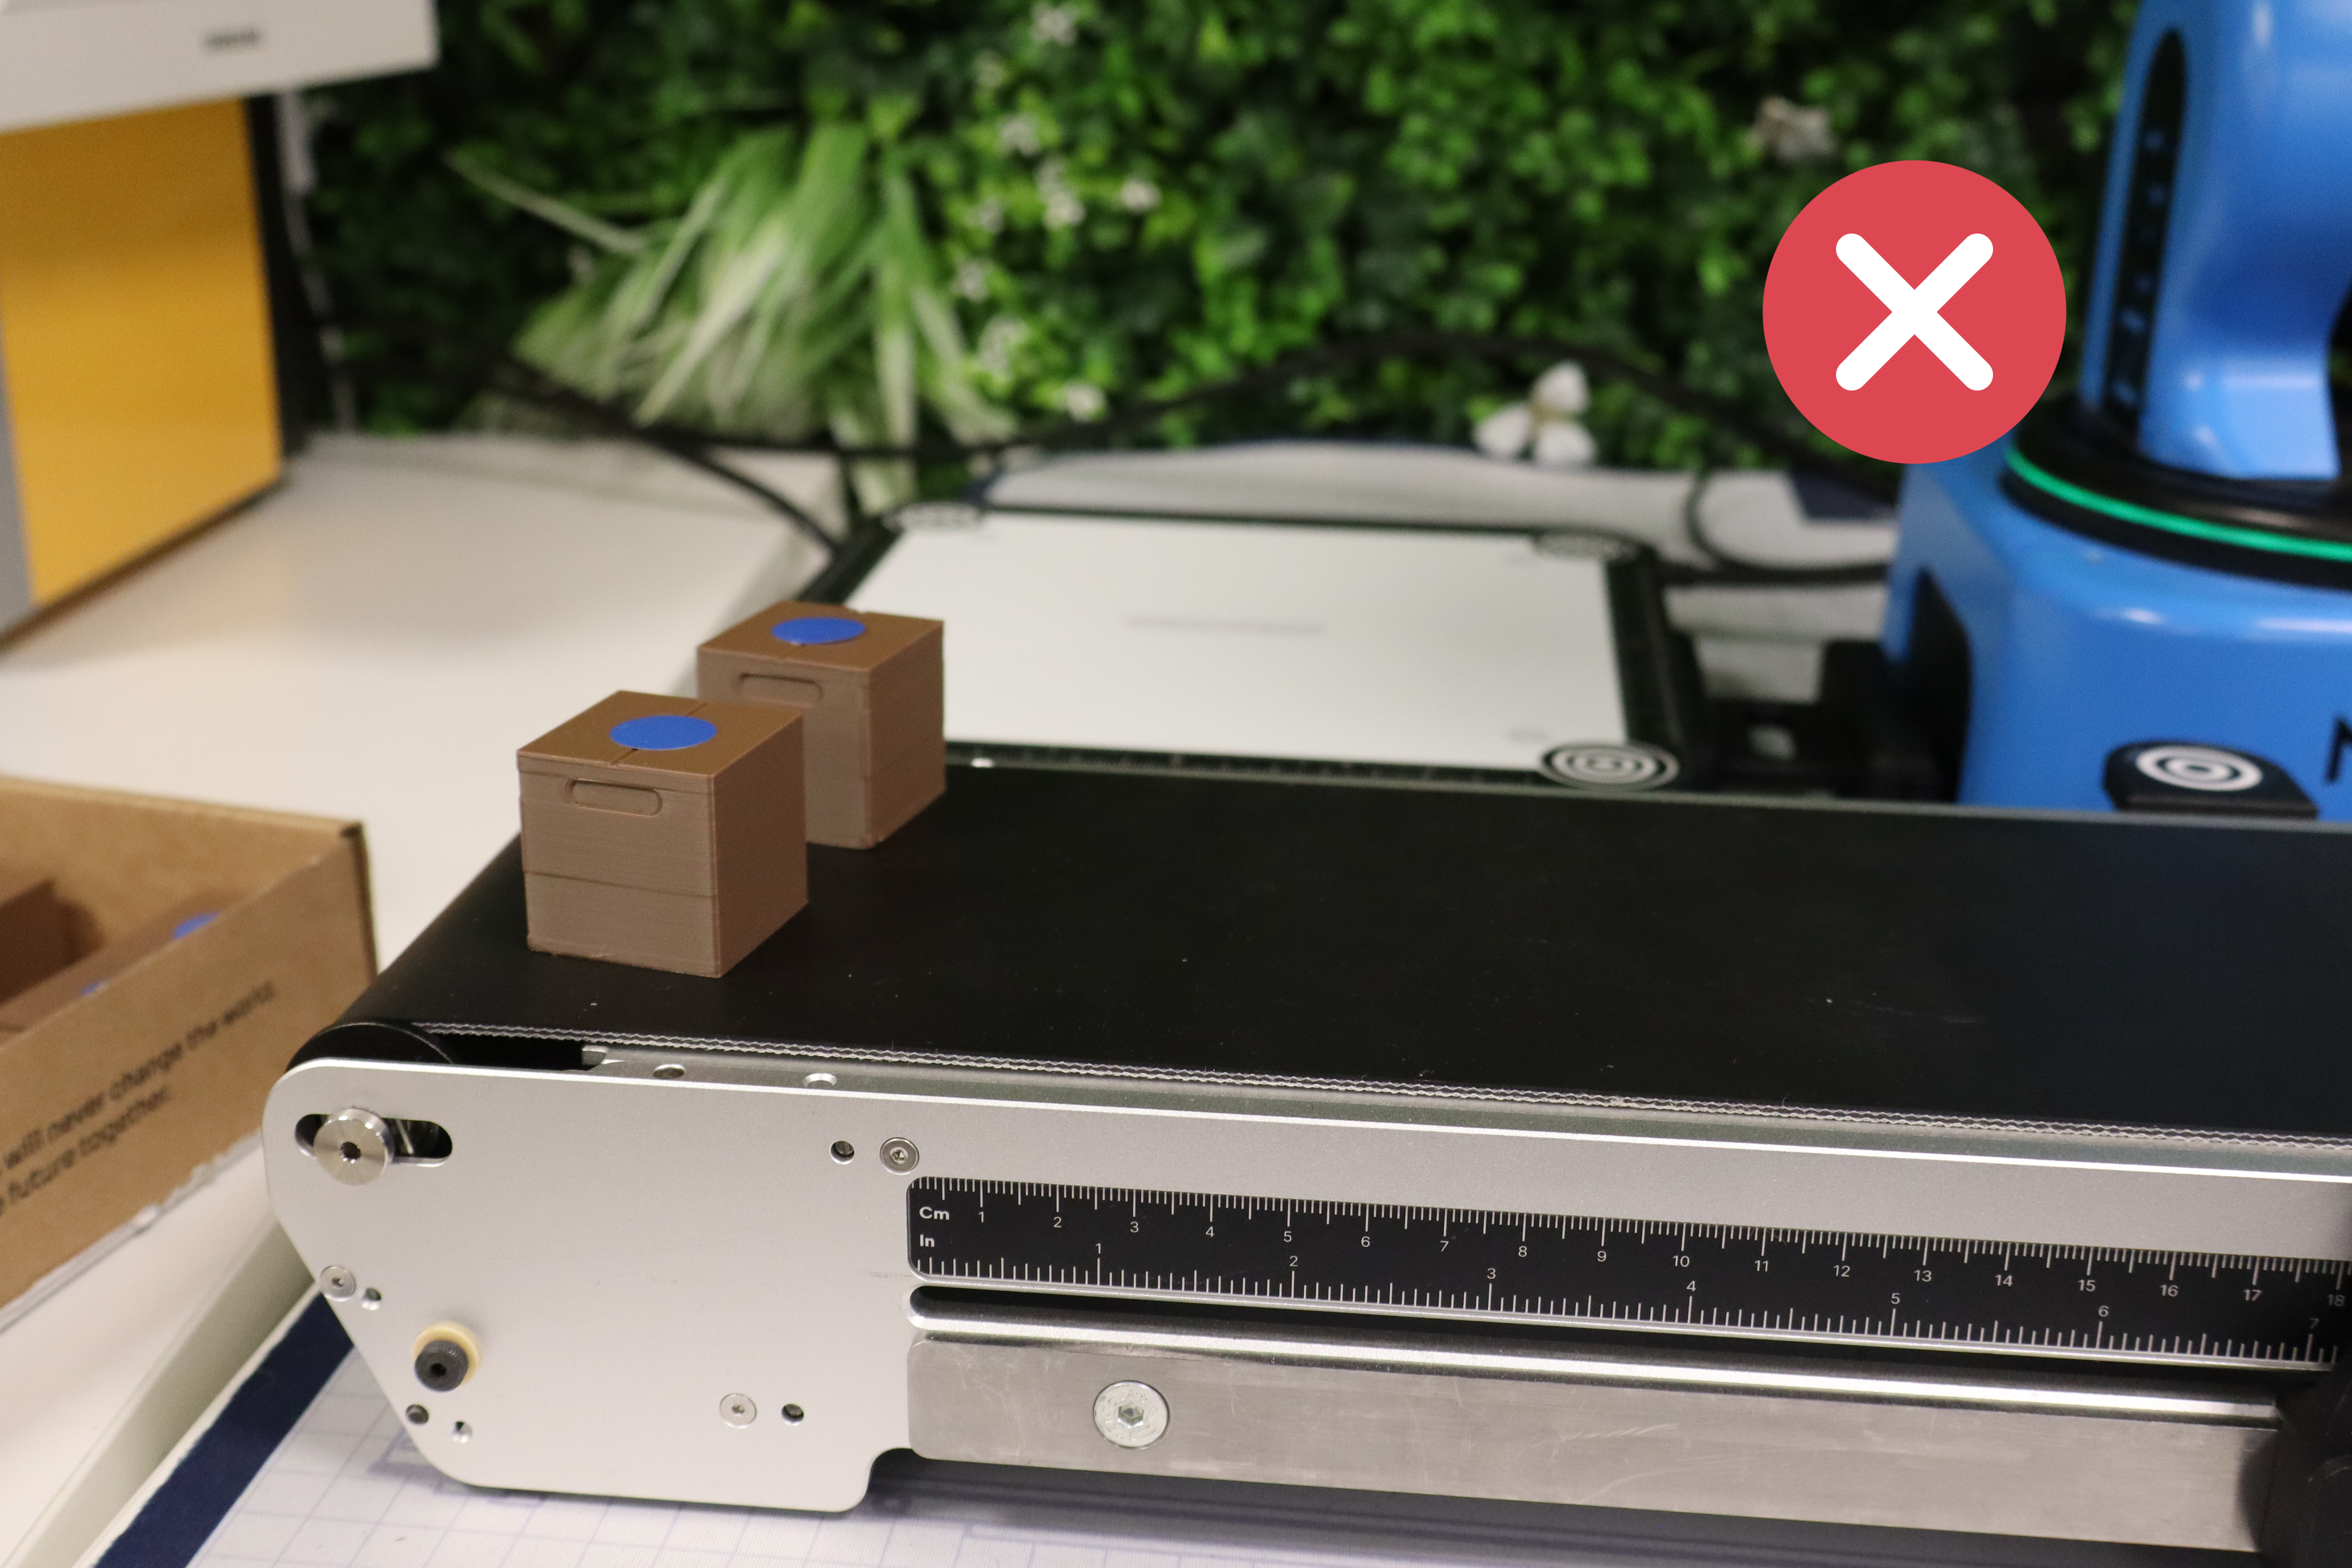
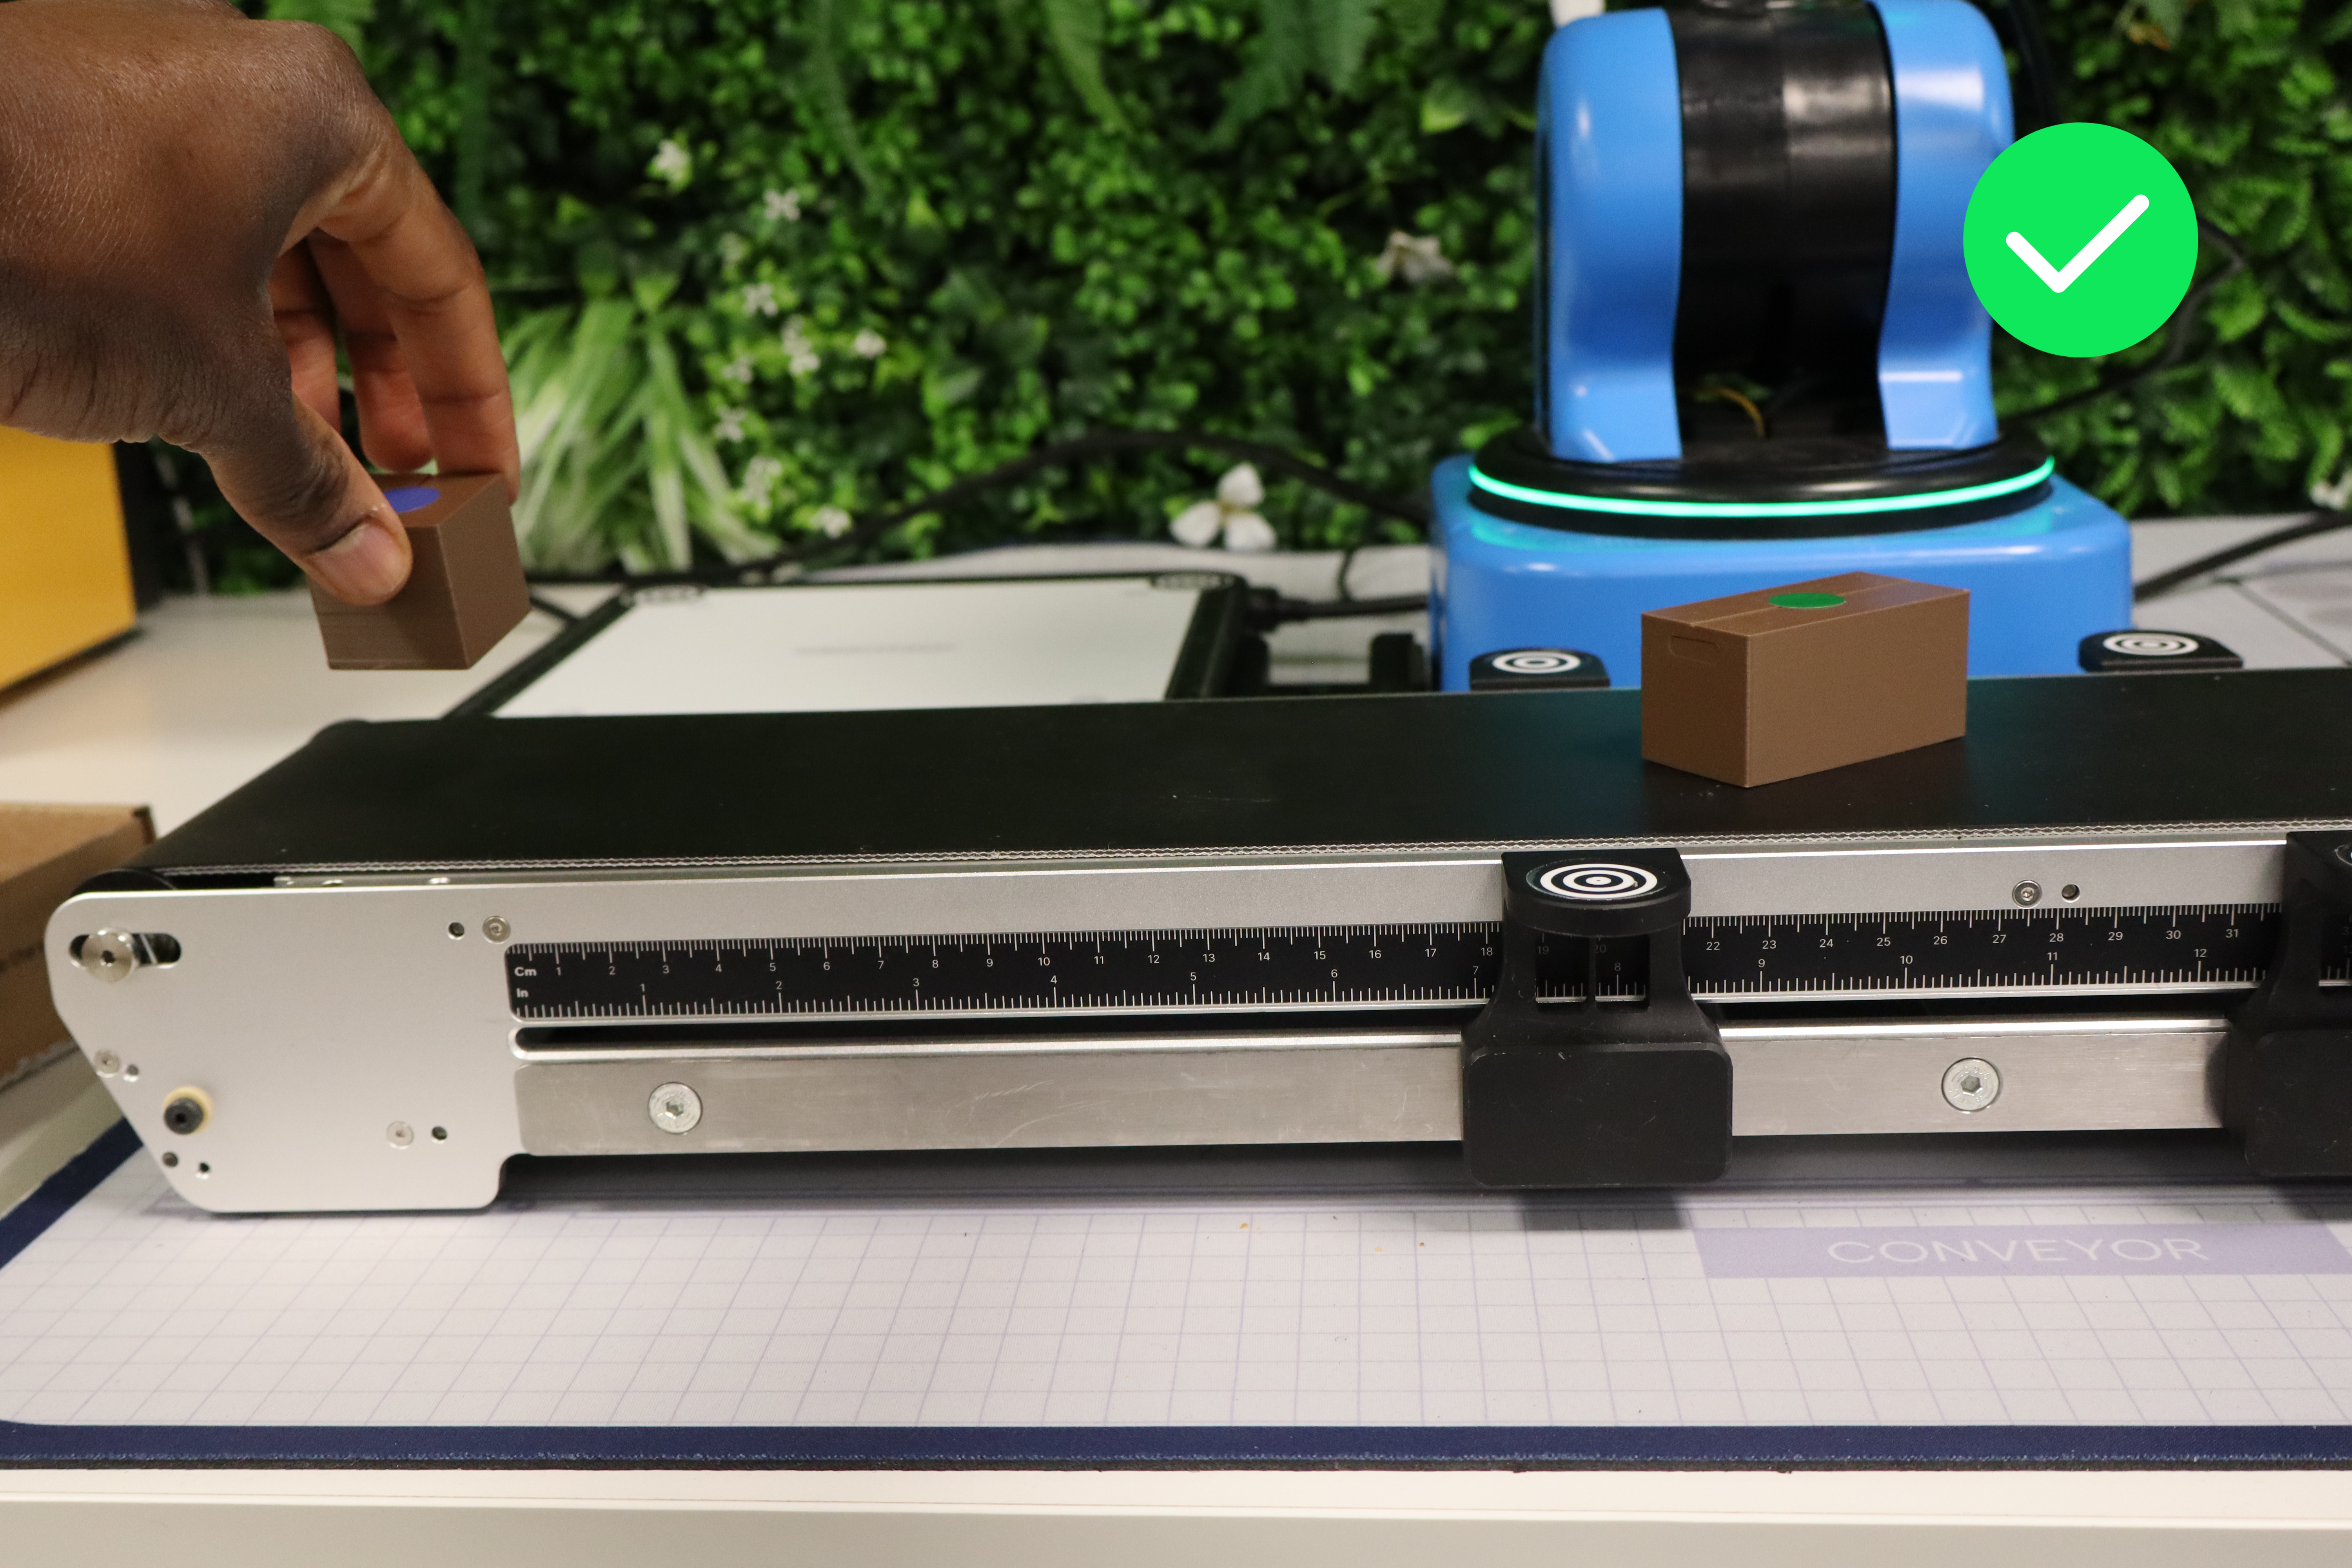
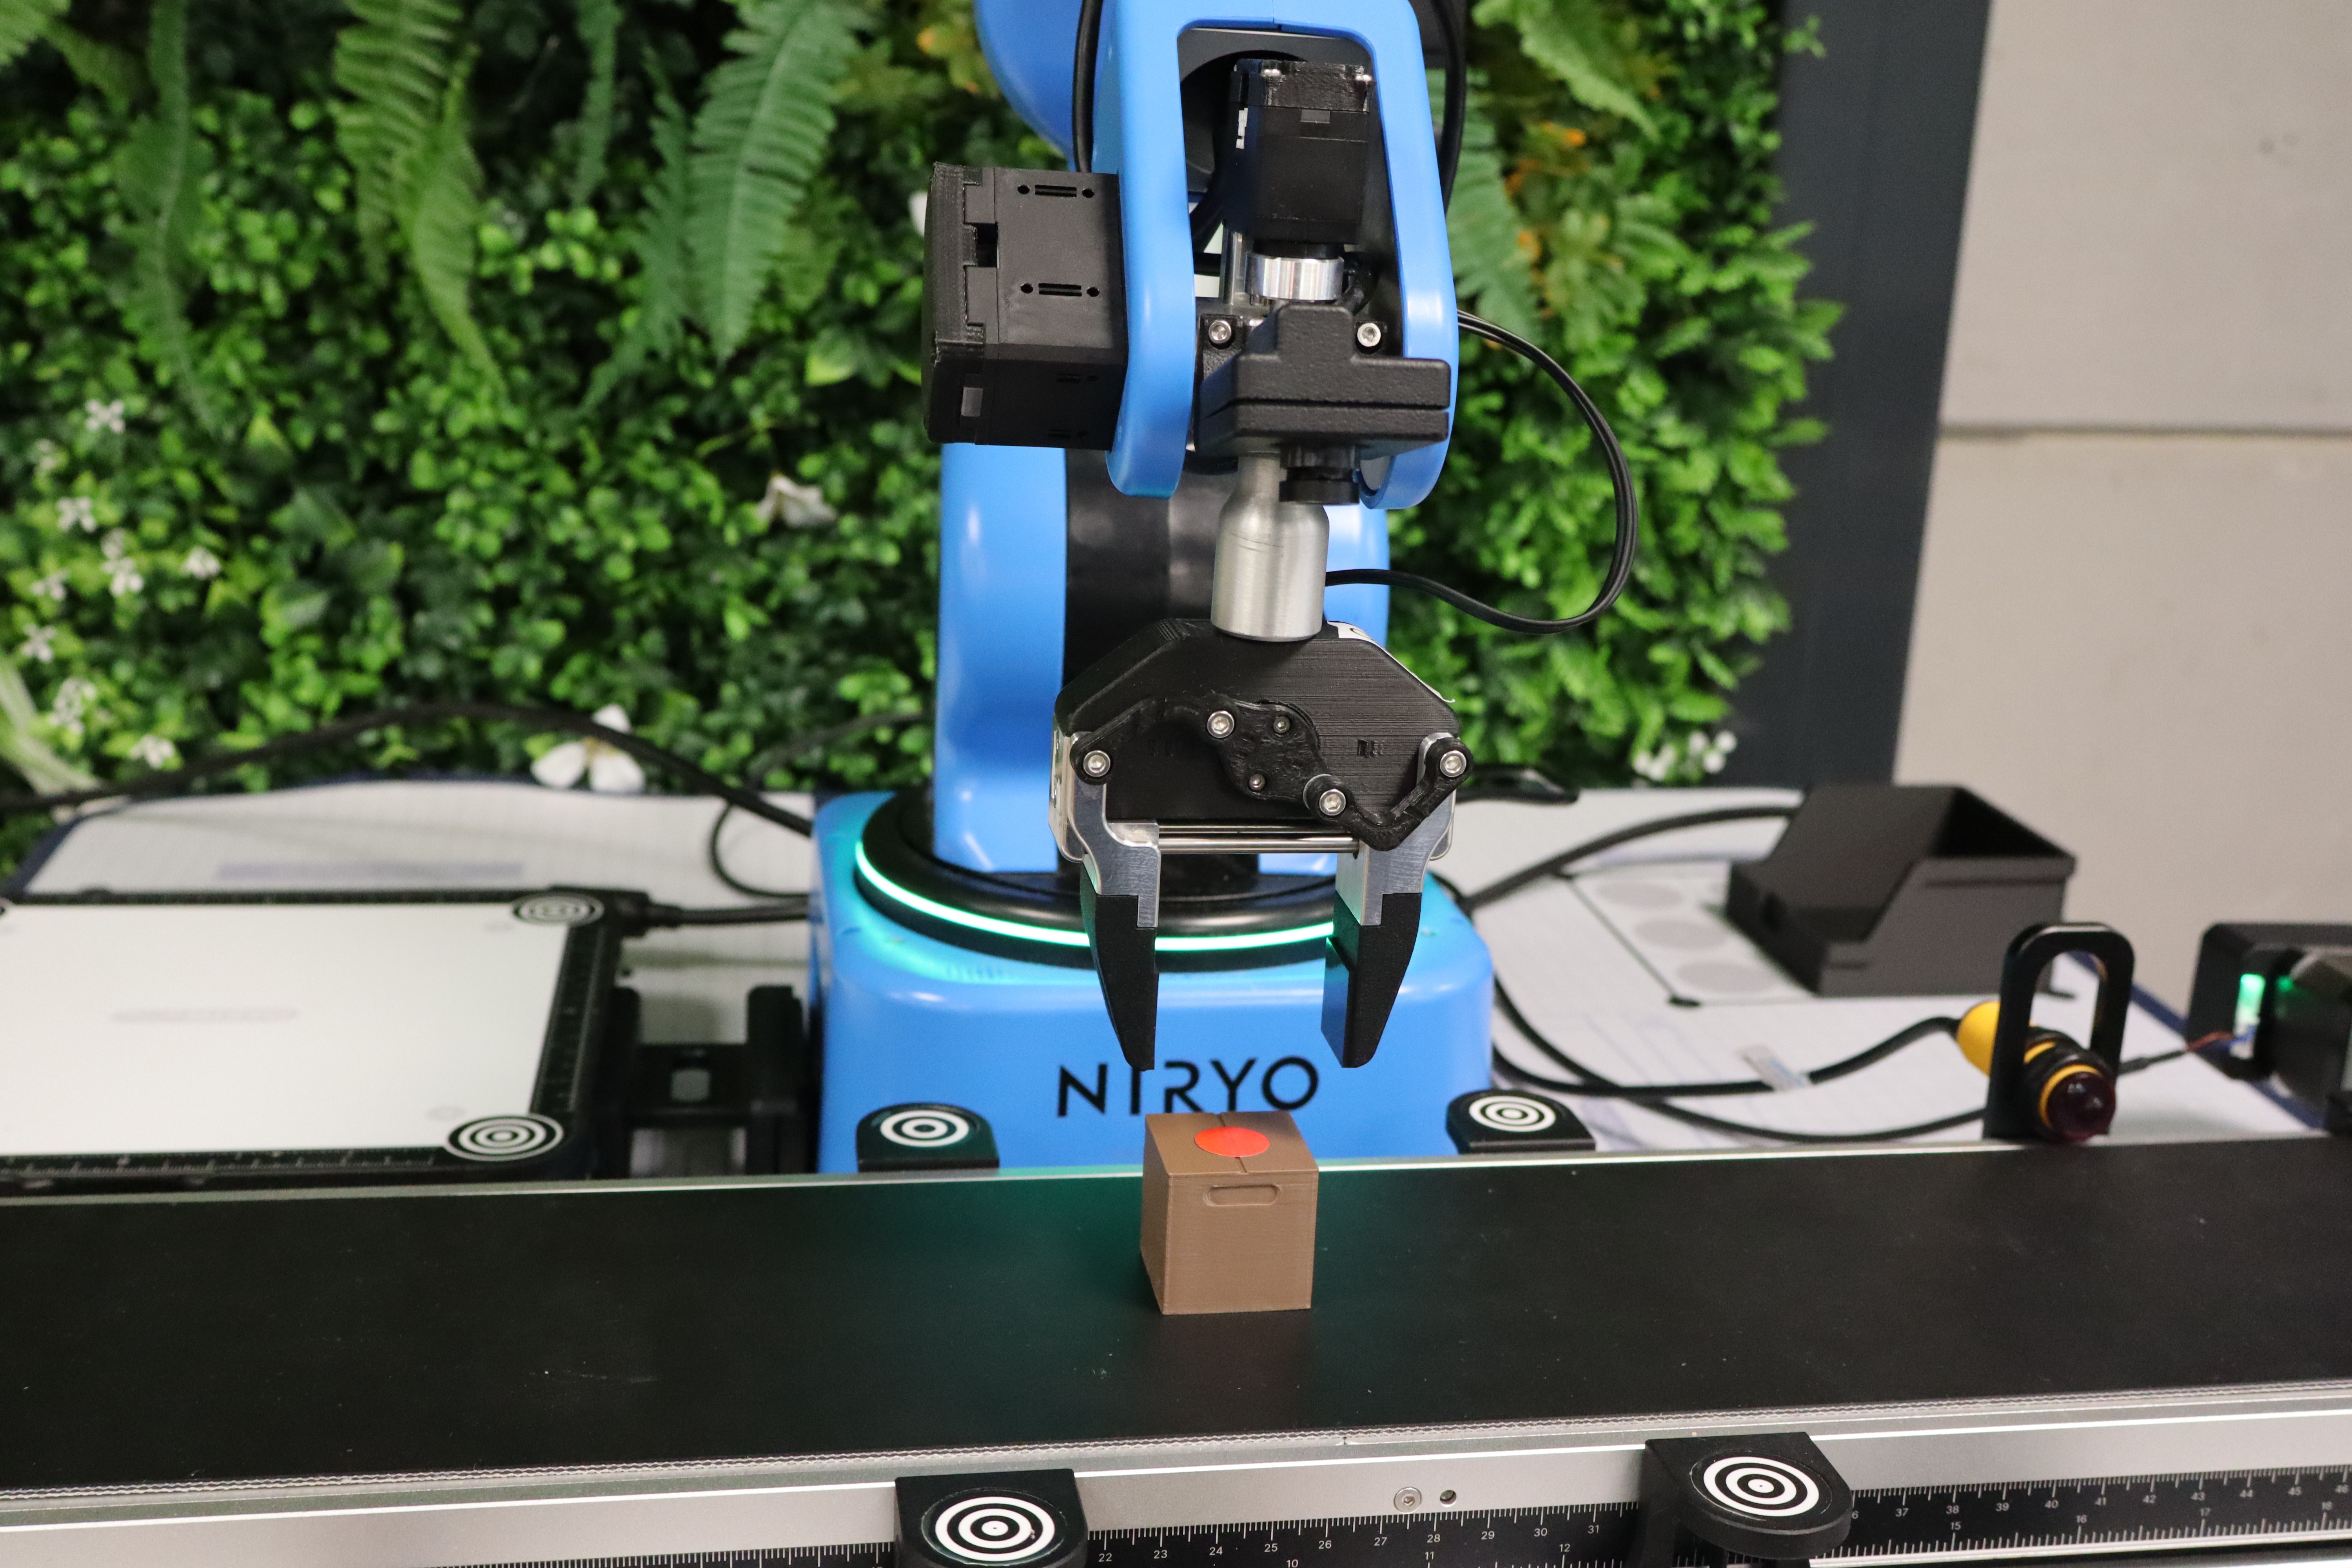
Packages must be placed in the dedicated zone illustrated in red. In case of non-compliance, a 2-second penalty is given.
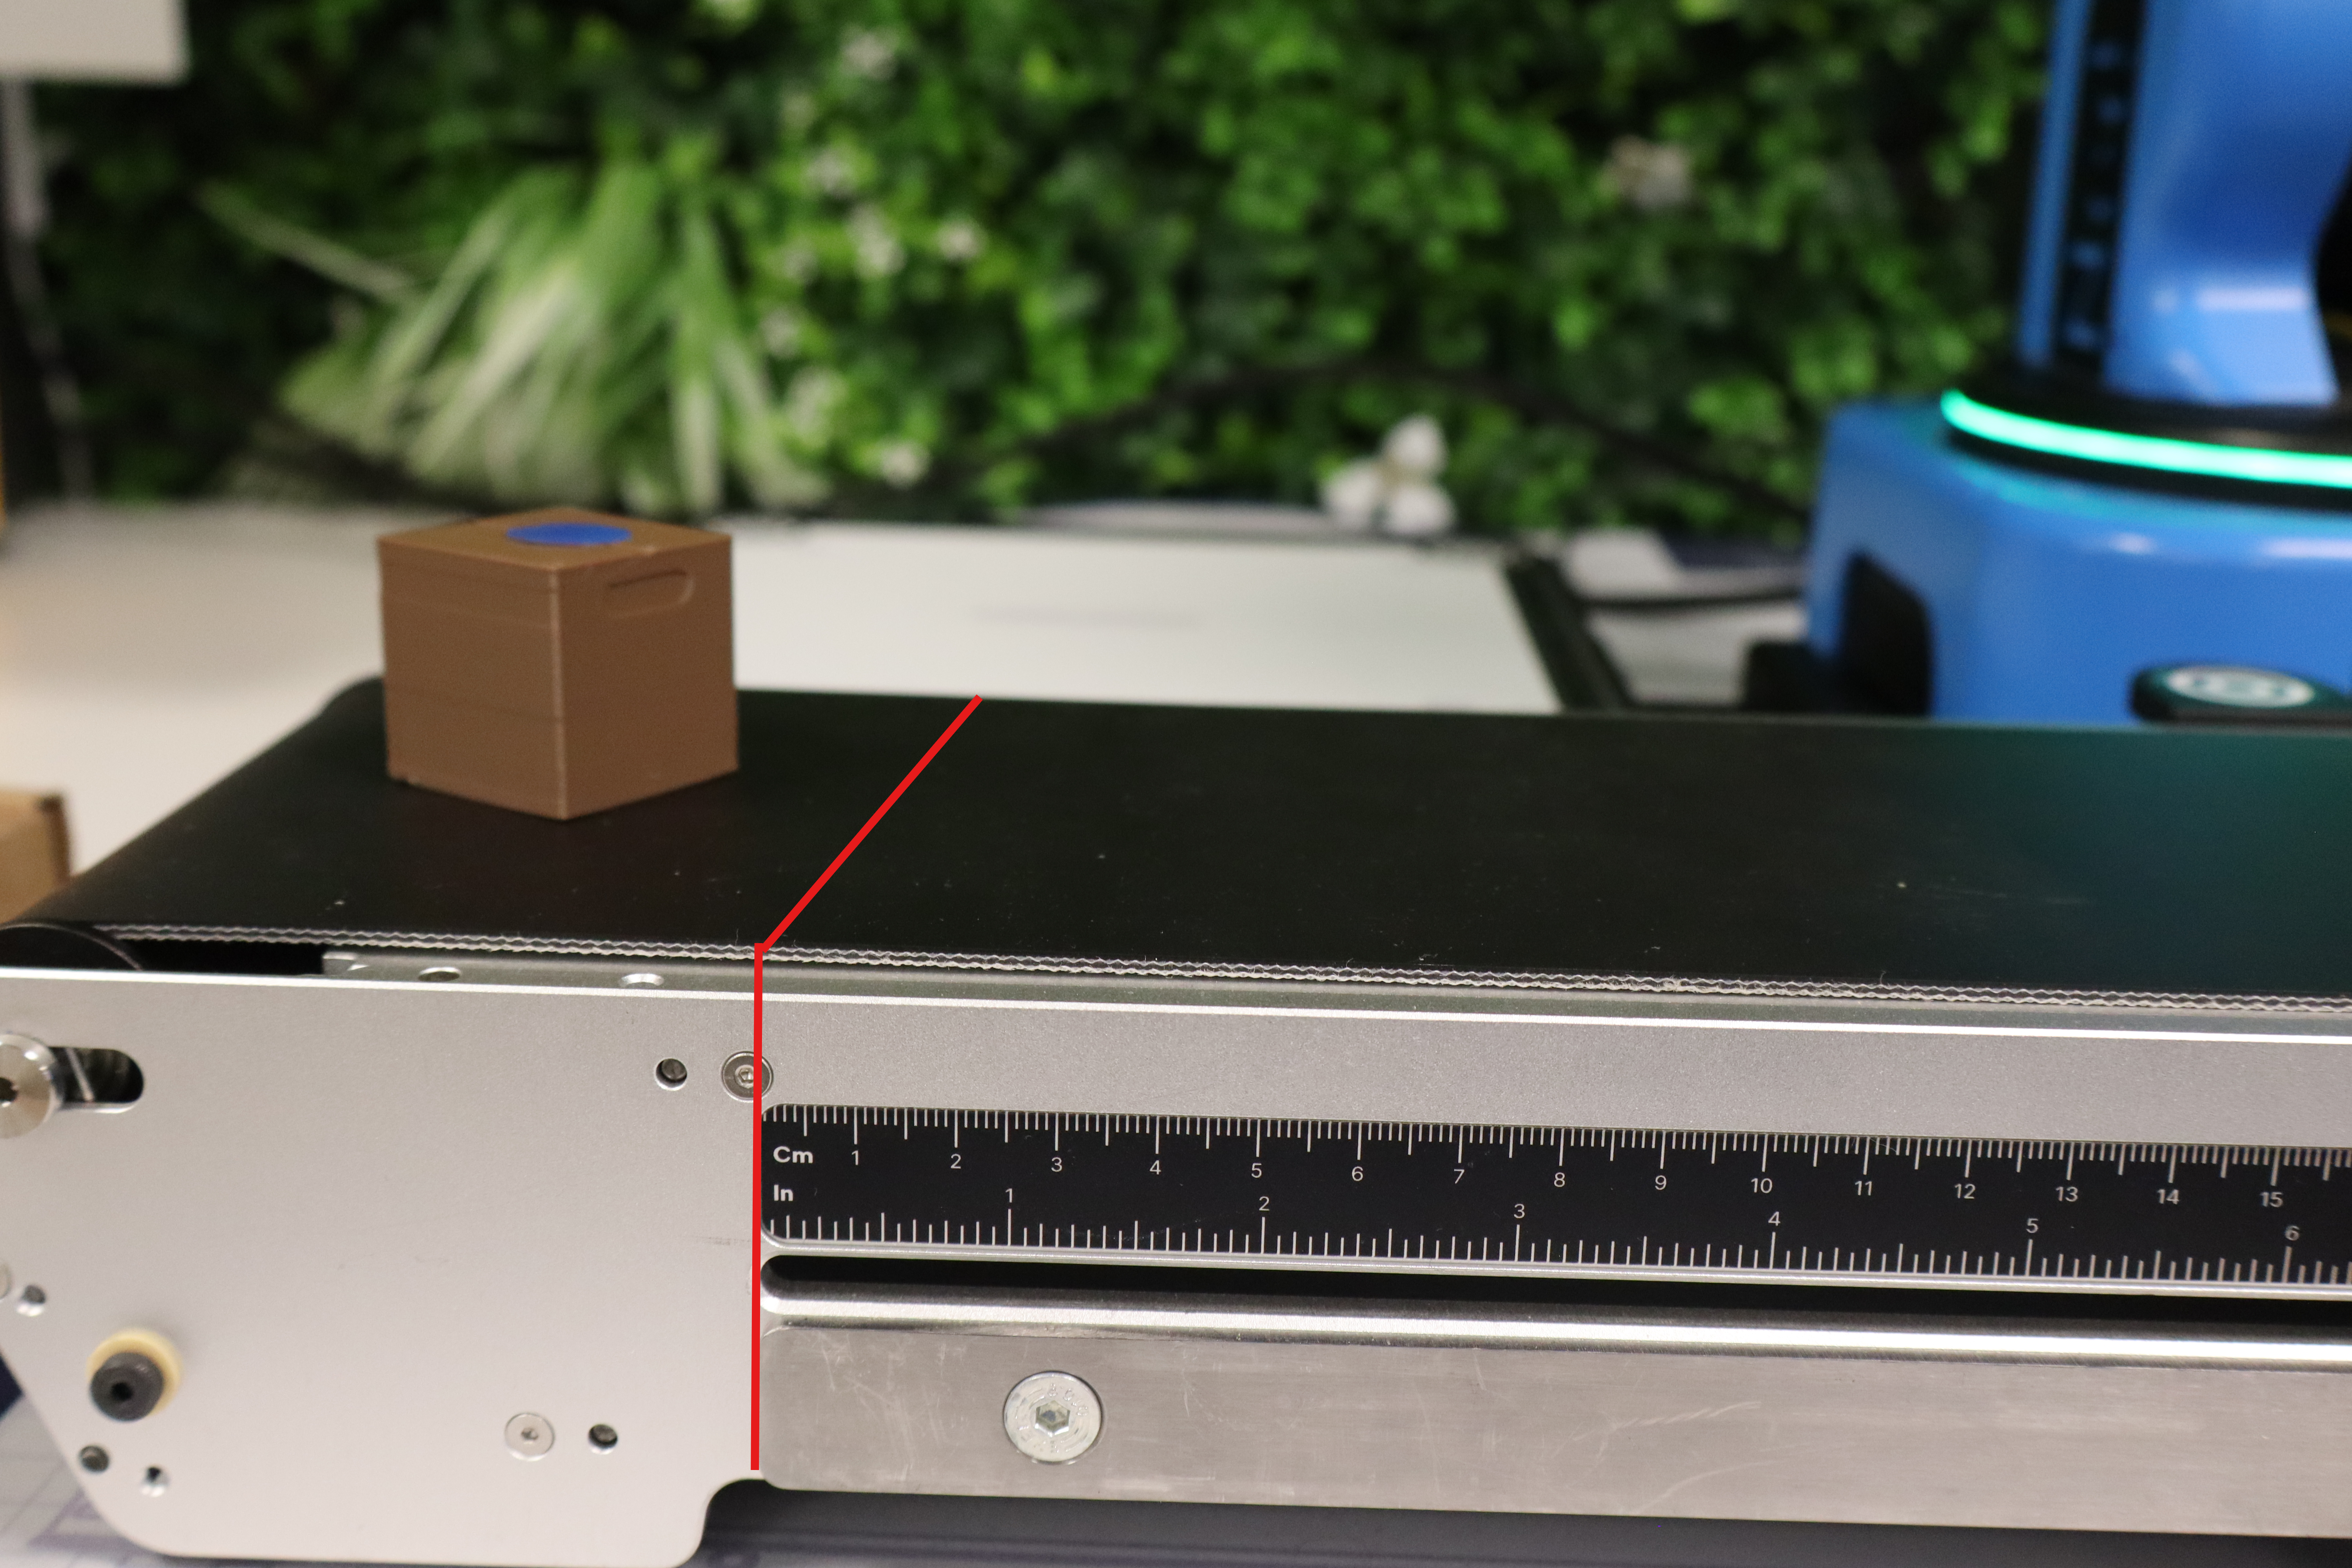
During this step, placement must be careful so that the part stops perfectly against the End Stopper (meaning slightly angled so the package does not get stuck).
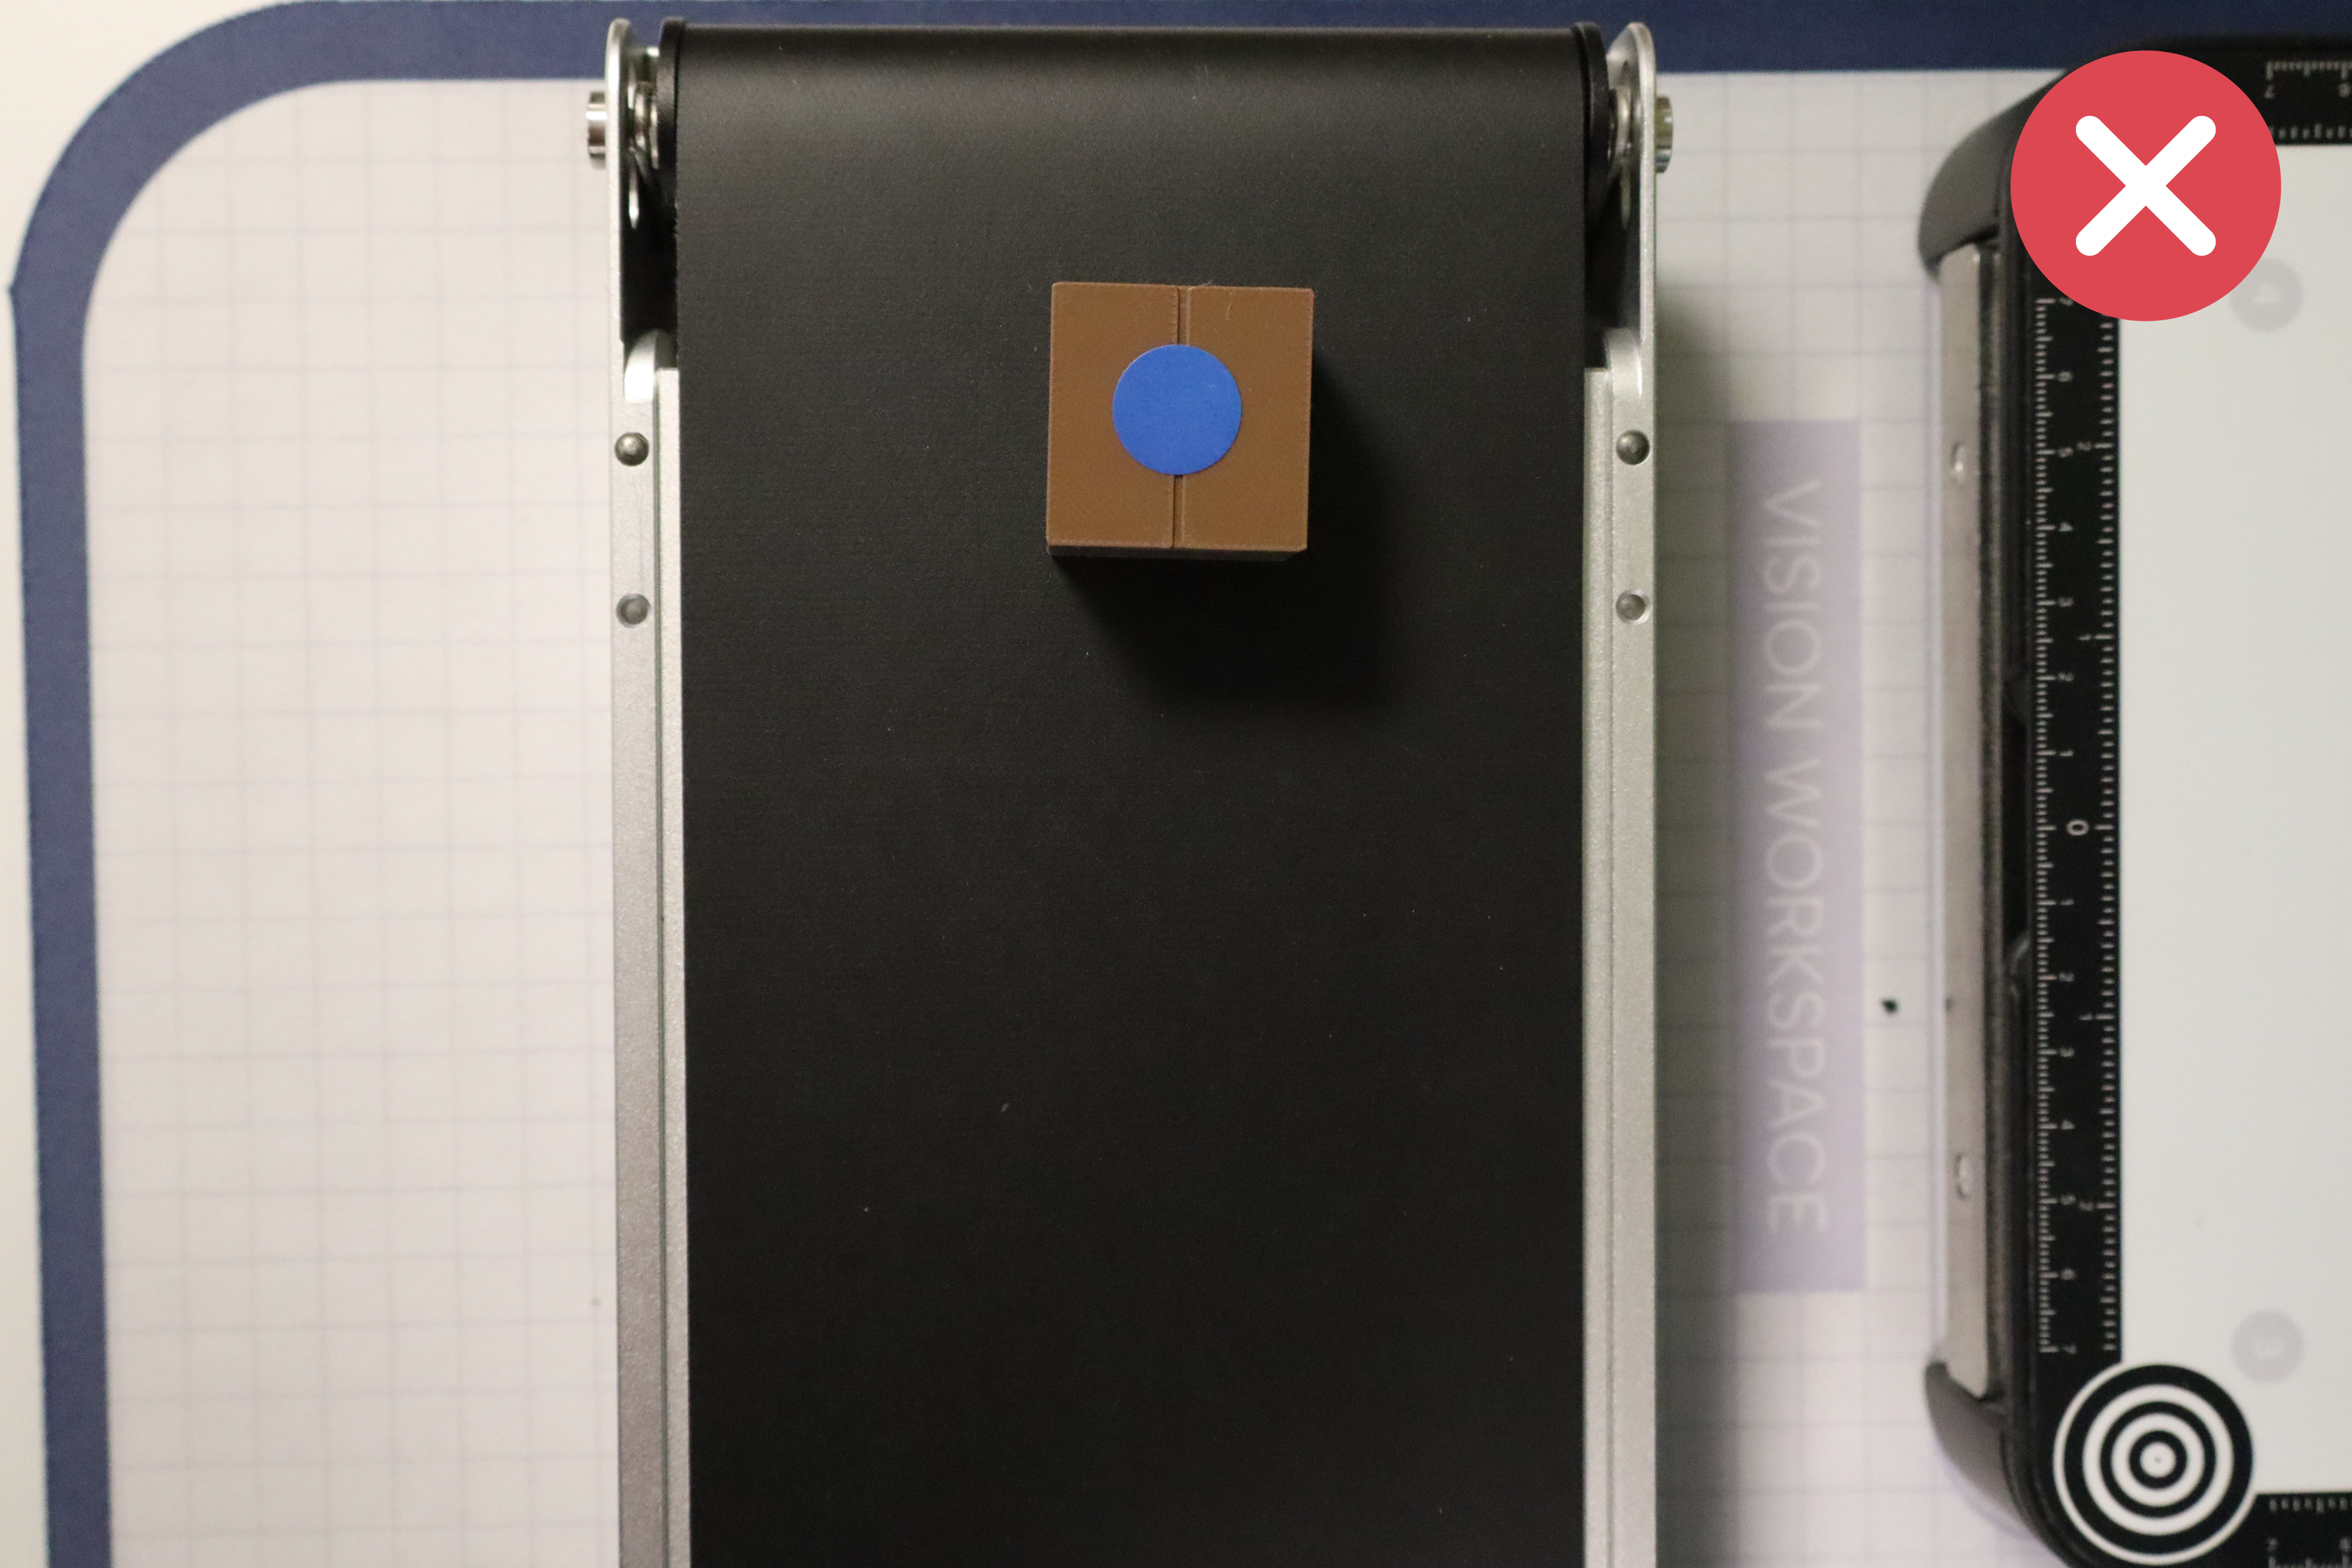
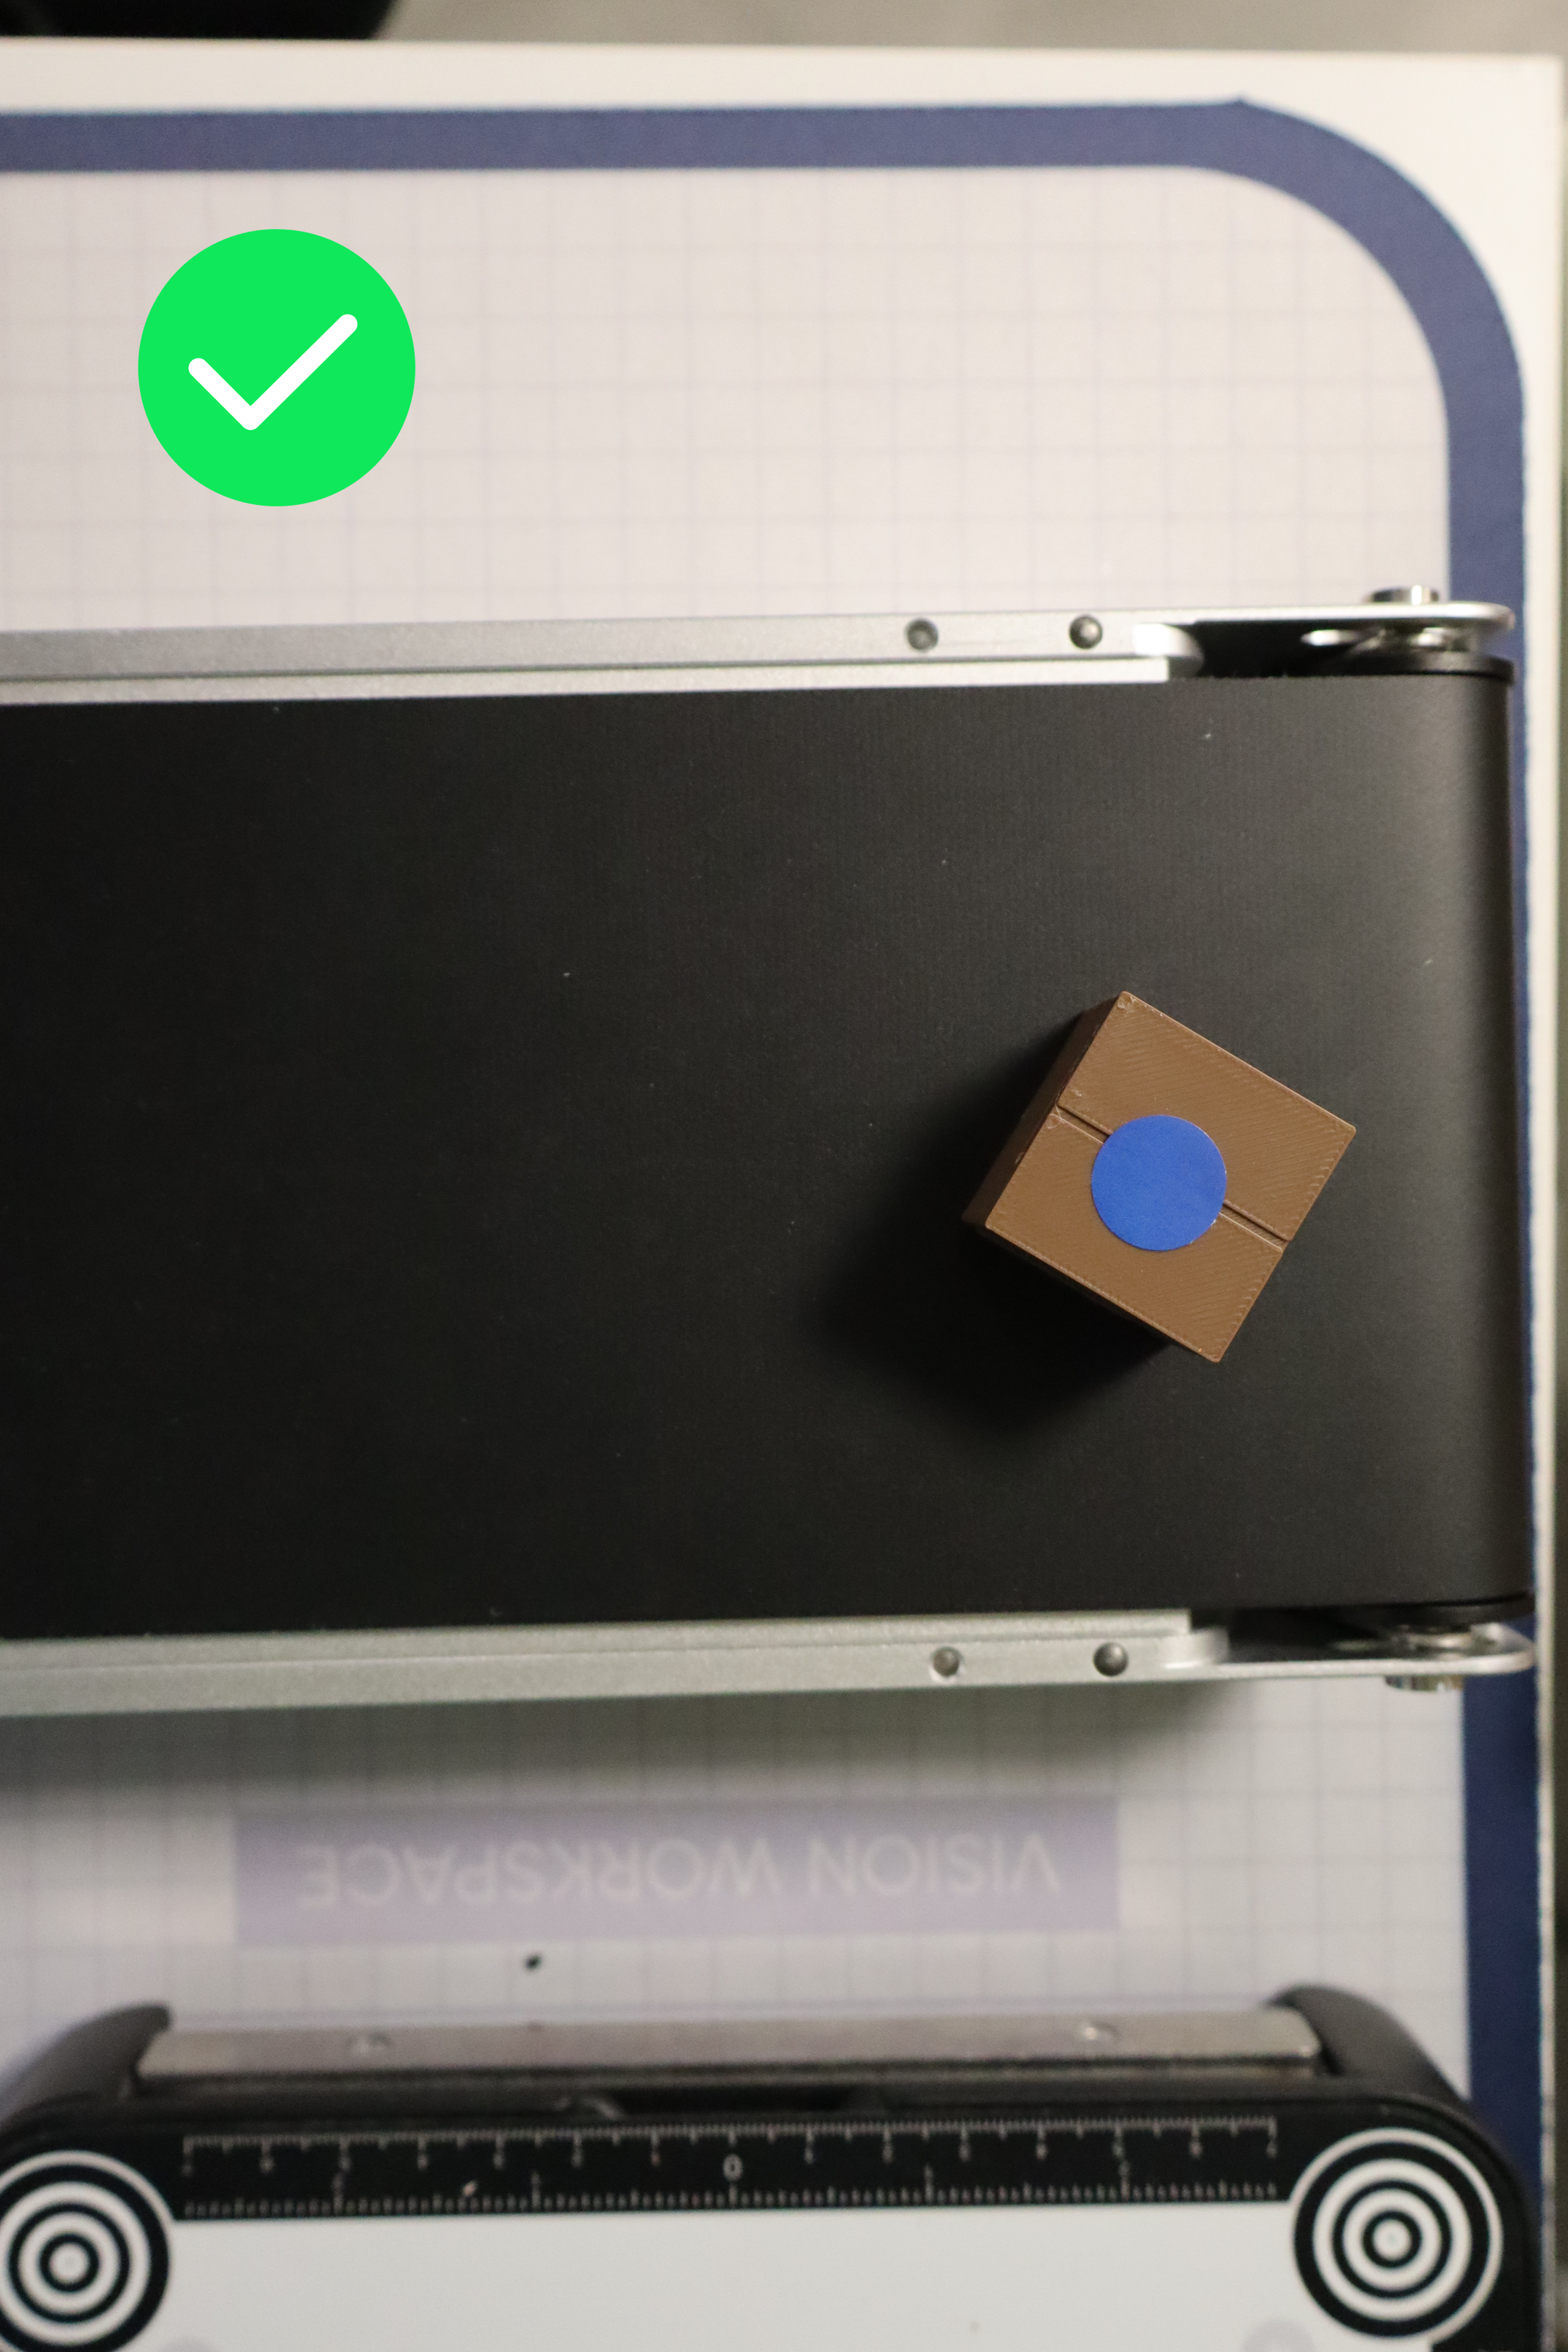
Quick tip: regarding rejects, where one retrieval solution is via Vision Pick, ensure they are placed parallel to the conveyor to facilitate the gripper's grasp.
To save time and depending on each group's strategy, it is entirely possible to sequence the placement of packages, but they must be placed one by one. If several packages are deposited at the same time, a 2-second penalty is given.
Packages sorting
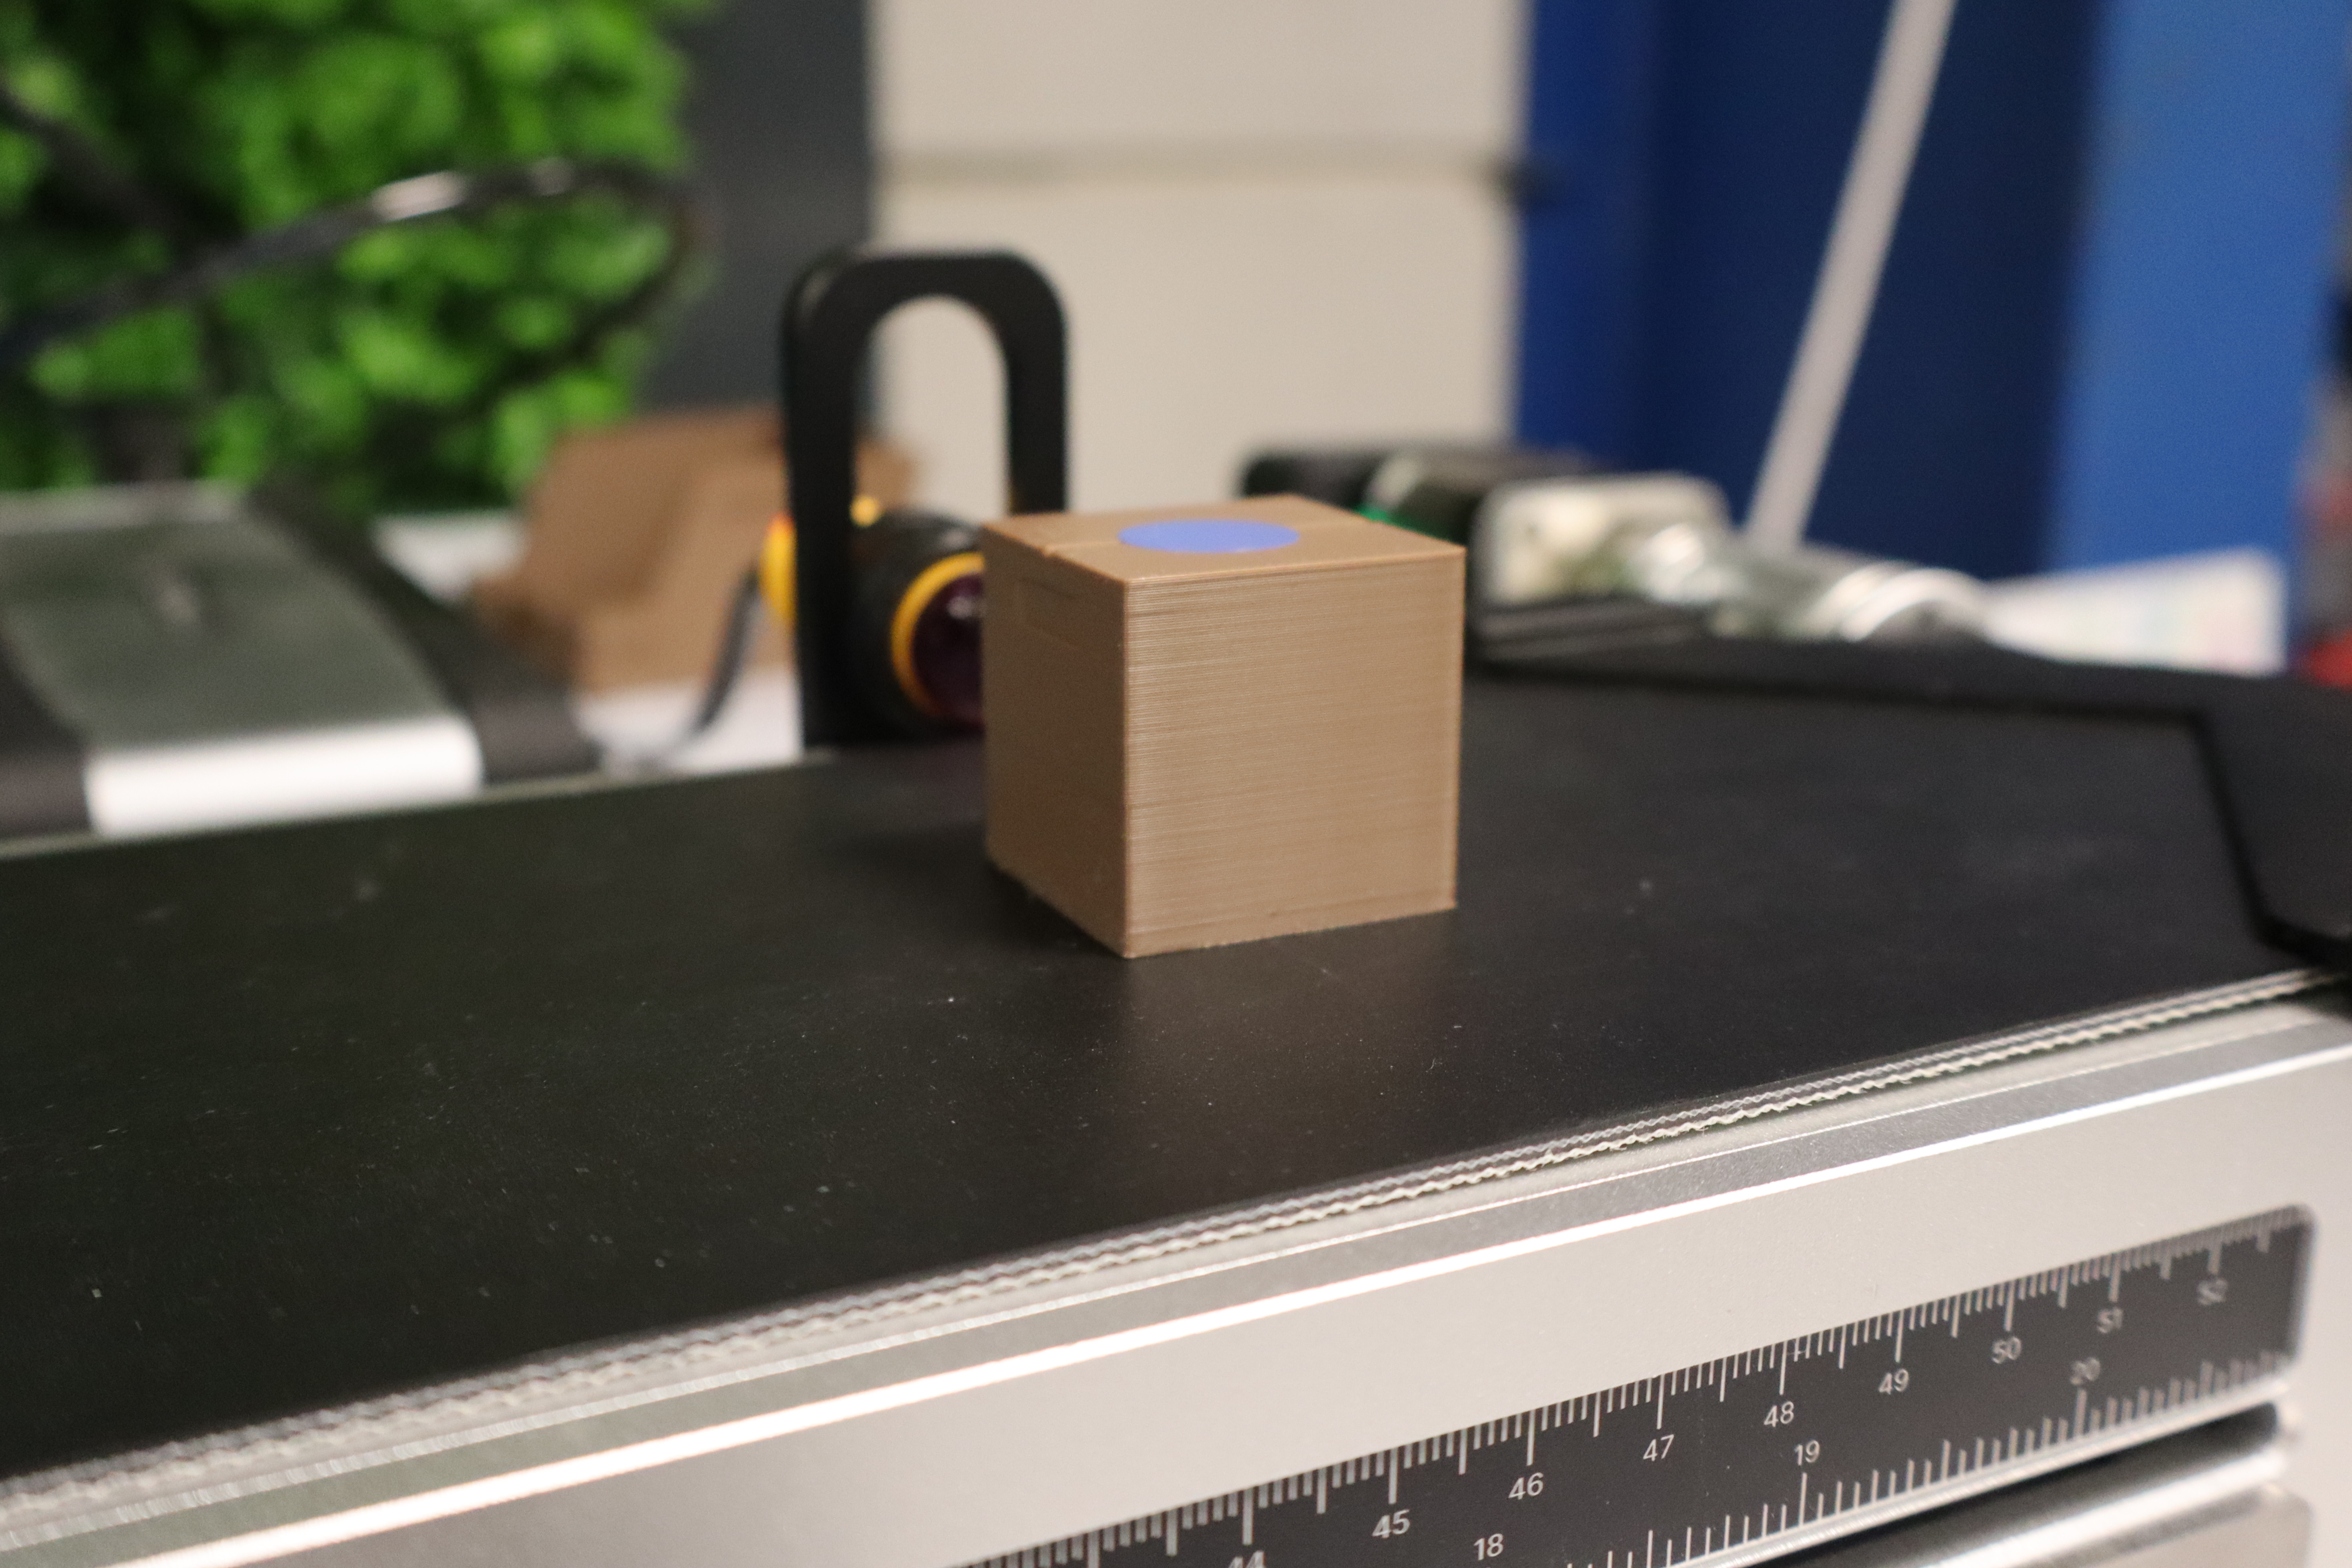
As soon as the package is placed on the conveyor, the next step is package sorting. To do this, the various groups must use camera vision to detect the color of the sticker.
- If the color is green or blue, the package must imperatively go to the end of the conveyor.
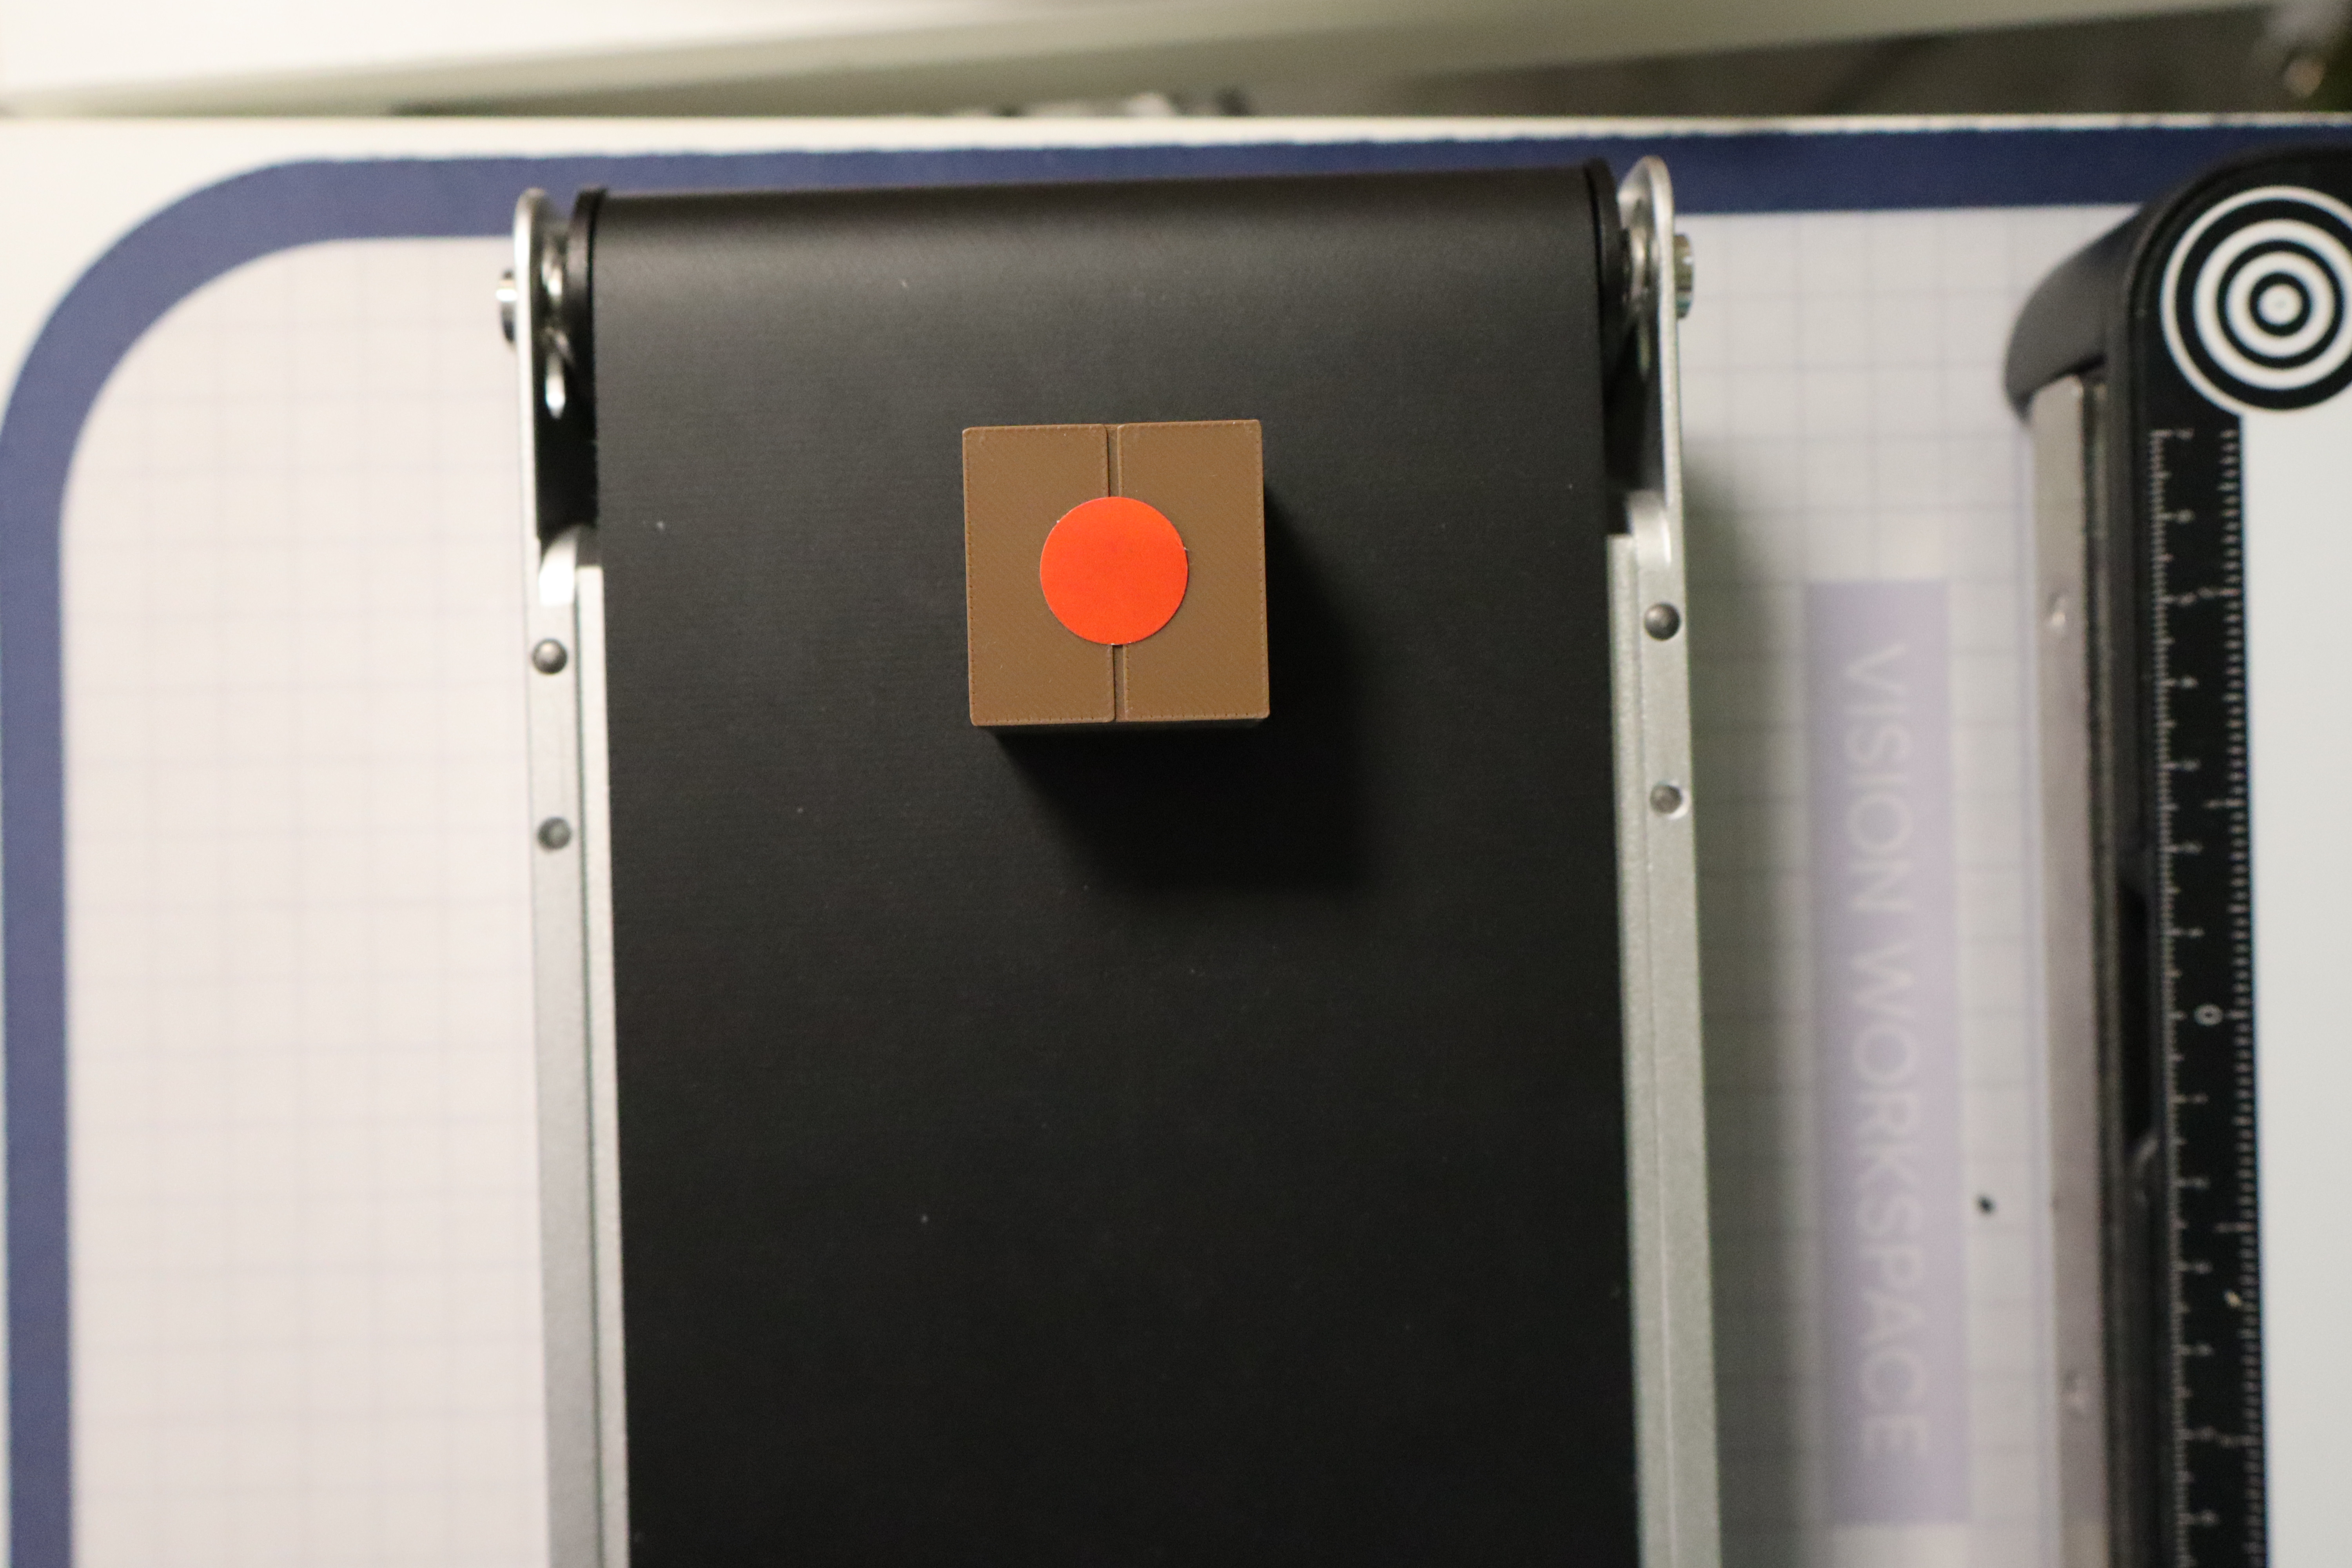
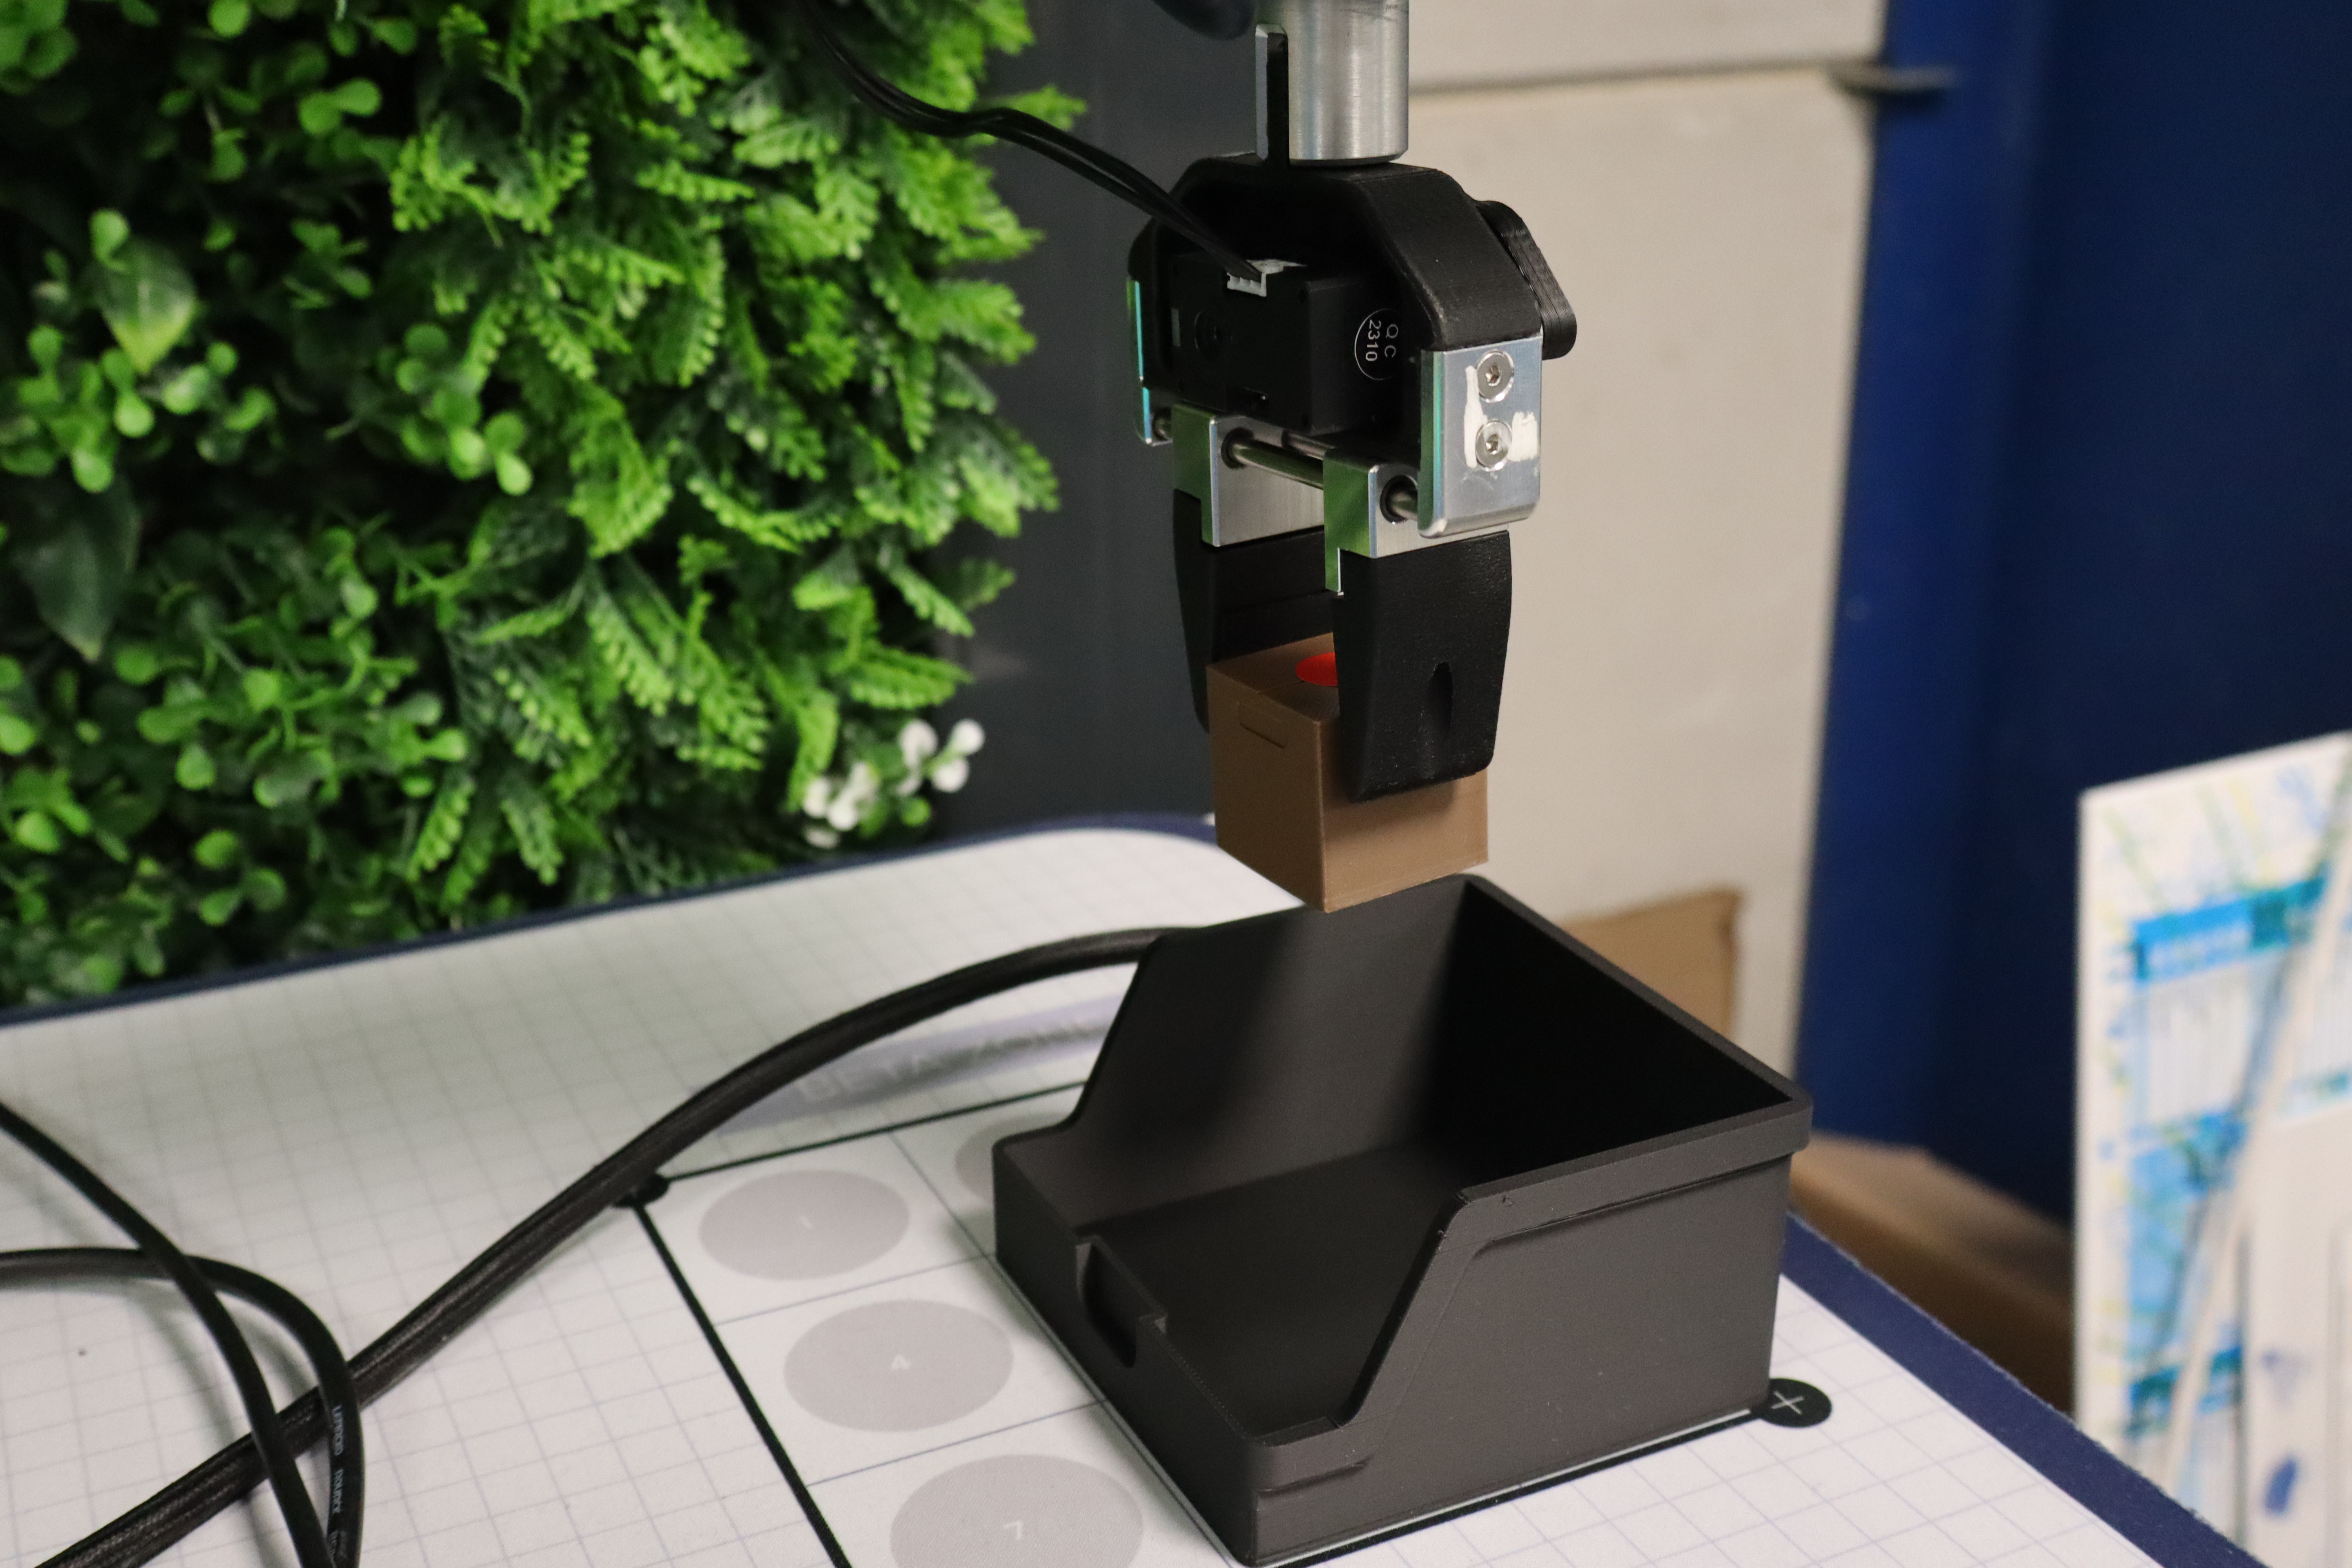
- If the color is red (rejects), the robot must pick up the package and place it in a reject bin located in the Beta Zone. Two methods are possible for retrieving the package: a classic pick by setting a precise position for the gripper—which is quite risky as the package does not stop at the same millimeter each cycle—or via Vision Pick.

Packages transportation
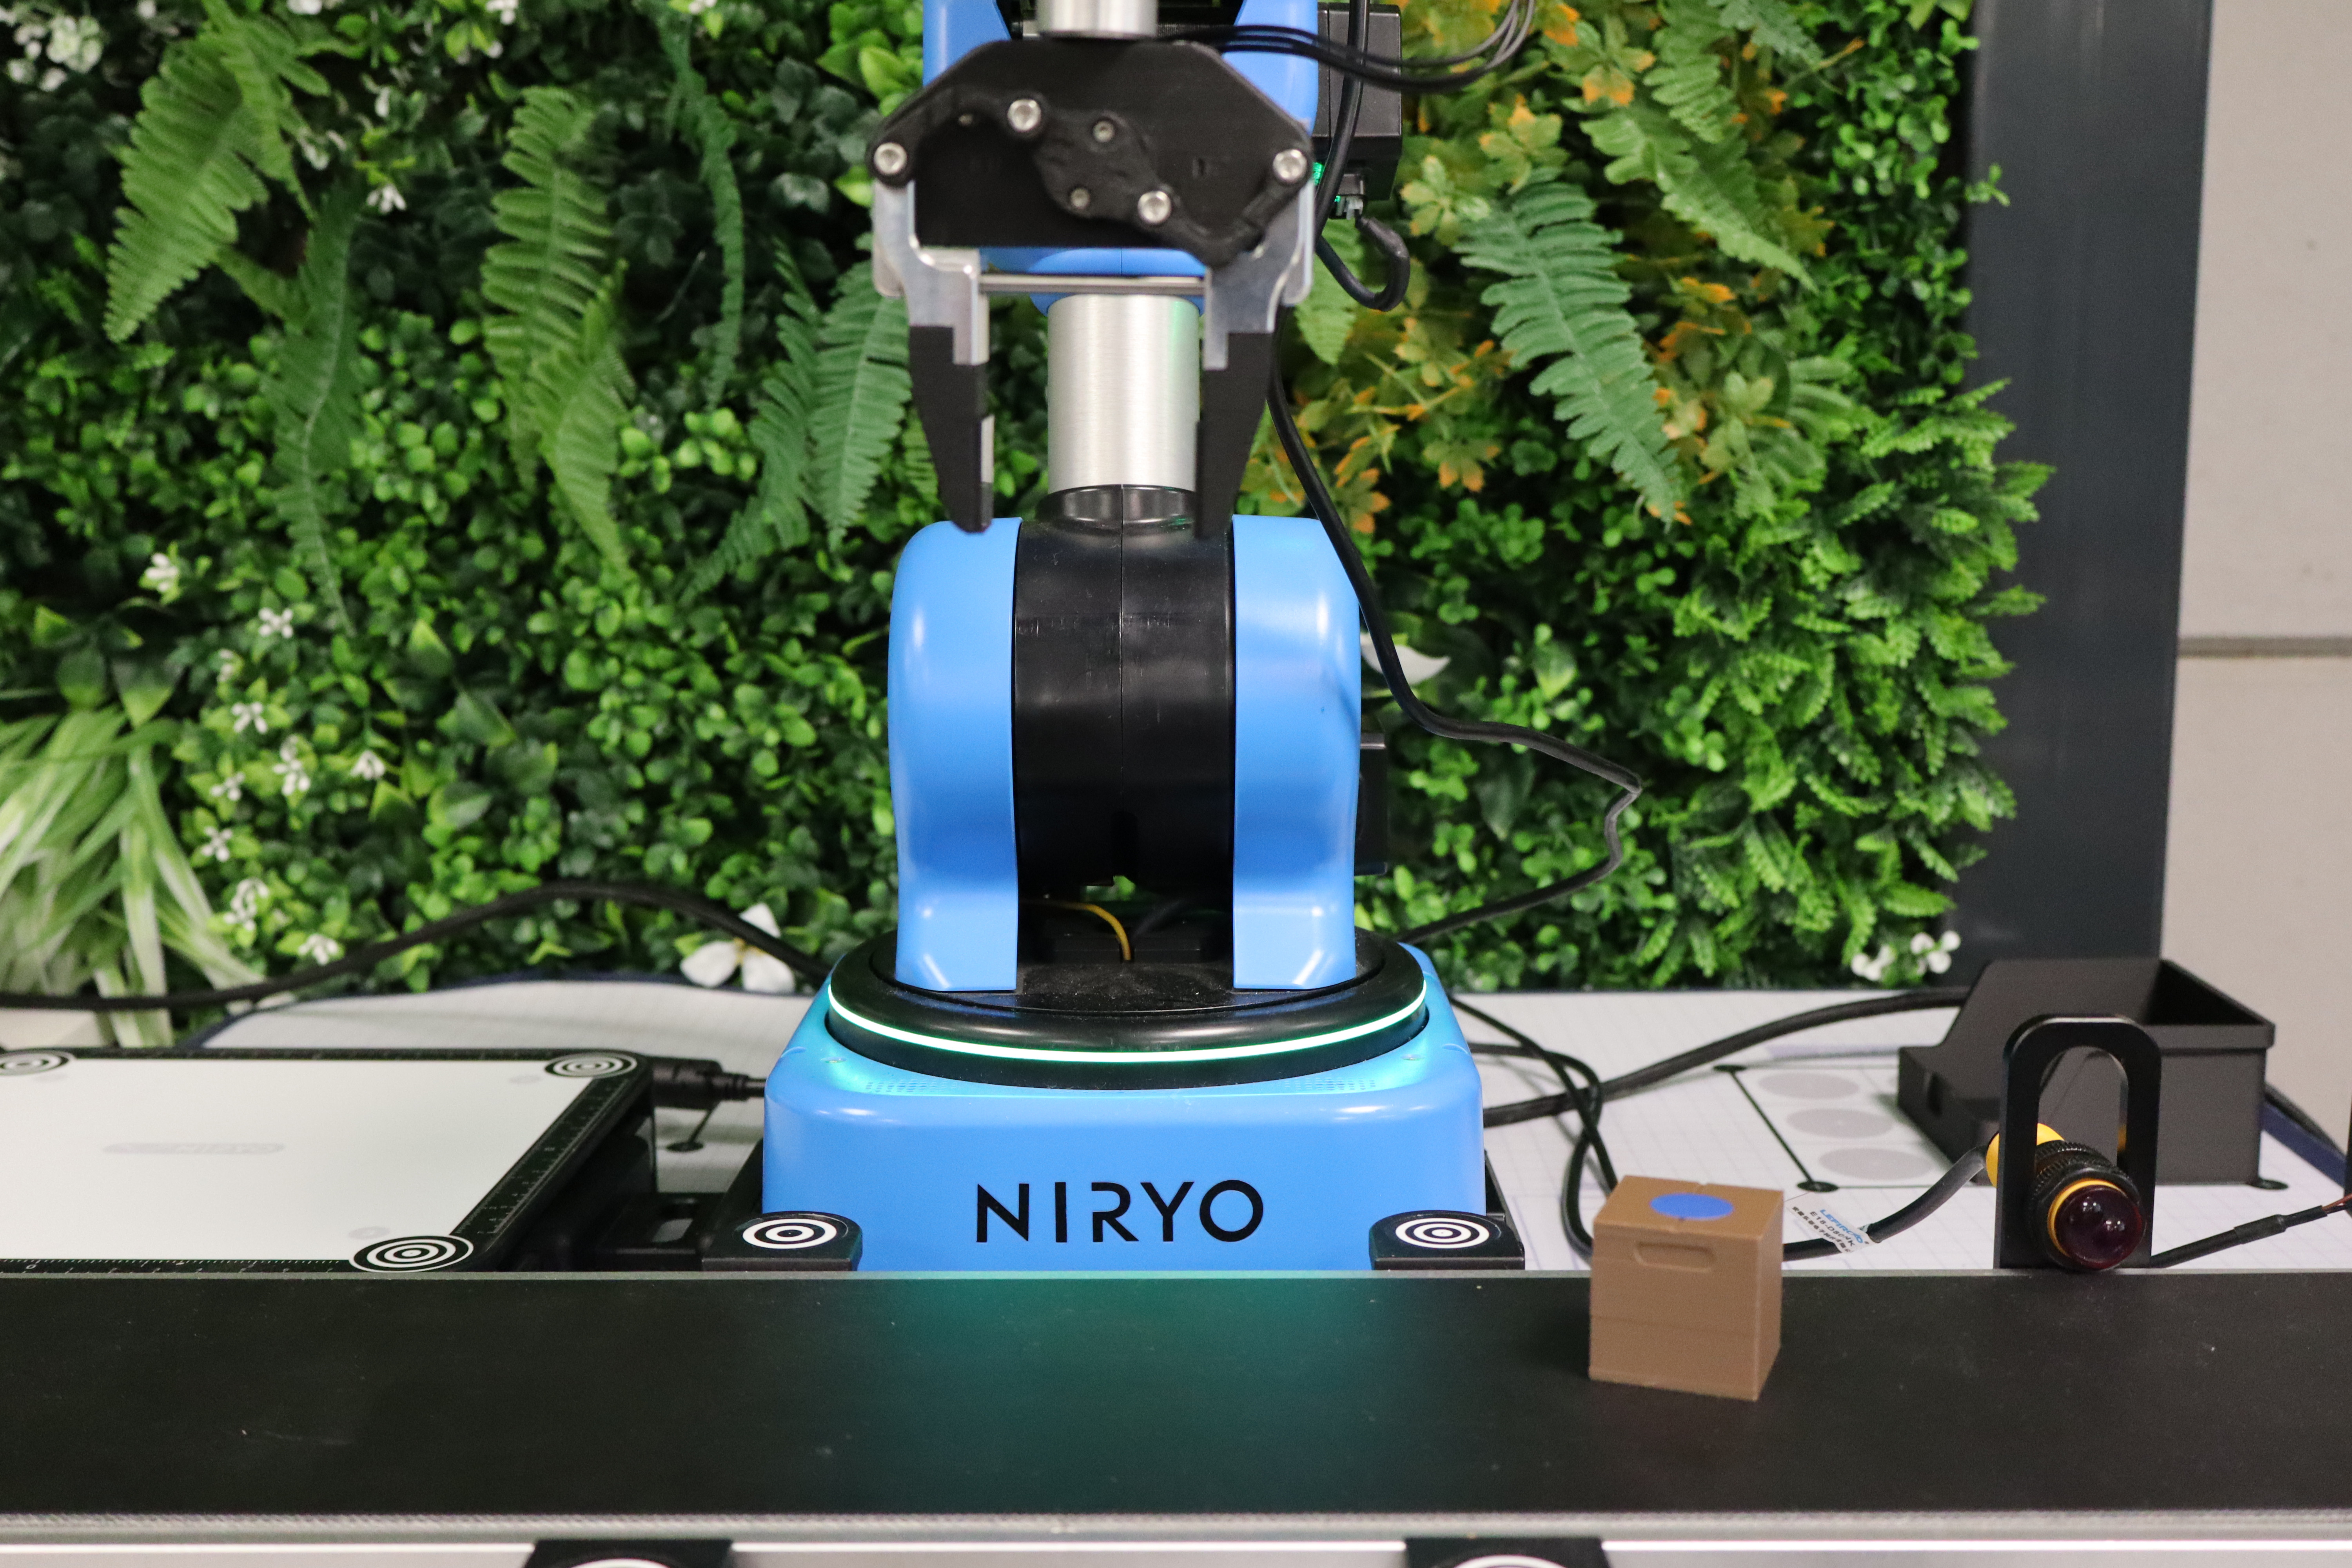
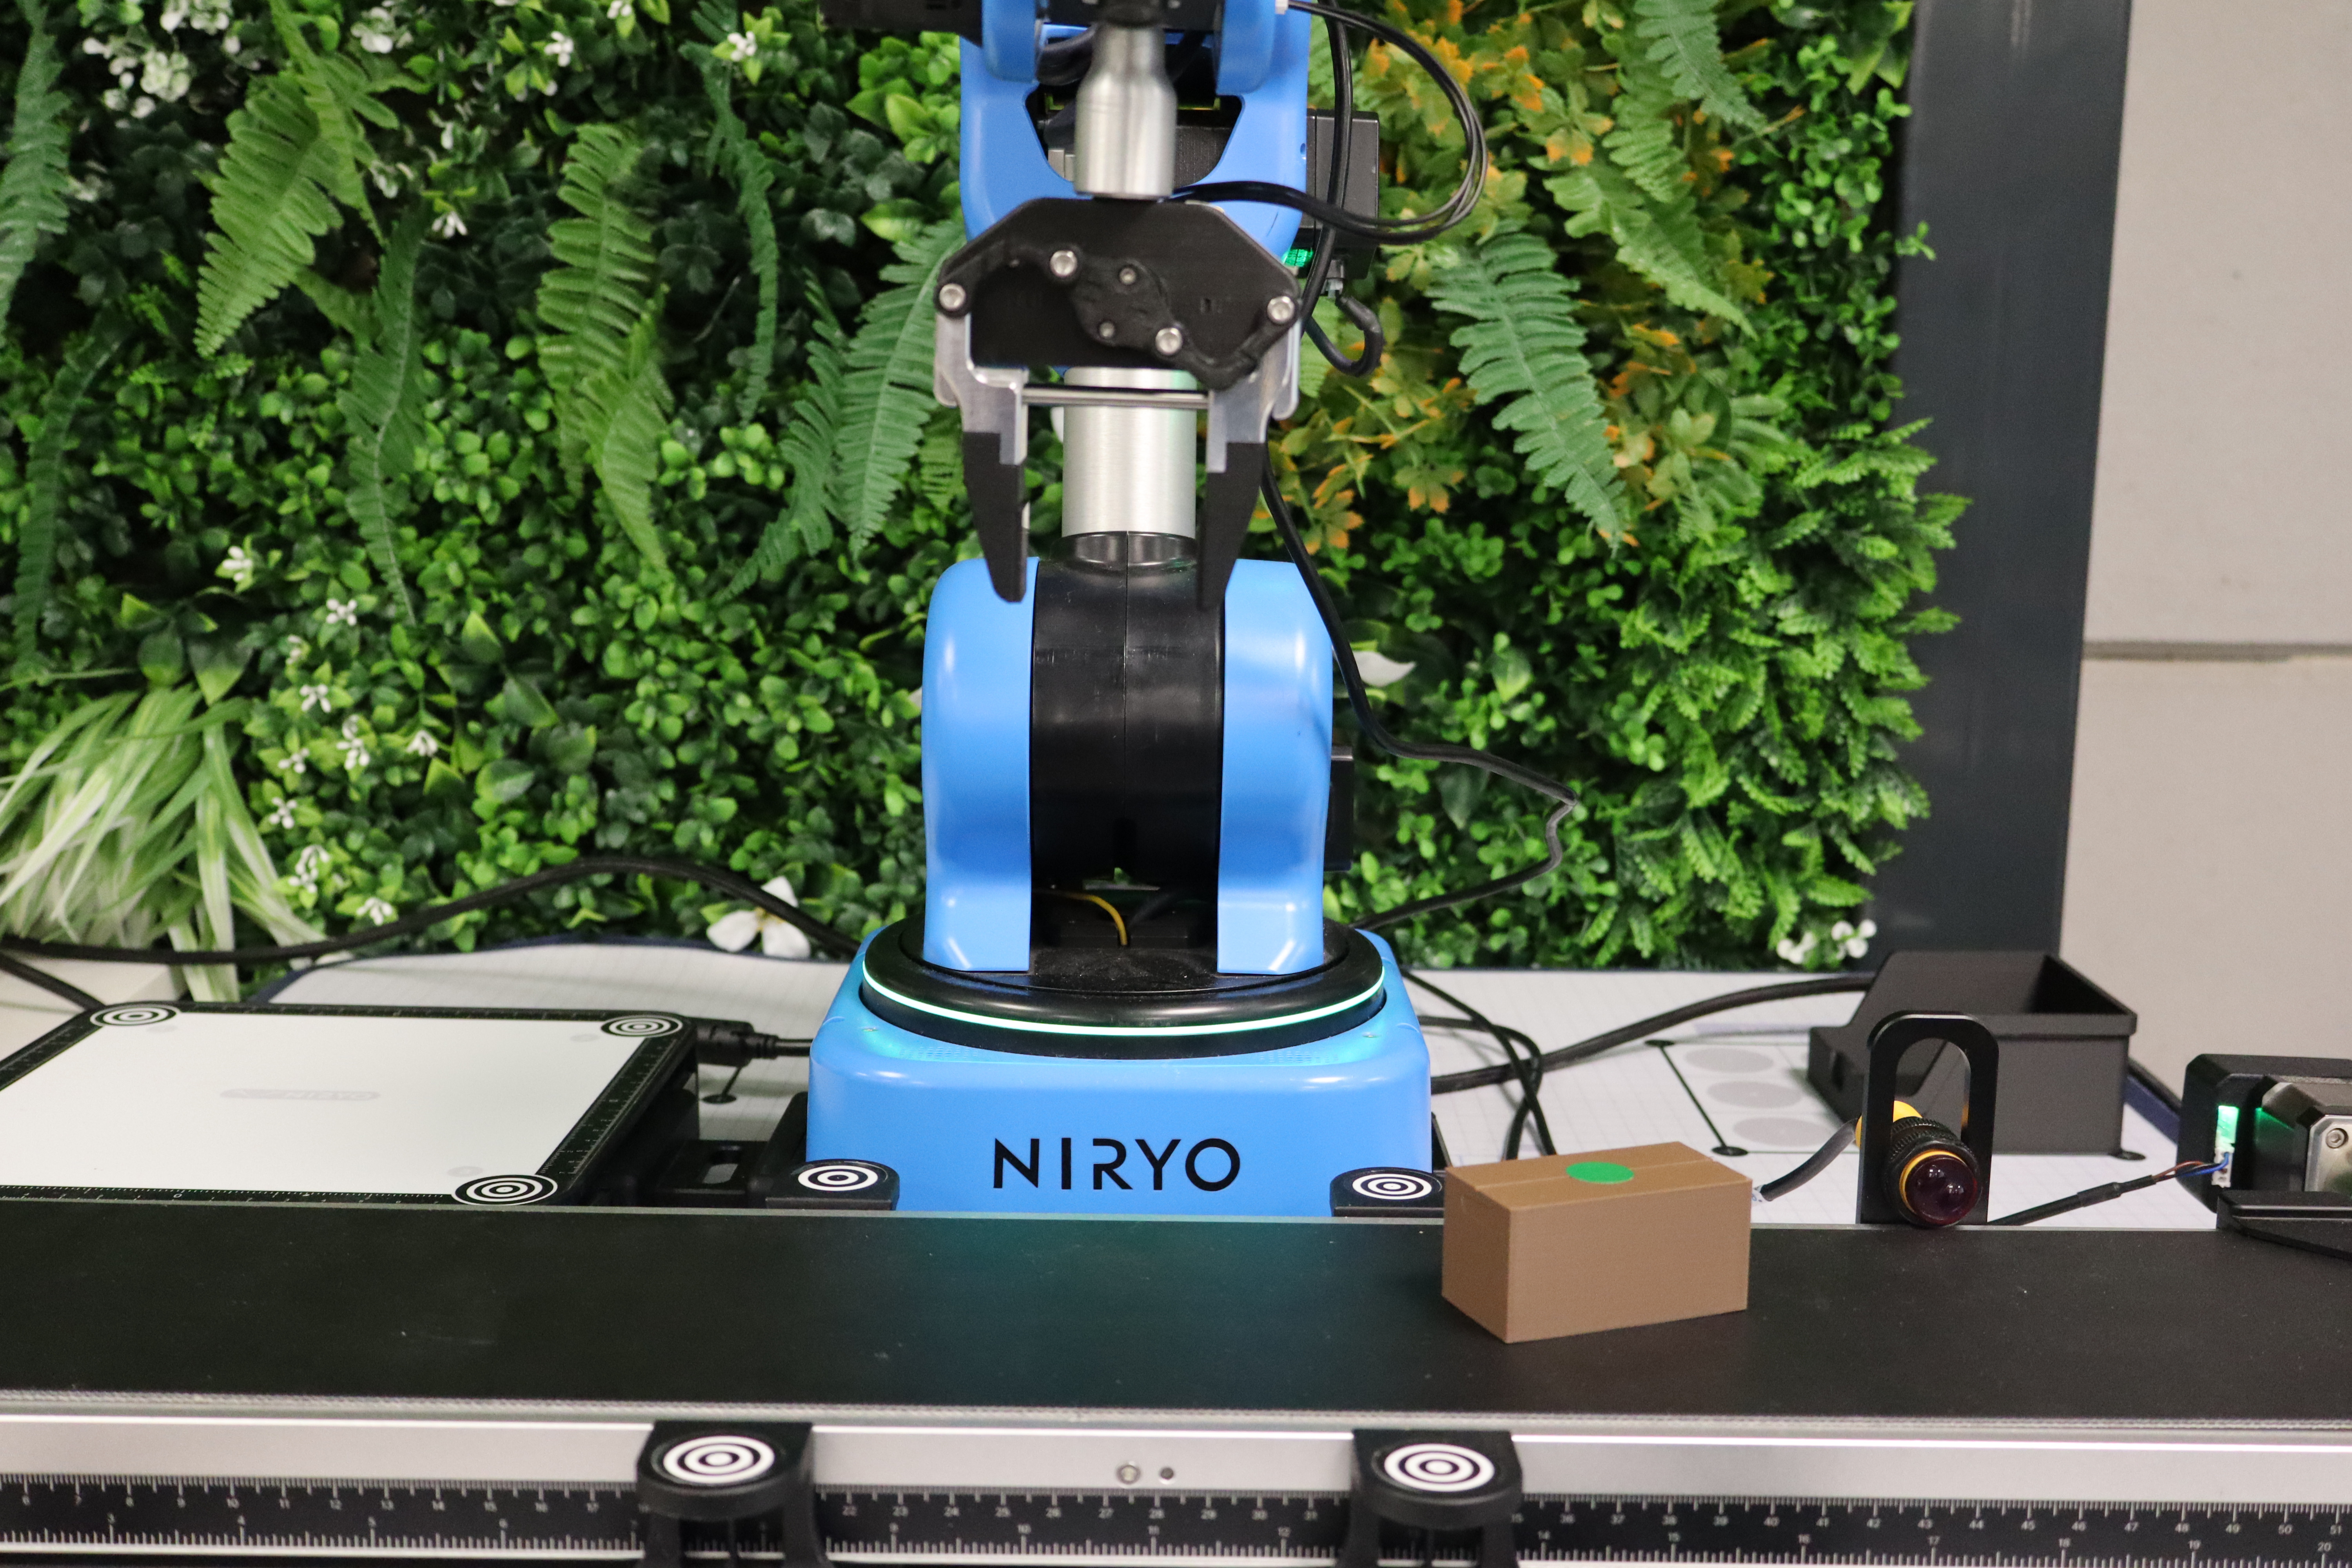
Stopping Packages
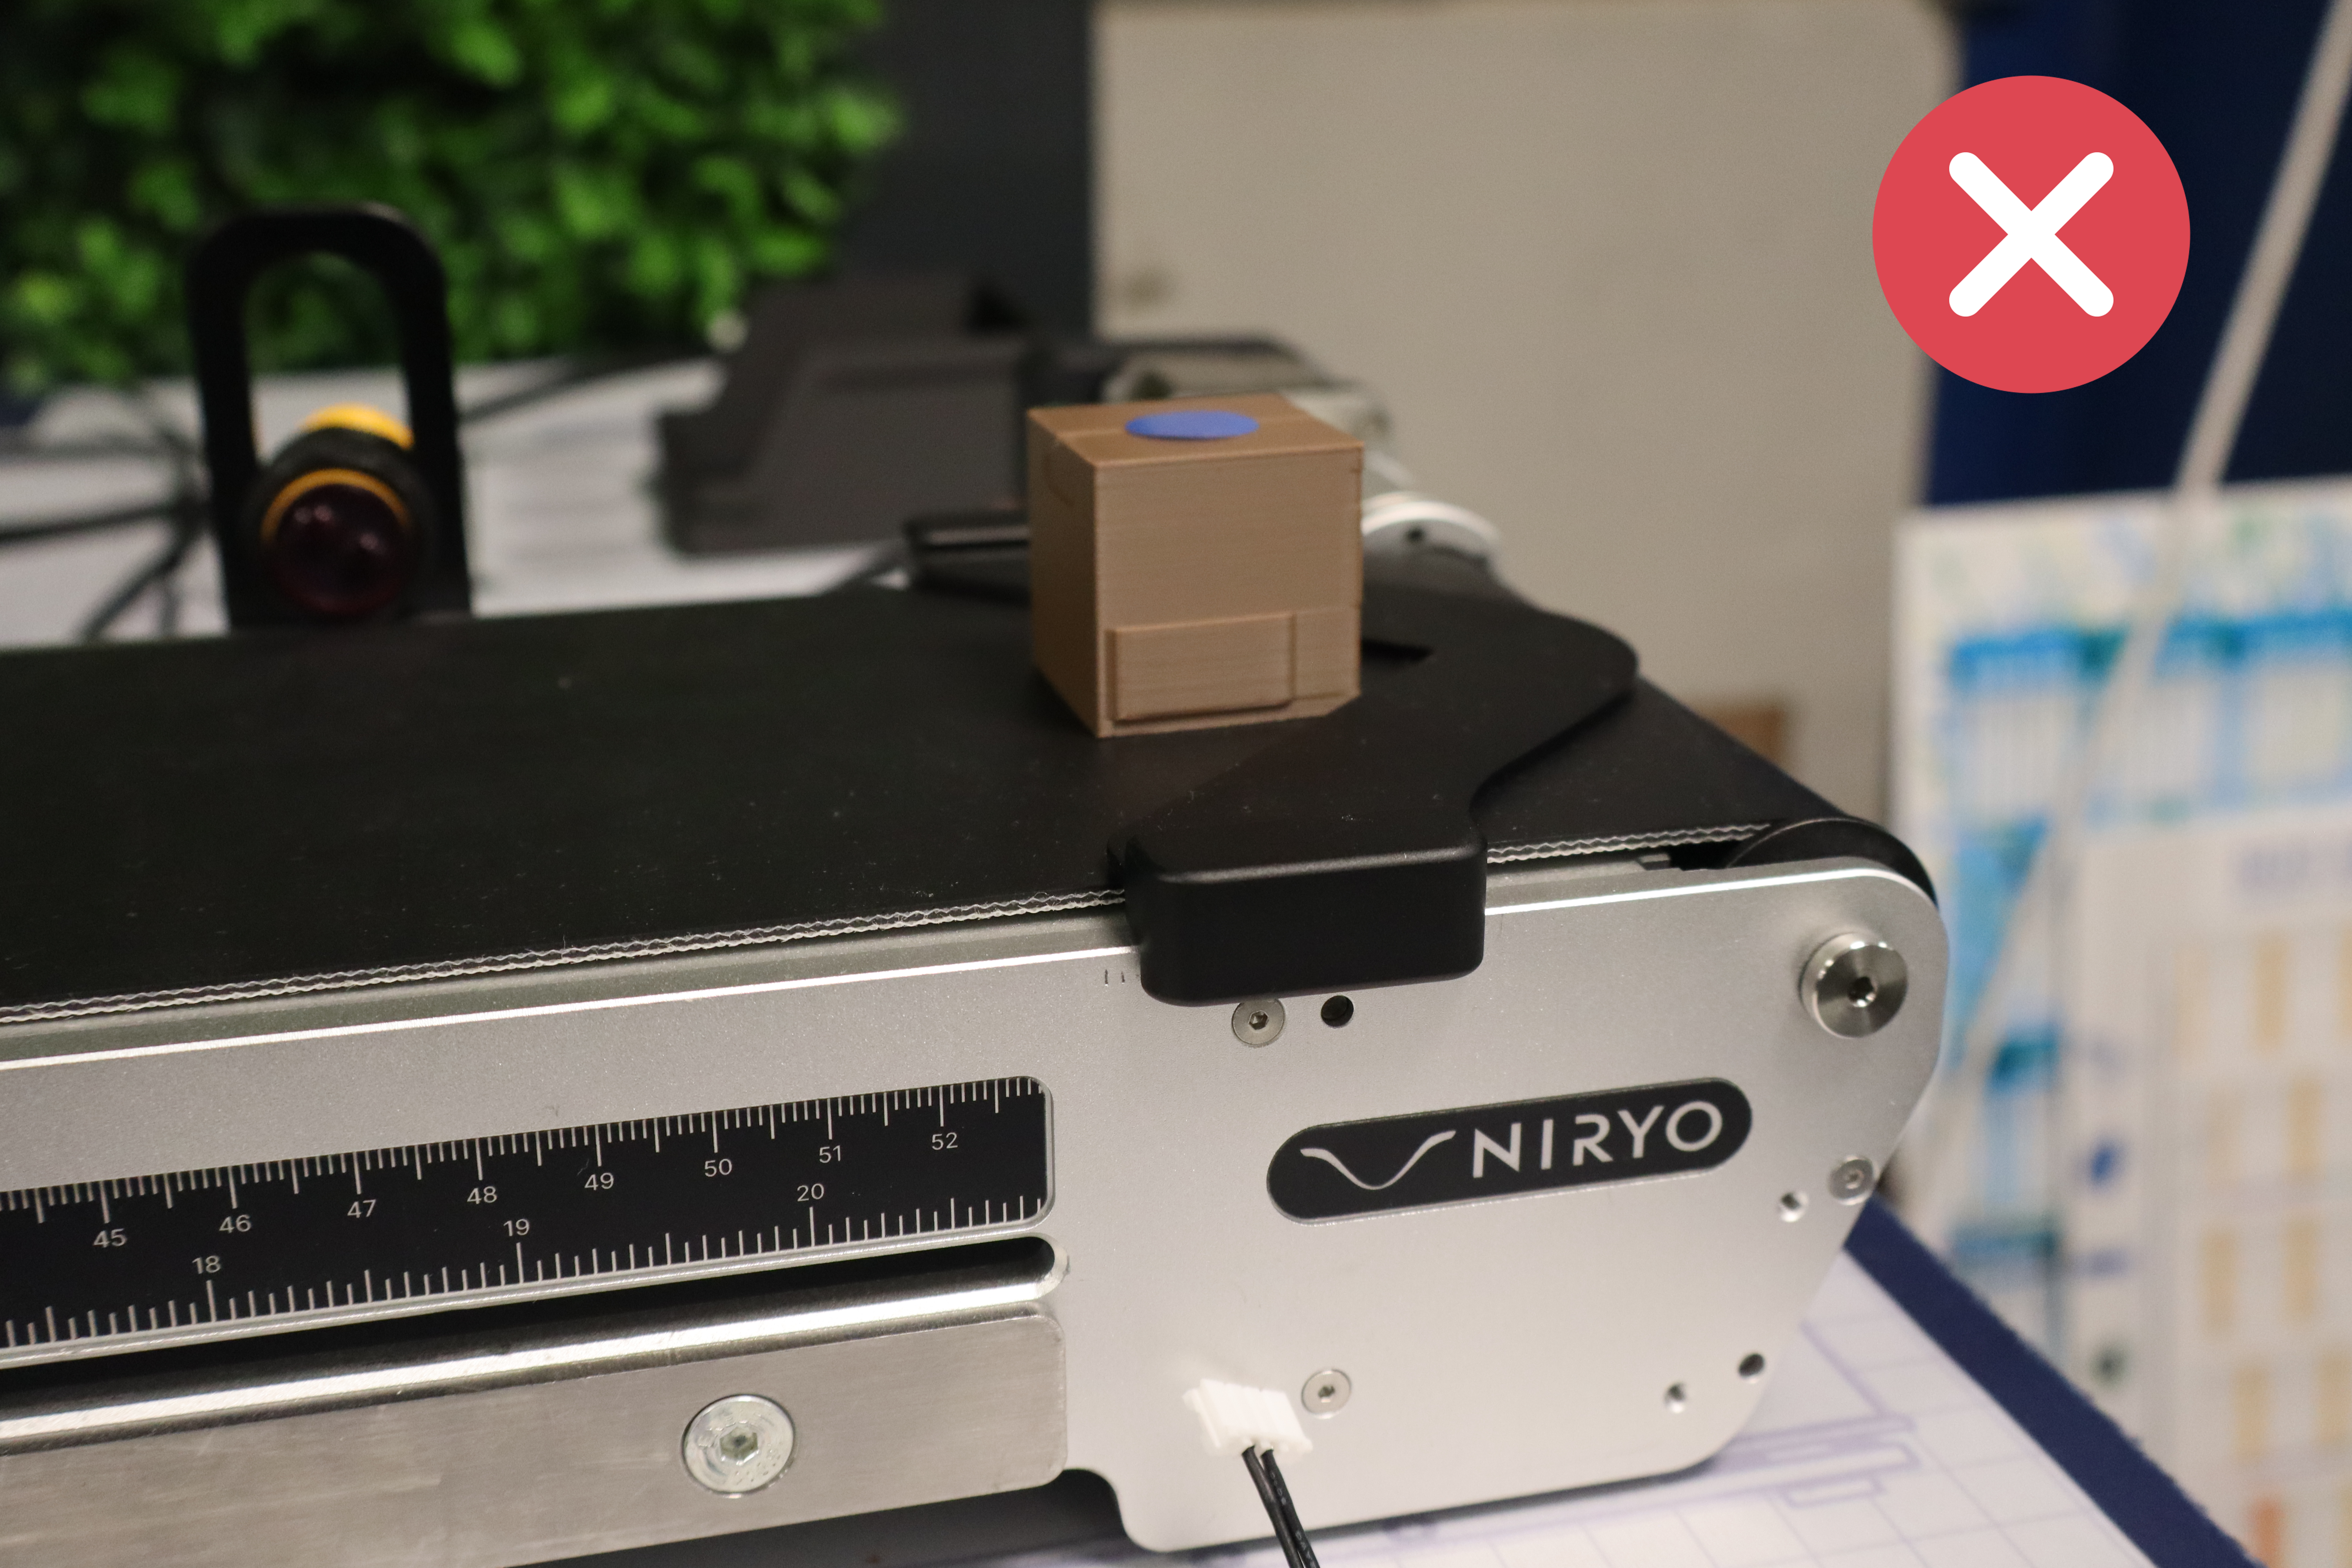
For standard and large packages, they must be transported at least as far as the IR sensor. It is entirely possible to use the IR sensor both to detect packages brought to the end stopper for a pick-up at that level, or to stop them right at the sensor for a pick-up there, potentially saving time.
However, this second option is quite risky, as the package will not necessarily stop at the exact same position (to the millimeter) throughout the cycles.
Furthermore, careful placement ensures that the package rests perfectly against the end stopper, offering the robot an identical and reliable grip every cycle. Use this at your own risk.

In the event of poor placement requiring human intervention, a 5-second penalty is given.
Conveyor Speed Management
The conveyor speed can be defined by the group itself. Be careful with high speeds, however, as detection failures may become more frequent. This also depends on the print quality of the package colors, camera settings, and the size of the colored stickers used.
Tower building
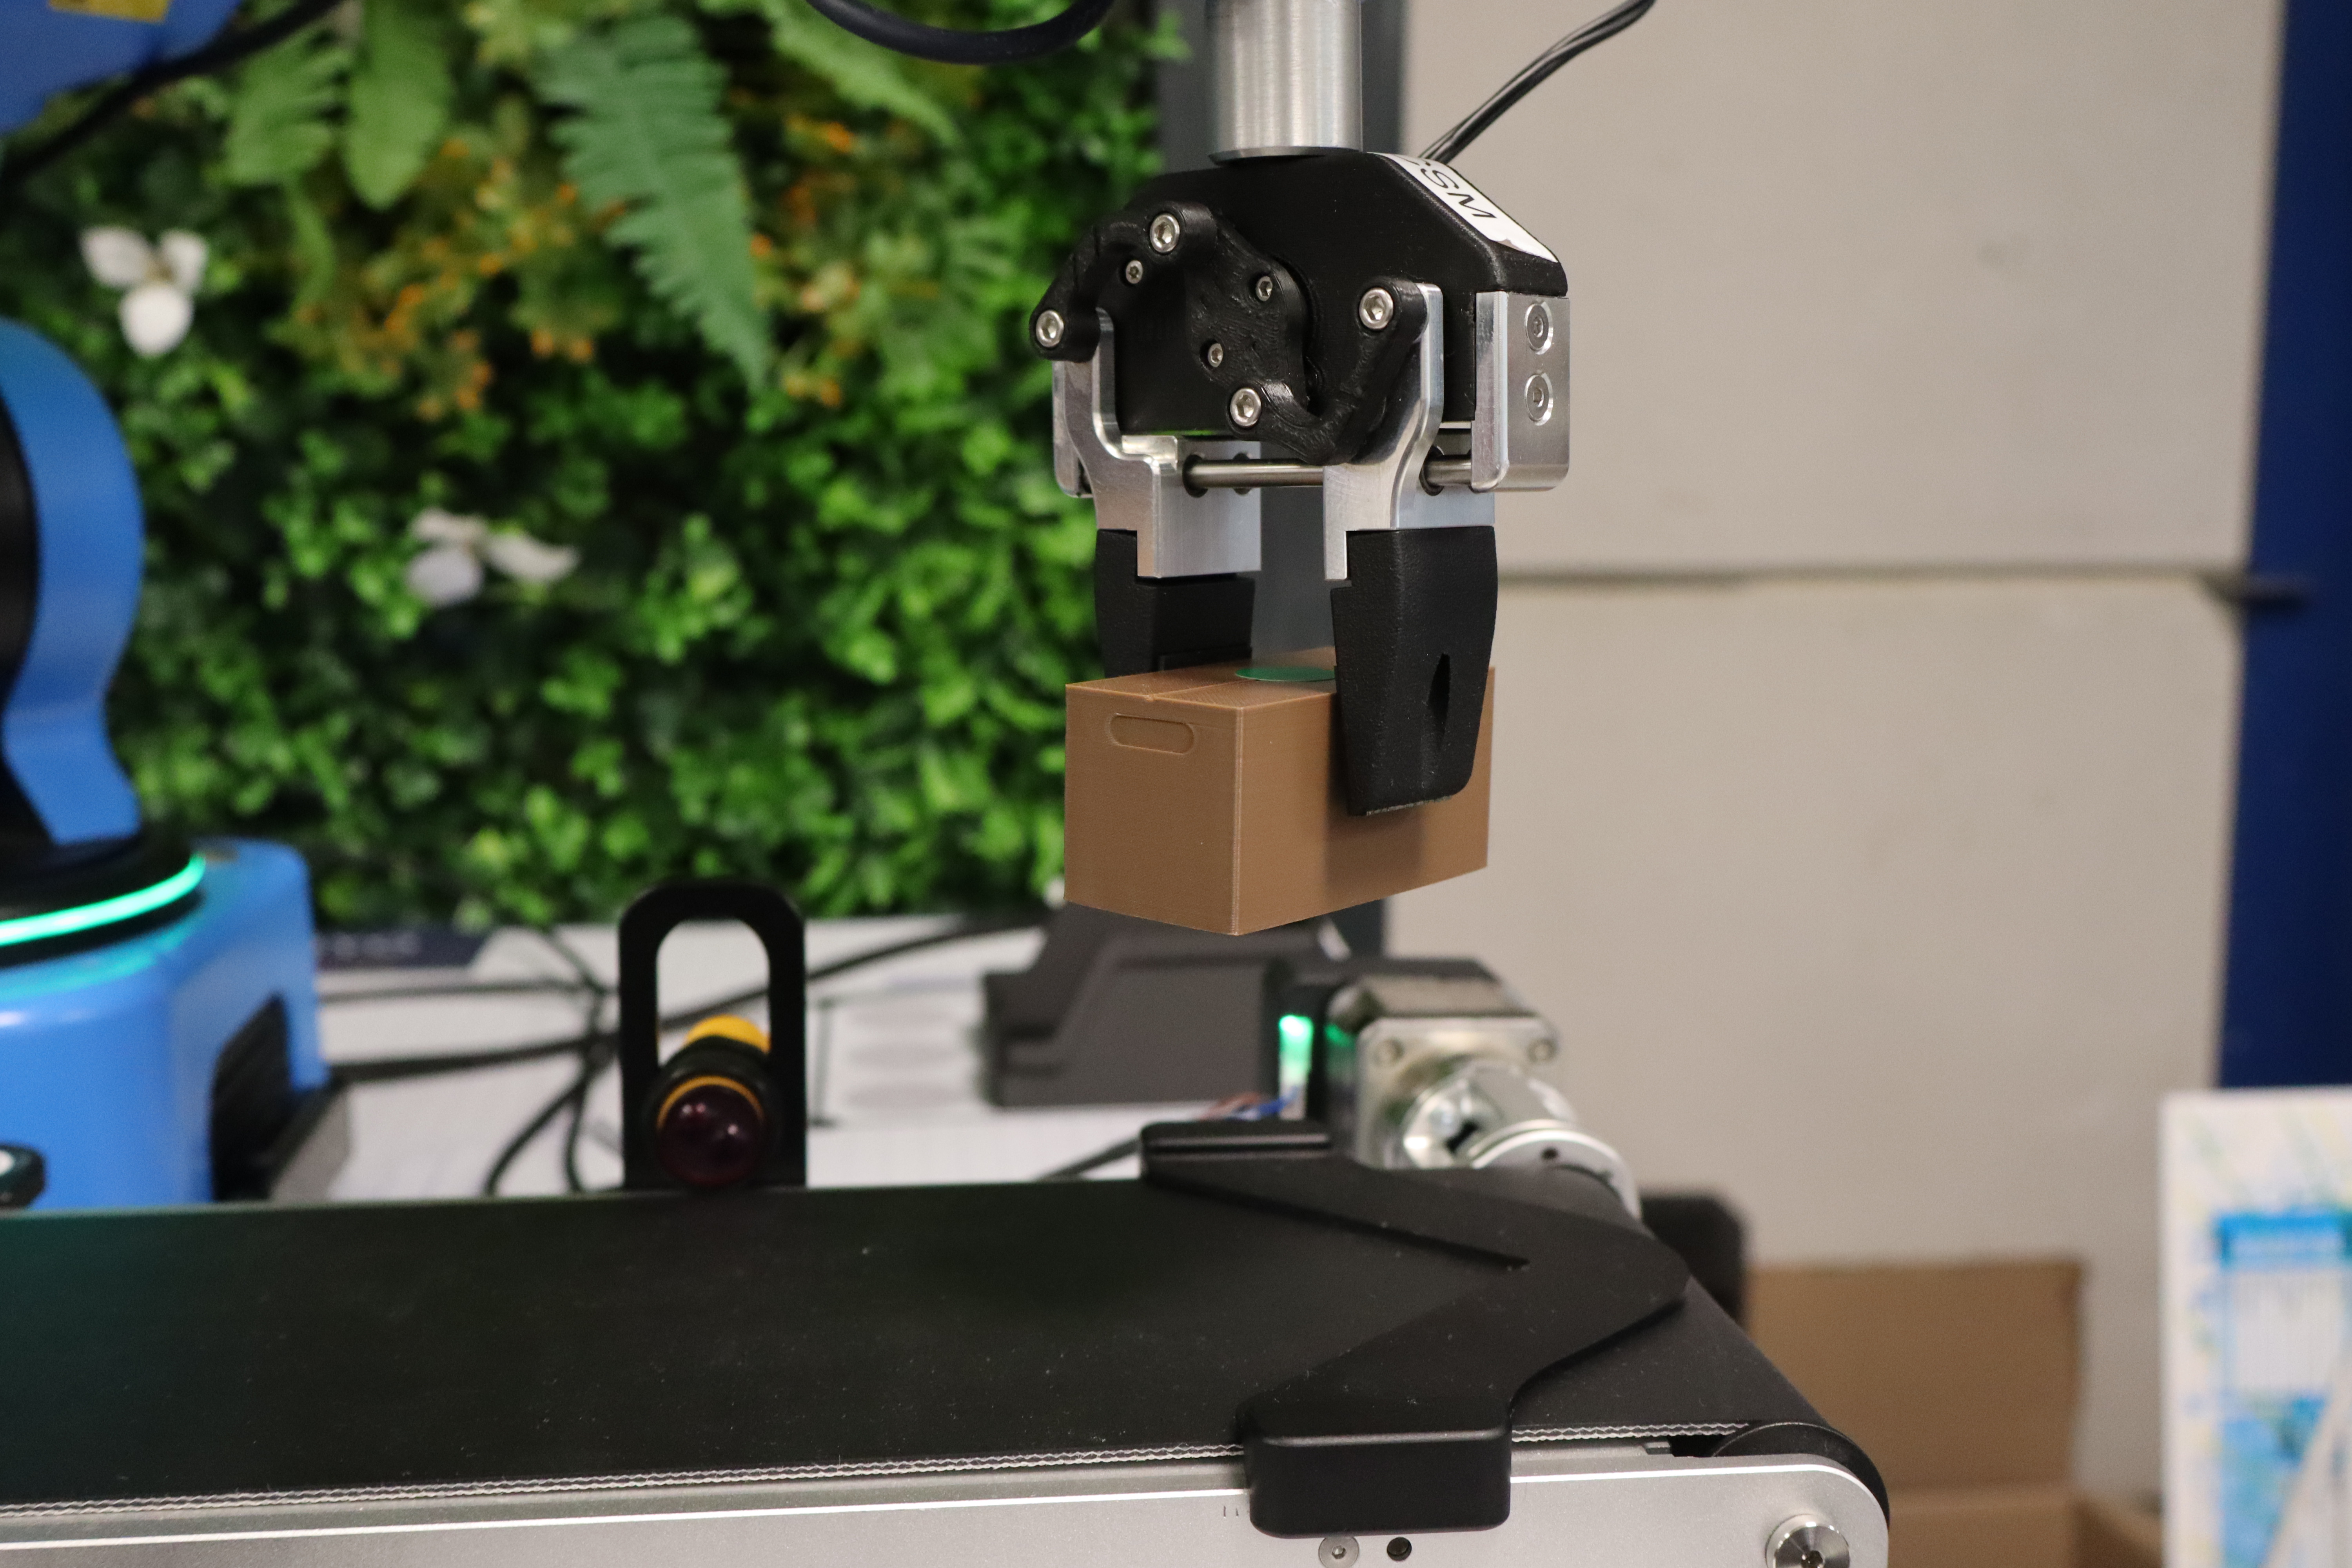
As soon as the package reaches the desired position, the robot must be able to retrieve it. Groups must take into account the different package sizes for the gripper's grasp. After retrieving the package, the robot must transport it to the Vision Set to begin building the tower.
Throughout the cycles, these packages can be placed horizontally or vertically and anywhere on the Vision Set.
Additionally, it is entirely possible to set them aside on the Vision Set to be picked up later for the tower construction.
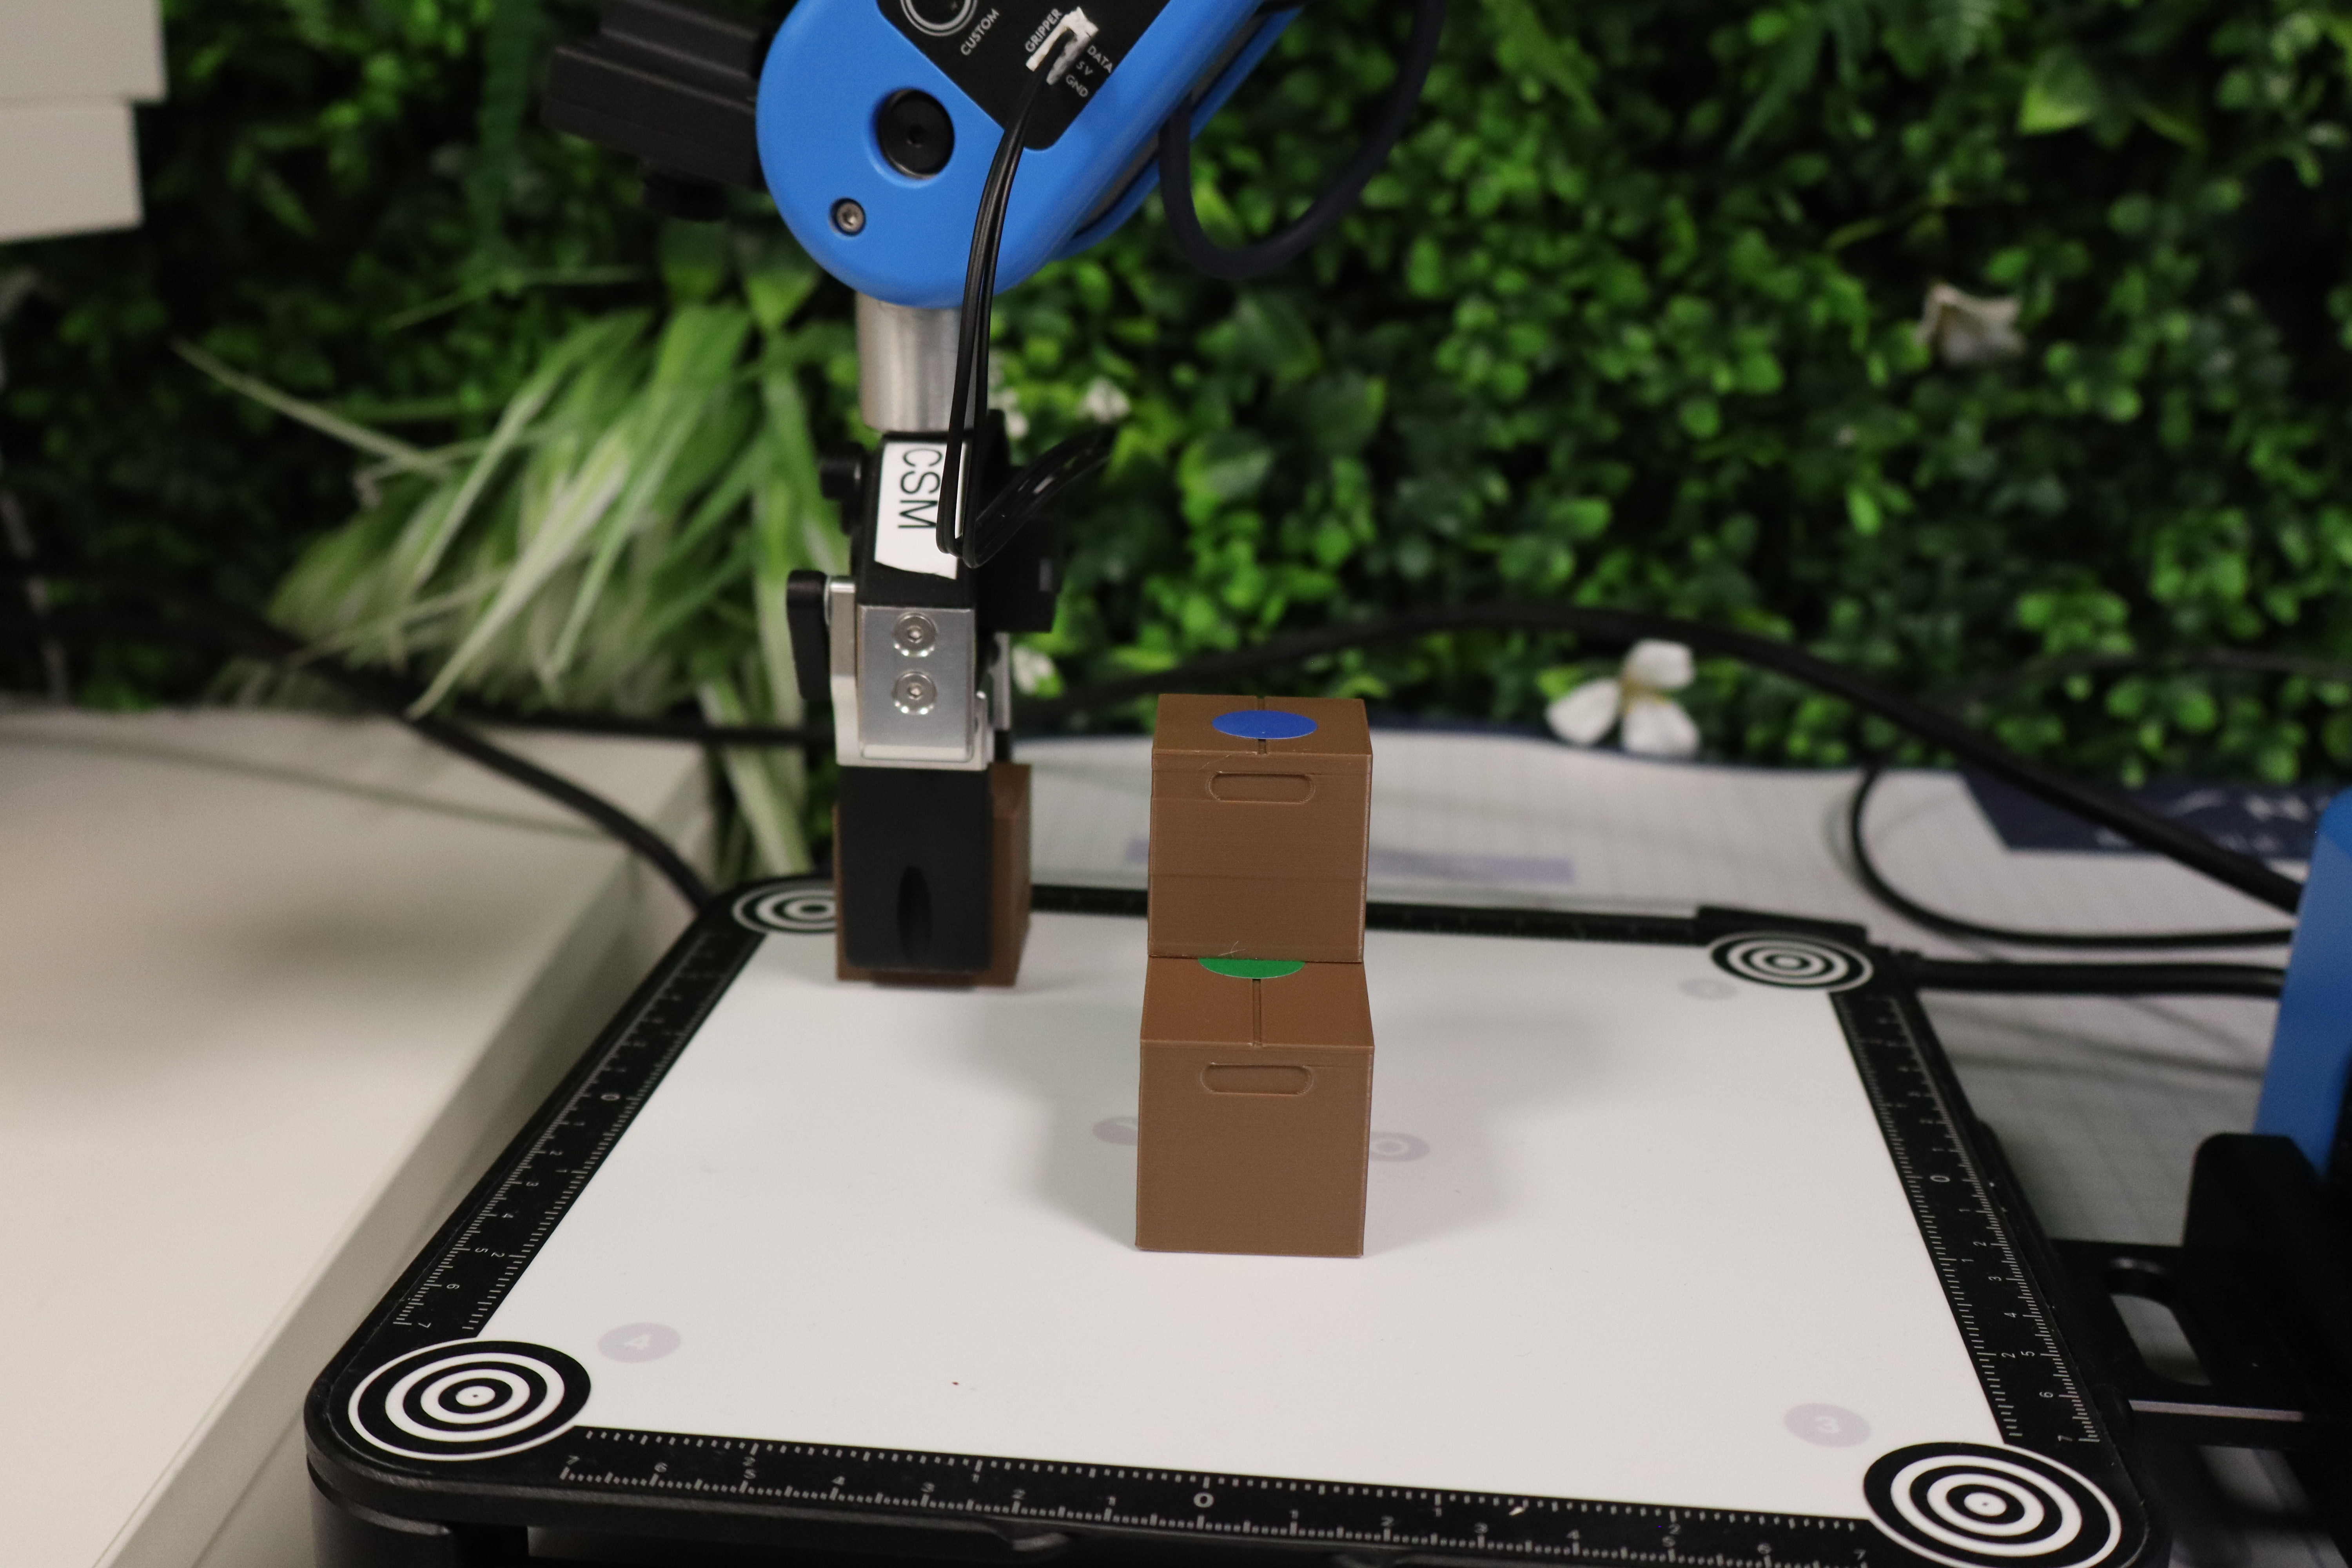
Everyone is free to use their own strategies. Depending on the chosen strategy, the number of packages used to reach a height of 8 units may vary. The goal here is to reduce this number to achieve a shorter construction time and potentially, in the event of a tie, gain a ranking advantage. Once the 8-block threshold is reached, the top floor must be dedicated to placing the special piece (2 units).
Thus, if a group manages to reach this 8-block threshold before using all the blocks from the command sheet, they can proceed directly to placing the special piece. Depositing this piece marks the end of the challenge, and the operator must stop the stopwatch as soon as the gripper has left the construction zone. They take this piece as an item reward for successfully completing the challenge.

Packages that fall during tower construction can be put back by hand, but a 5-second penalty is given for each package.
In case of a program stop, regardless of the issue, the operator may replace the package in the dedicated starting zone and restart the code. In this case, no penalty is applied, as these manipulations already waste time while the stopwatch continues to run.
Scoring system and victory criteria
Point Calculation
Construction: The winning team is the one that finishes the tower as quickly as possible after adding the various penalties.
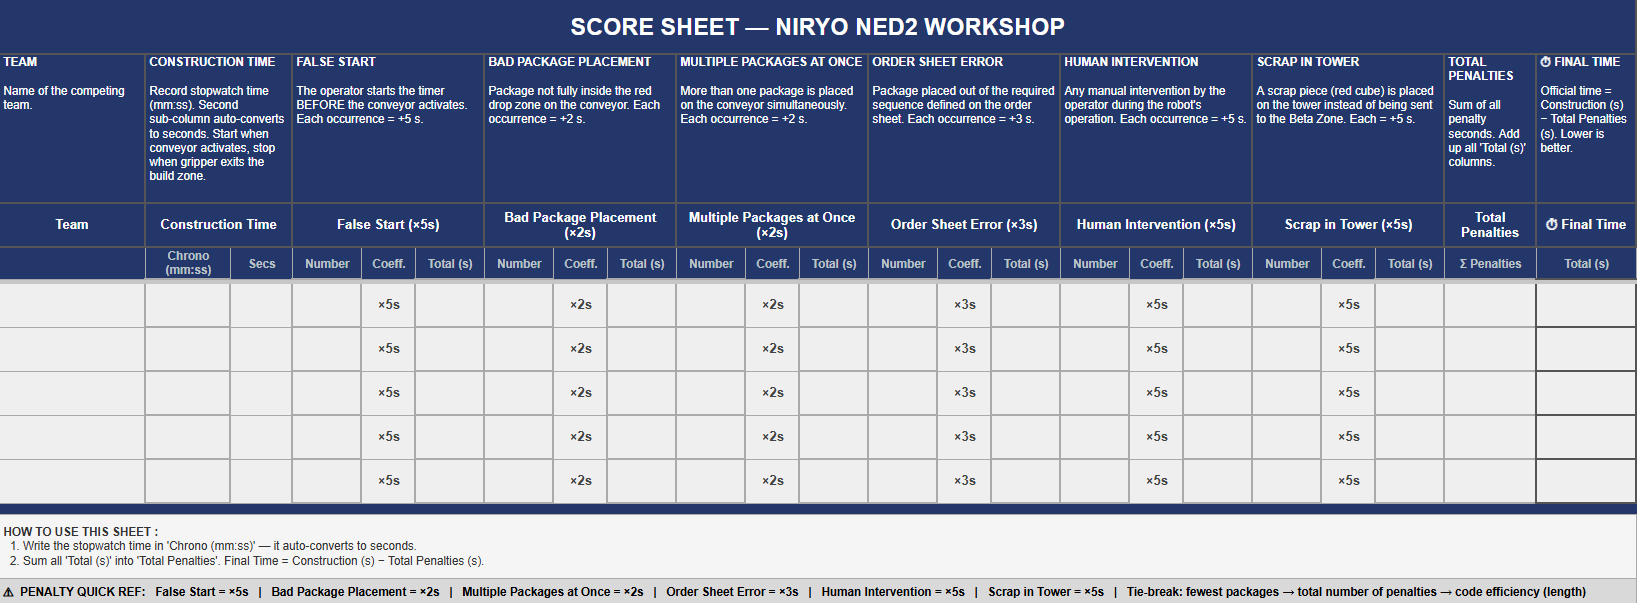
Here is a summary of the faults and their penalties.
| Faults | Penalty Time |
| False start | 5 seconds |
| Wrong placement of packages on the starting line | 2 seconds |
| Multiple packages deposited simultaneously | 2 seconds |
| Error following the command sheet | 3 seconds |
| Human intervention | 5 seconds |
| Introduction of a reject into the tower | 5 seconds |
Tie-breaking Criteria
In the event of a tie, teams are ranked according to:
- The number of packages used.
- The total number of penalties.
- Code sobriety (number of code blocks used).
Cautions
To ensure an enjoyable challenge experience, here are a few precautions to take:
- Do not print the packages in dark colors (black, navy blue, etc.), as the IR sensor may fail to detect them.
- Use color stickers that are large enough to allow the camera to detect the packages effectively.
- Use the exact same setup during training and the challenge itself; otherwise, significant differences may occur if positions have changed.
Solutions
Example Code
Here is one example of a solution among several possibilities. The code is as follows and can be downloaded here.
The chosen approach relies on a standardization of the grip to guarantee a unique placement during stacking. By dynamically adjusting the gripper's position according to the detected package color, the robot grasps each object precisely by its center. This method compensates for dimensional variations and ensures perfect geometry during the tower's construction.
All packages are retrieved horizontally, resting against the conveyor's end stopper, which provides a constant reference point for the robotic arm.
Management of the Special Piece
To finalize the structure, the program integrates a specific condition:
-
Counting: A counter tracks the stack's progress in real-time.
-
Adaptation: As soon as the threshold of 8 packages is reached, the robot switches to a dedicated trajectory.
-
Technical Constraint: Since this special piece is twice as tall as standard packages, the gripper parameters and approach heights are automatically recalculated to accommodate this extra volume.
Note: This automation strategy is one optimized solution among other possible configurations to meet these specifications.
Initialization Phase and Variable Declaration
1. Initialization of variables
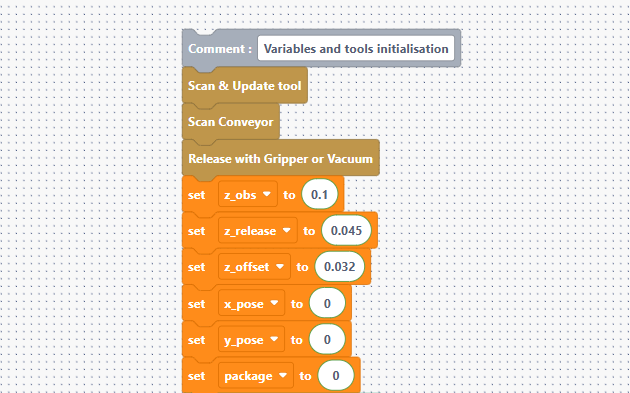
These gold-colored blocks first initialize the conveyor and the gripper, which we have just opened. The orange ones define the starting parameters for height management and counting:
- z_obs and z_release: Define the safety heights (approach) and the drop-off heights.
- z_offset: The value added at each level (32 mm) so that the robot rises as the tower grows.
- x_pose and y_pose: Base coordinates to move the gripper toward the package to be retrieved. Using variables is relevant because the packages are of the same size.
- package: A counter starting at 0 to track the number of blocks placed.
Conveyor Search Loop
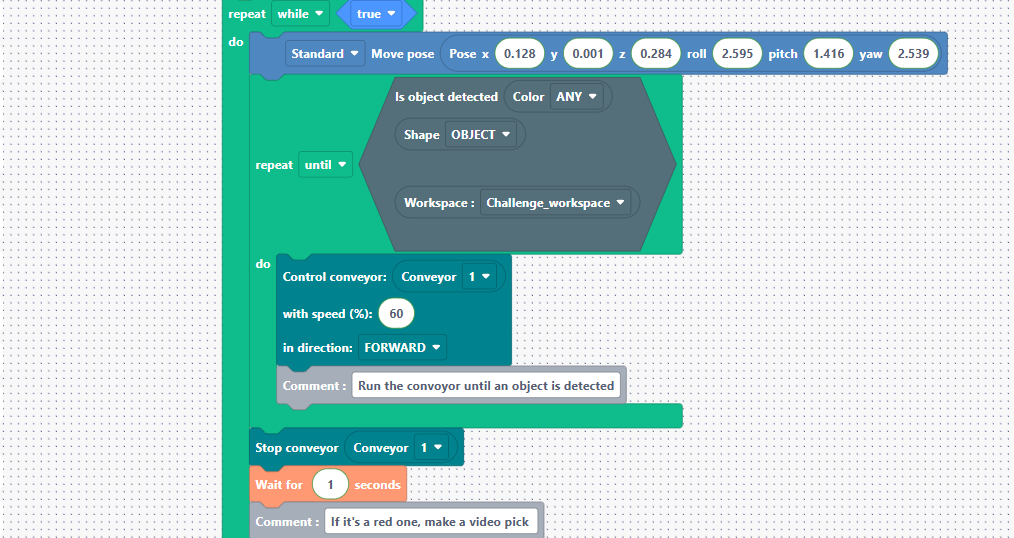
- Repeat while true: An infinite loop so the robot works continuously.
- Move pose: The robot moves to an observation position above the conveyor.
- Repeat until (Is object detected): The robot activates the conveyor at 60% speed as long as no object is seen by the camera. As soon as a package appears, it stops the motor.
Sorting and Handling Red Blocks
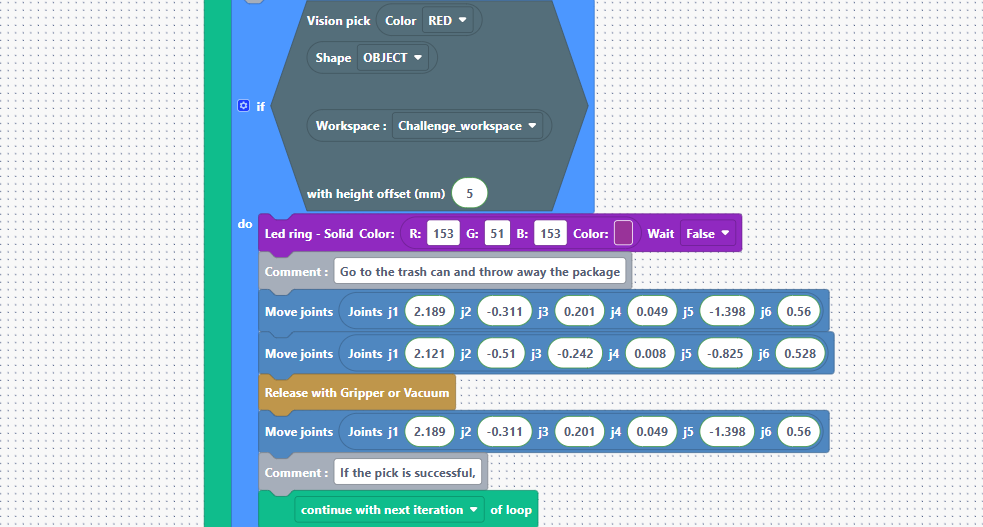
This is where the placement of rejects into the bin located in the Beta Zone (waste area) is managed.
- Vision pick (Color RED): If the object is red, the robot catches it with a 5 mm offset.
- Led ring: The LEDs turn purple to visually indicate that waste is being processed.
- Movement sequence: The robot moves to specific joint coordinates (the waste area), releases the package, and then moves back up.
- Continue with next iteration: Very important: this tells the robot to ignore the rest of the code (the stacking) and return to the starting position to wait for the next package.
Color Identification and Positioning
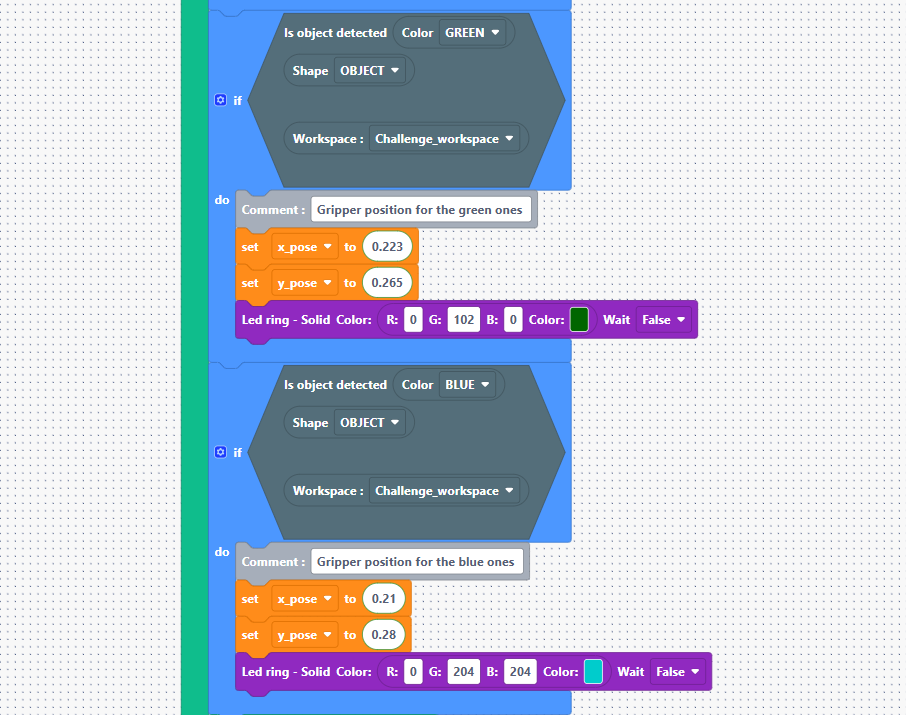
If the block was not red, the robot continues here to sort the other colors (green and blue).
- If Color GREEN / BLUE: Depending on the detected color, the robot updates the x_pose and y_pose variables.
Note: This allows for a precise definition of where the gripper should position itself to retrieve the packages. The LEDs change color to match the object size (standard or large package).
Package Routing
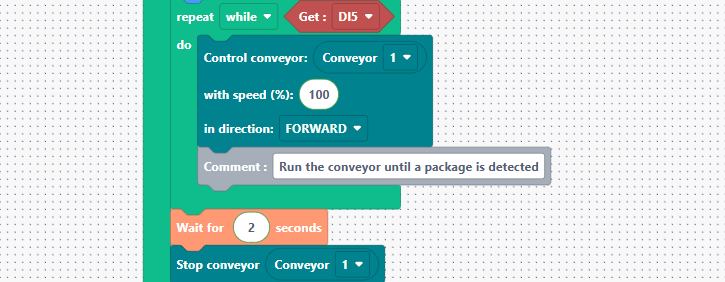
Repeat while Get DI5: This block routes the packages after sorting. As long as digital input 5 is active (the IR sensor detects no package), the conveyor moves at 100%. As soon as the IR sensor detects the package, the conveyor remains on for 2 seconds to allow the package to position itself correctly against the end stopper.
Retrieval Logic, Transport, Stacking, and Special Piece
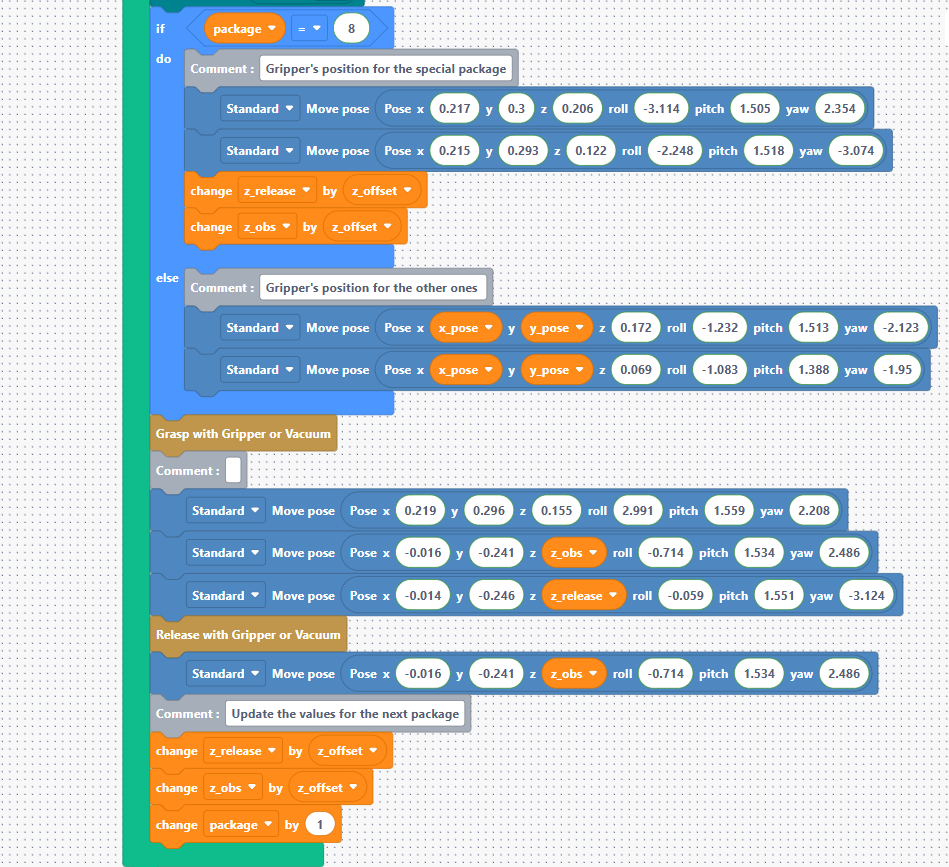
This is where all movements are defined to retrieve the package at the end stopper and transport it to the Vision Set for tower construction. Every cycle, we check that the number of packages placed on the Vision Set does not exceed 8 to leave room for the special piece.
- Condition if package = 8: If it is time for the special piece, the robot uses different pose coordinates and angles (roll, pitch, yaw) adapted to the object's larger size.
It adjusts the z_release and z_obs variables with the offset before placing to compensate for the height. For standard blocks (0 to 7), it uses the x_pose and y_pose coordinates defined previously to position itself above the package with a z coordinate that provides a safety margin before reaching the package height. For stacking, the logic is the same, using a safety margin with z_pose and the drop-off height with z_release.
- Grasp & Release: The final commands to grab the object in the pick zone (negative Y coordinates) and release it onto the tower.
- Increment: Increments the package counter by 1 and updates the z_release and z_obs values with the offset (z_offset) for the next level.