About the course
Scenario :
The student discovers how to connect and communicate simple instructions between an Arduino and the Ned2’s Raspberry Pi. In this exercise, the Ned2 robotic arm, depending on the gesture made by the operator, carries out
different operations with bottles. The Robotic Arm is programmed with Blockly and the Arduino is programmed in C++.
This exercise simulates the interaction of an assembly line operator with a robot to optimize “TAKT TIME”.
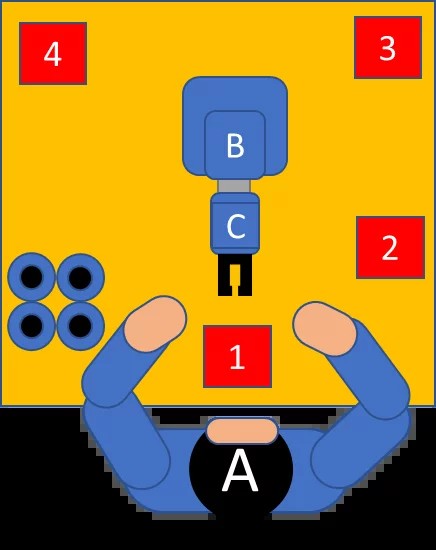
The operator works on an assembly line which prepares 3 products: Perfume, Cologne and Eau de Toilette. Depending on the preparation, the Ned2 robotic arm (B) must:
- In the case of perfume: take the bottle from position 1 and position it to the left of the operator in position 4.
- In the case of Cologne: take the bottle from position 1, move it from right to left and turn it several times, then position it to the right of the operator in position 2.
- In the case of an Eau de Toilette: take the bottle from position 1, shake it with the bottle horizontally and place it in the rear right corner of the table in position 3.
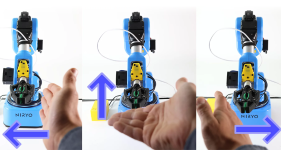
To indicate to the NED2 robotic arm to perform one of the three operations, the operator makes a hand gesture in front of the gesture sensor located on the NED2 robotic arm, a gesture which is interpreted by Ned2 Robotic Arm.
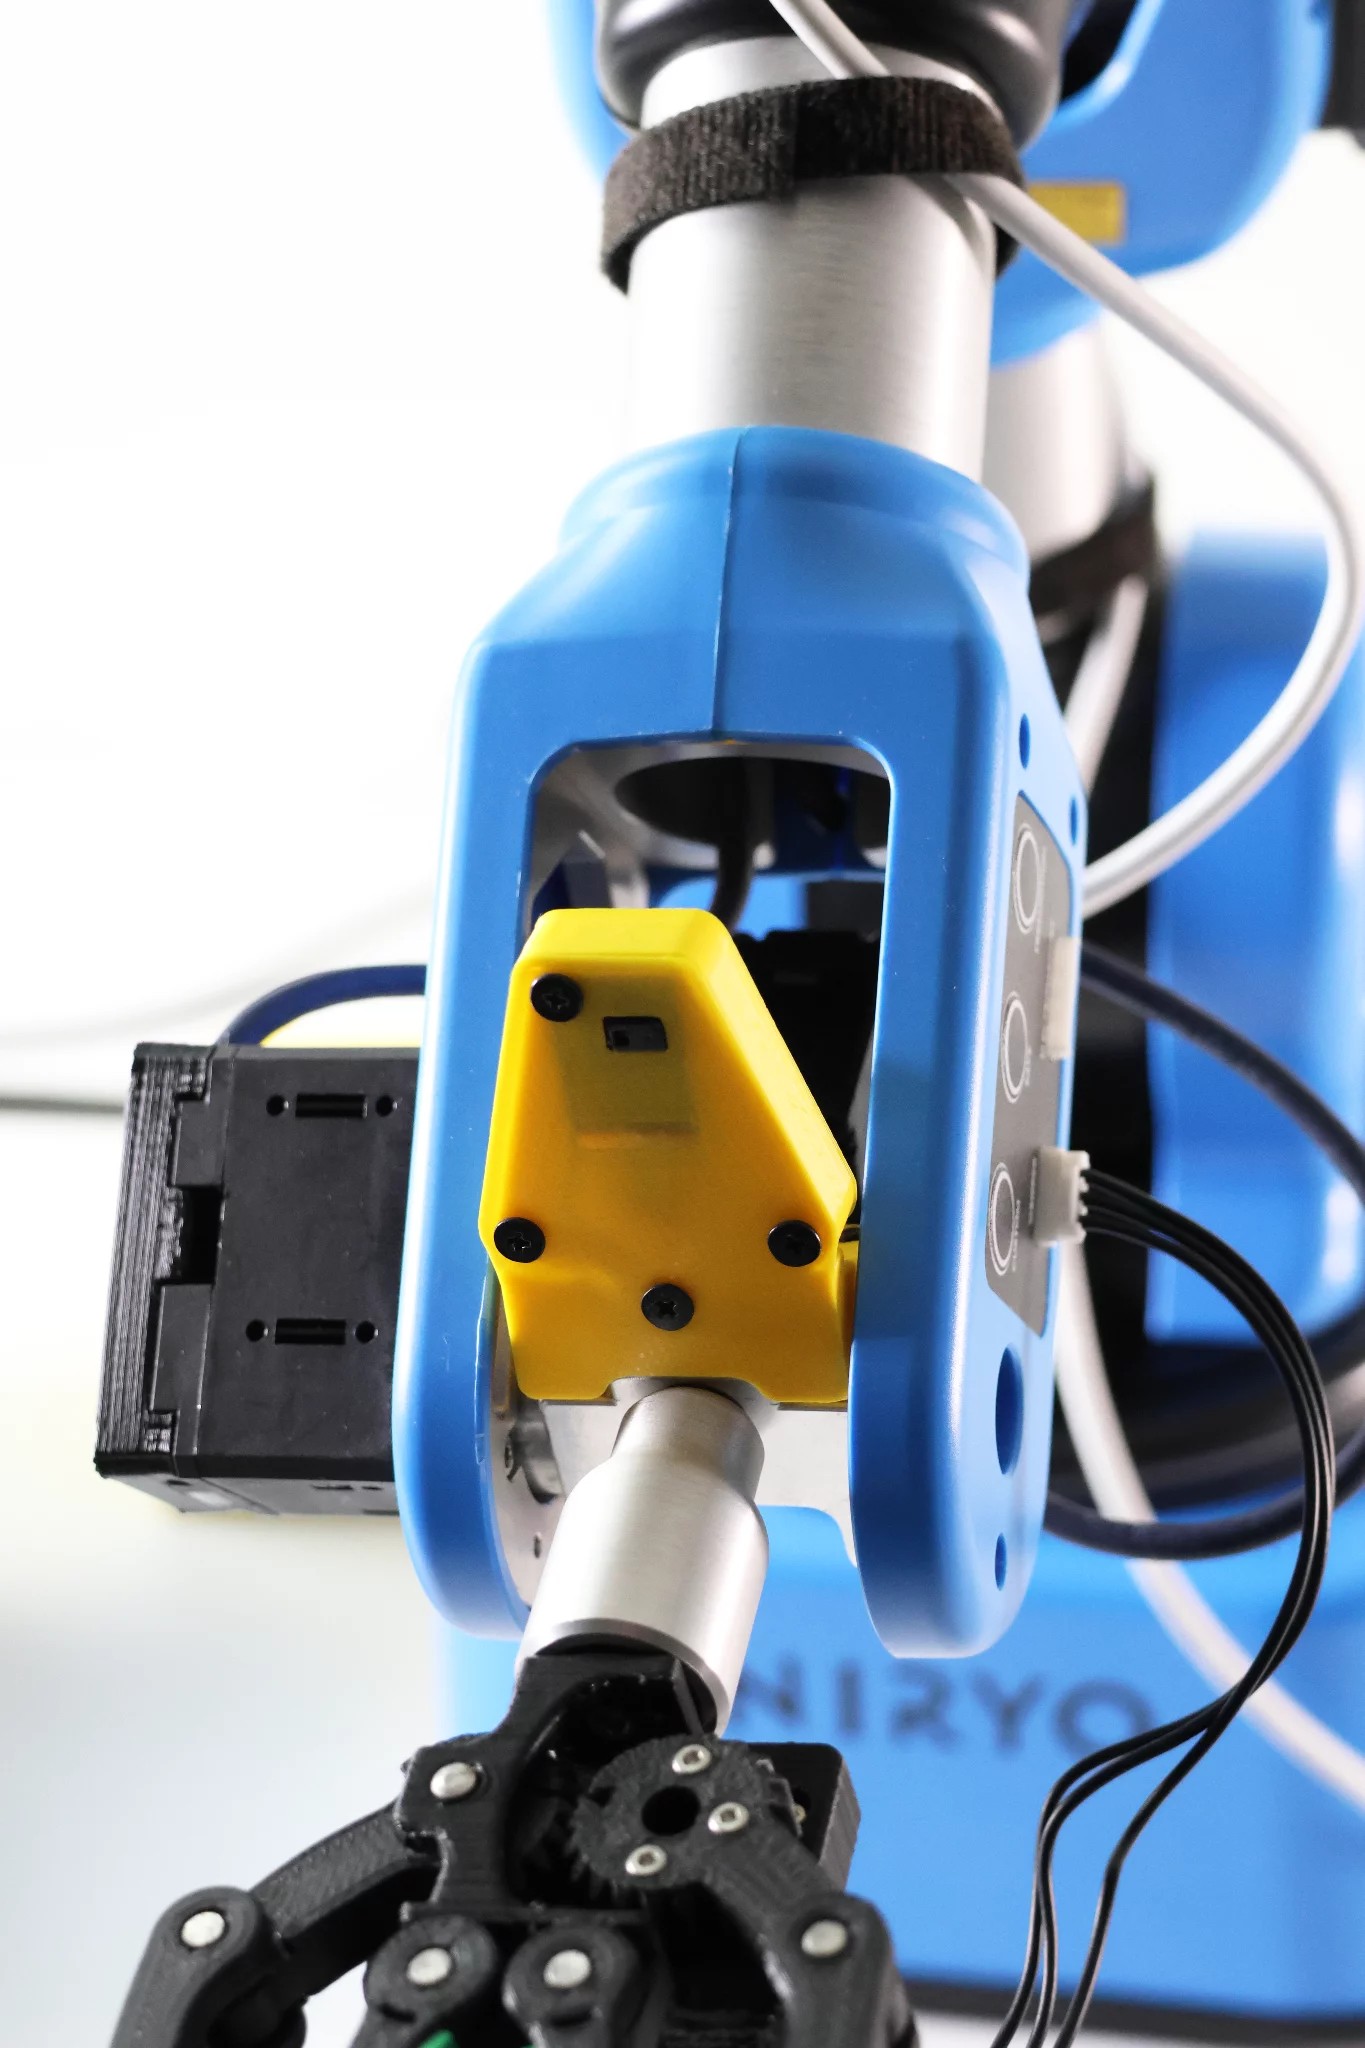
The gesture sensor is connected to an Arduino Nano and the Arduino Nano is connected to the digital pins on the back panel of the Ned2 robotic arm.
The gesture sensor is capable of interpreting 9 gestures:
- Up
- Down
- Left
- Right
- Forwards
- Backwards
- Clockwise rotation
- Counterclockwise rotation
- Undulation
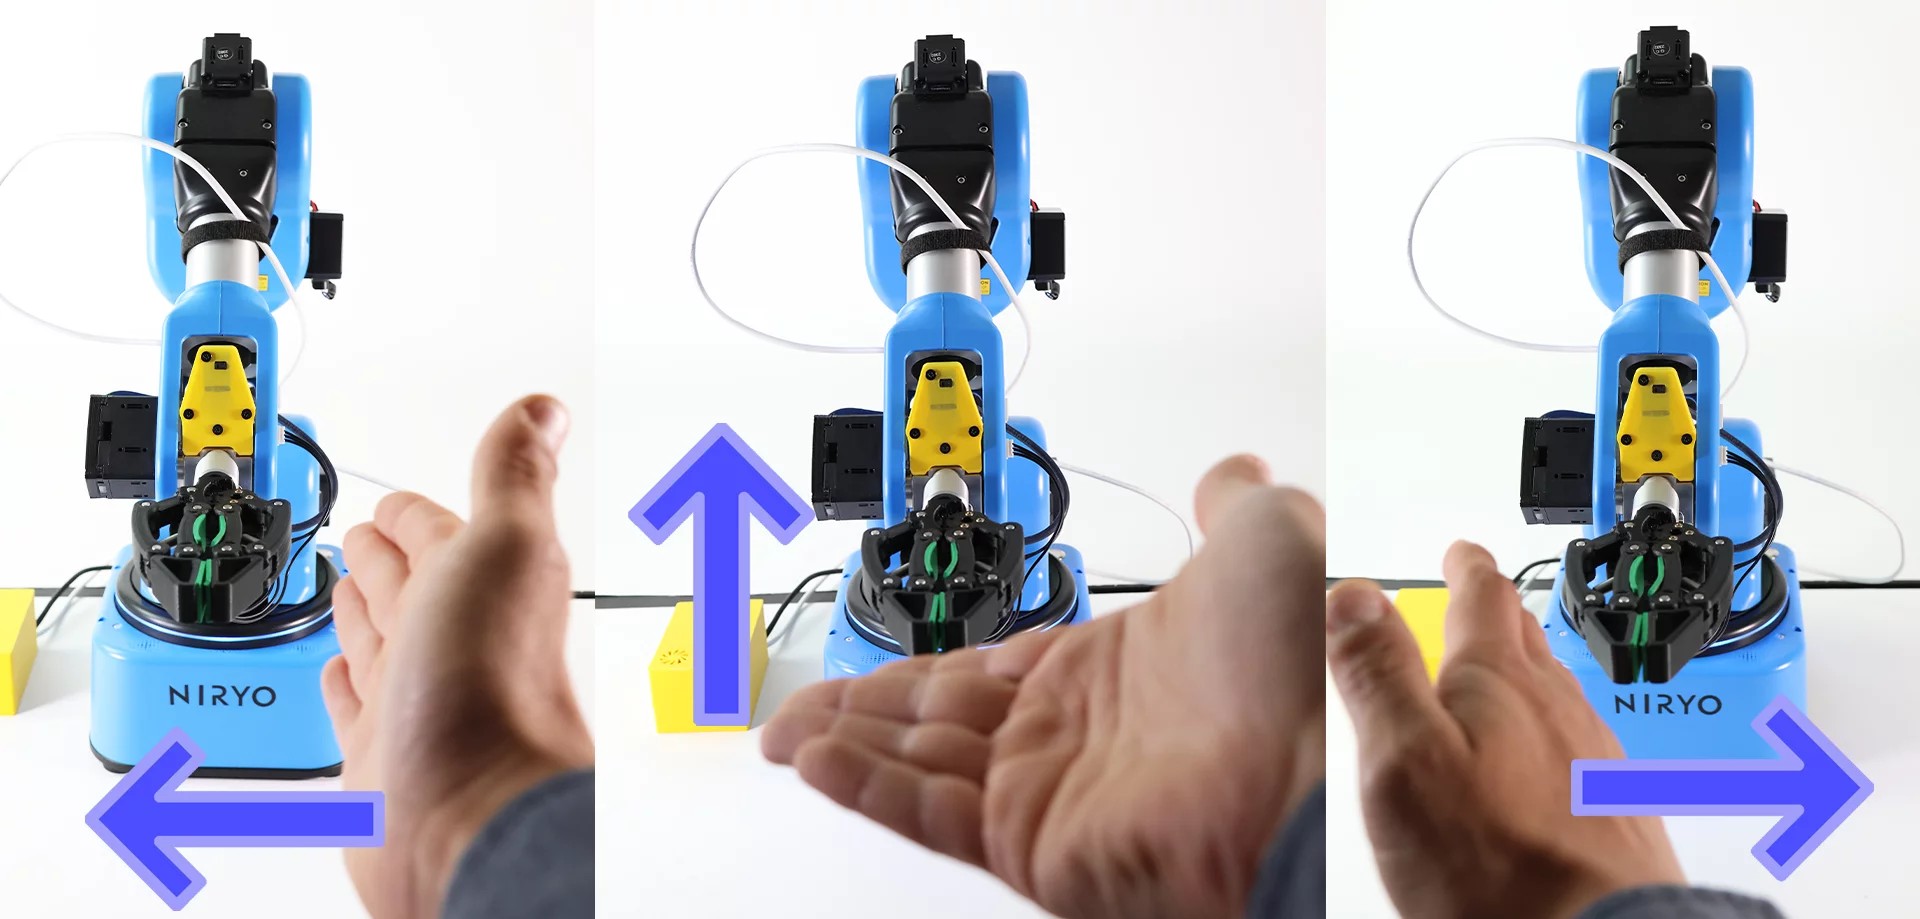
In this exercise, we will only use 4 gestures:
- Up
- Down
- Left
- Right
There are two gestures, up and down, that we are going to use for the same movement of the NED2 robotic arm, since, during the tests, the operators did not remember whether they should move their hand upward or downwards.
Laboratory Content
Chapter 1: Discovering Blockly
- Blockly overview
Chapter 2: Creating the gesture recognition module
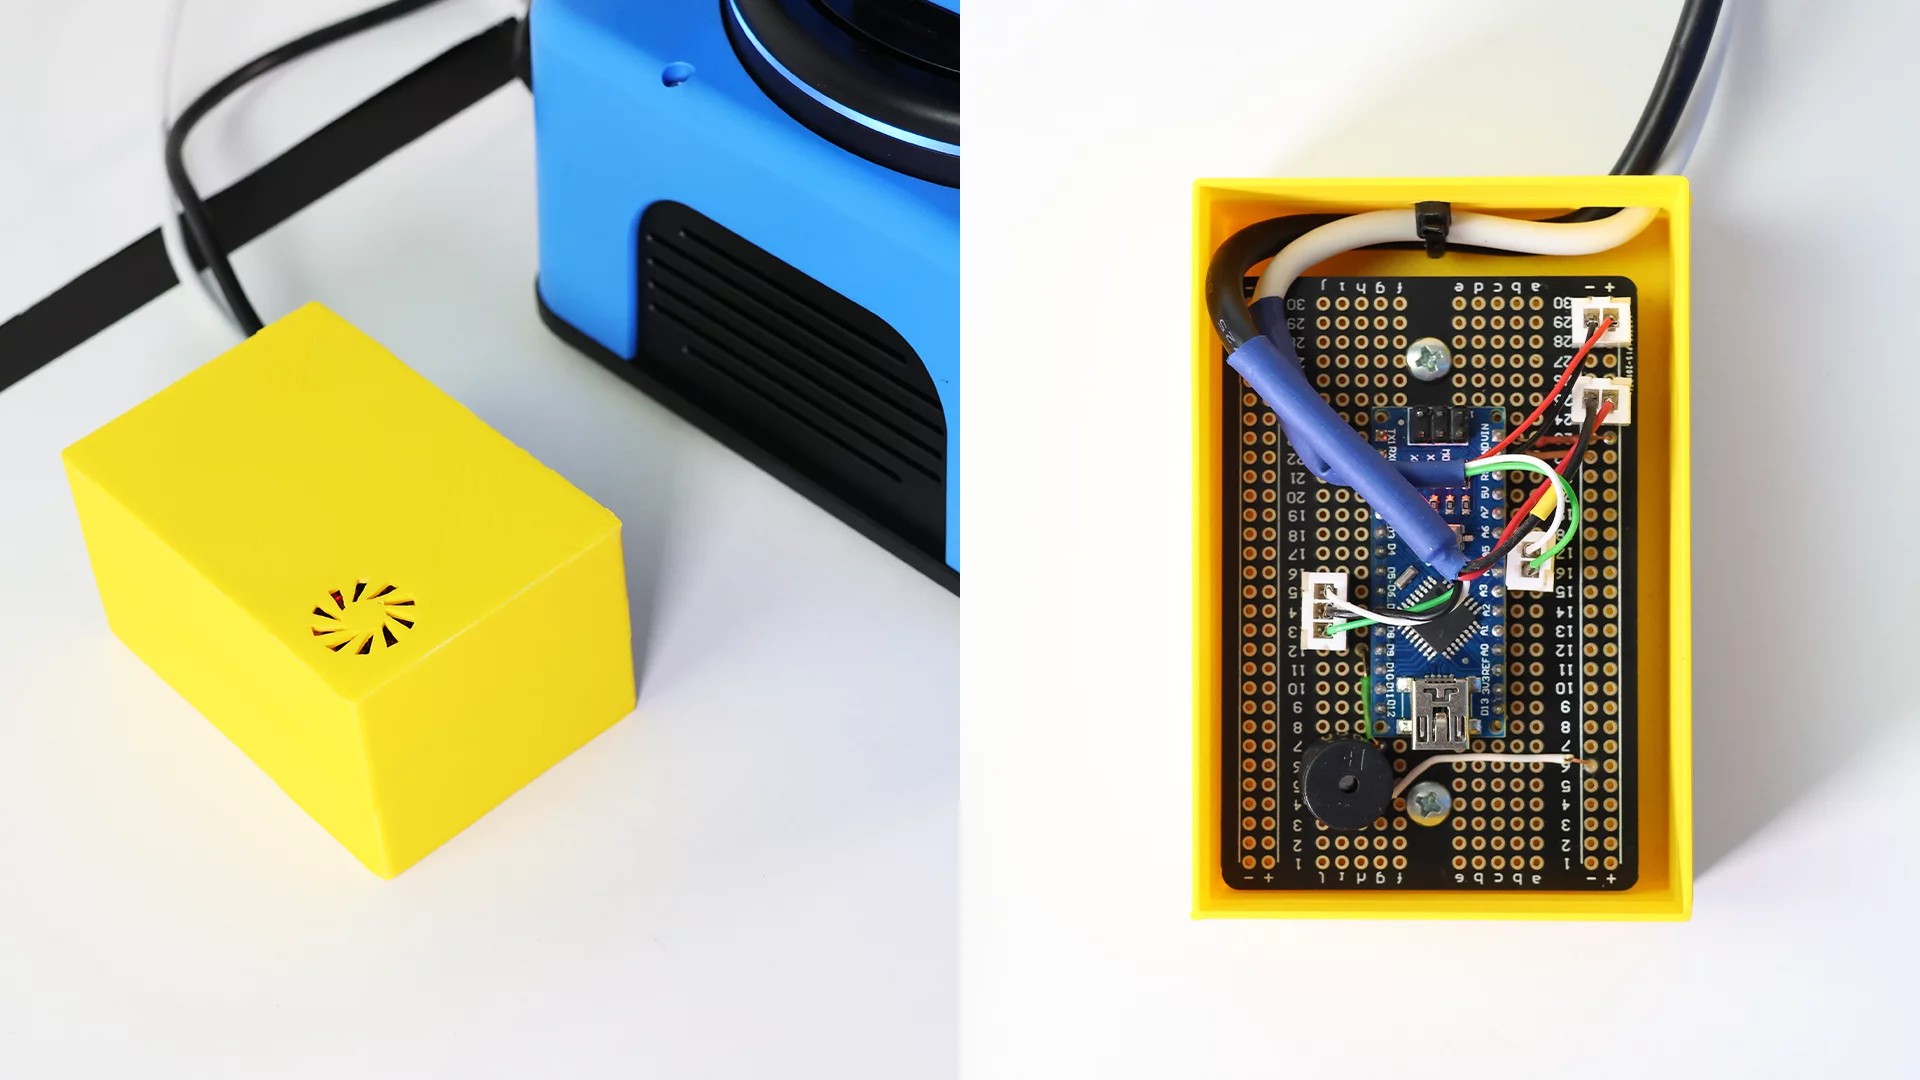
- Create an accessory for the NED2 robotic arm capable of giving orders to the NED2 Robotic Arm using an Arduino microcontroller and a PAJ7620 sensor
Chapter 3: Creating movement sequences for the NED2 robotic arm
- Create a sequence of trajectories
Required equipment
 Ned 2
Ned 2
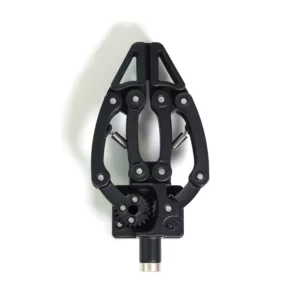 Adaptative Gripper (or other)
![]() NiryoStudio
NiryoStudio![]() Arduino Nano
Arduino Nano
Other tools:
- 400 point prototype board (30 rows)
- Piezo Buzzer
- PAJ7620 motion sensor
- Male-male and male-female electric cables
Prerequisite knowledge:
The installation of the Arduino programming environment, as well as the uploading of the Arduino program is not explained in this document.
It is strongly recommended to complete the Blockly getting started lab and the Ned2 control lab with Arduino box before completing this lab if you are not used to using Blockly.
Setup:
- Place the Ned2 robotic arm on a table.
- The Ned2 robotic arm must have an obstacle-free perimeter of approximately 60 centimeters in radius.
- Connect the Ned2 robotic arm to the NED2 robotic arm safety box
- Connect the safety box of the NED2 robotic arm to the power supply of the NED2 robotic arm
- Connect the power supply of the NED2 robotic arm to the electrical network
- Connect the Ned2 robotic arm to NiryoStudio
- Connect the Arduino box to the Ned2 robotic arm (Once the box is mounted)
Course content
About the Author

Enrolment options
Robotic arm Ned2 gesture control with Arduino
- Content Type: Lab
- Programming: Arduino
- Equipment: Bundle discovery
Scenario :
The student discovers how to connect and communicate simple instructions between an Arduino and the Ned2’s Raspberry Pi. In this exercise, the Ned2 robotic arm, depending on the gesture made by the operator, carries out
different operations with bottles. The Robotic Arm is programmed with Blockly and the Arduino is programmed in C++.
This exercise simulates the interaction of an assembly line operator with a robot to optimize “TAKT TIME”.
The operator works on an assembly line which prepares 3 products: Perfume, Cologne and Eau de Toilette. Depending on the preparation, the Ned2 robotic arm (B) must:
- In the case of perfume: take the bottle from position 1 and position it to the left of the operator in position 4.
- In the case of Cologne: take the bottle from position 1, move it from right to left and turn it several times, then position it to the right of the operator in position 2.
- In the case of an Eau de Toilette: take the bottle from position 1, shake it with the bottle horizontally and place it in the rear right corner of the table in position 3.
To indicate to the NED2 robotic arm to perform one of the three operations, the operator makes a hand gesture in front of the gesture sensor located on the NED2 robotic arm, a gesture which is interpreted by Ned2 Robotic Arm.
The gesture sensor is connected to an Arduino Nano and the Arduino Nano is connected to the digital pins on the back panel of the Ned2 robotic arm.
The gesture sensor is capable of interpreting 9 gestures:
- Up
- Down
- Left
- Right
- Forwards
- Backwards
- Clockwise rotation
- Counterclockwise rotation
- Undulation
In this exercise, we will only use 4 gestures:
- Up
- Down
- Left
- Right
There are two gestures, up and down, that we are going to use for the same movement of the NED2 robotic arm, since, during the tests, the operators did not remember whether they should move their hand upward or downwards.
Laboratory Content
Chapter 1: Discovering Blockly
- Blockly overview
Chapter 2: Creating the gesture recognition module
- Create an accessory for the NED2 robotic arm capable of giving orders to the NED2 Robotic Arm using an Arduino microcontroller and a PAJ7620 sensor
Chapter 3: Creating movement sequences for the NED2 robotic arm
- Create a sequence of trajectories
Required equipment
Ned 2
Adaptative Gripper (or other)
![]() NiryoStudio
NiryoStudio![]() Arduino Nano
Arduino Nano
Other tools:
- 400 point prototype board (30 rows)
- Piezo Buzzer
- PAJ7620 motion sensor
- Male-male and male-female electric cables
Prerequisite knowledge:
The installation of the Arduino programming environment, as well as the uploading of the Arduino program is not explained in this document.
It is strongly recommended to complete the Blockly getting started lab and the Ned2 control lab with Arduino box before completing this lab if you are not used to using Blockly.
Setup:
- Place the Ned2 robotic arm on a table.
- The Ned2 robotic arm must have an obstacle-free perimeter of approximately 60 centimeters in radius.
- Connect the Ned2 robotic arm to the NED2 robotic arm safety box
- Connect the safety box of the NED2 robotic arm to the power supply of the NED2 robotic arm
- Connect the power supply of the NED2 robotic arm to the electrical network
- Connect the Ned2 robotic arm to NiryoStudio
- Connect the Arduino box to the Ned2 robotic arm (Once the box is mounted)
- Enrolled students: 52
- Content Type: Lab
- Programming: Arduino
- Equipment: Bundle discovery
This course includes
Resources