


Conveyor Belt Module Tutorial
Completion requirements
This tutorial presents how to use the Niryo conveyor control module and how it works.
This module allows the conveyor to be controlled autonomously, without relying on the Ned2 robot interface or the NiryoStudio software. This approach offers greater operational flexibility: the conveyor's operation is no longer affected by the robot's state (for example, if the robot program is paused or interrupted). It can therefore be fully managed by a PLC or by external power supplies.
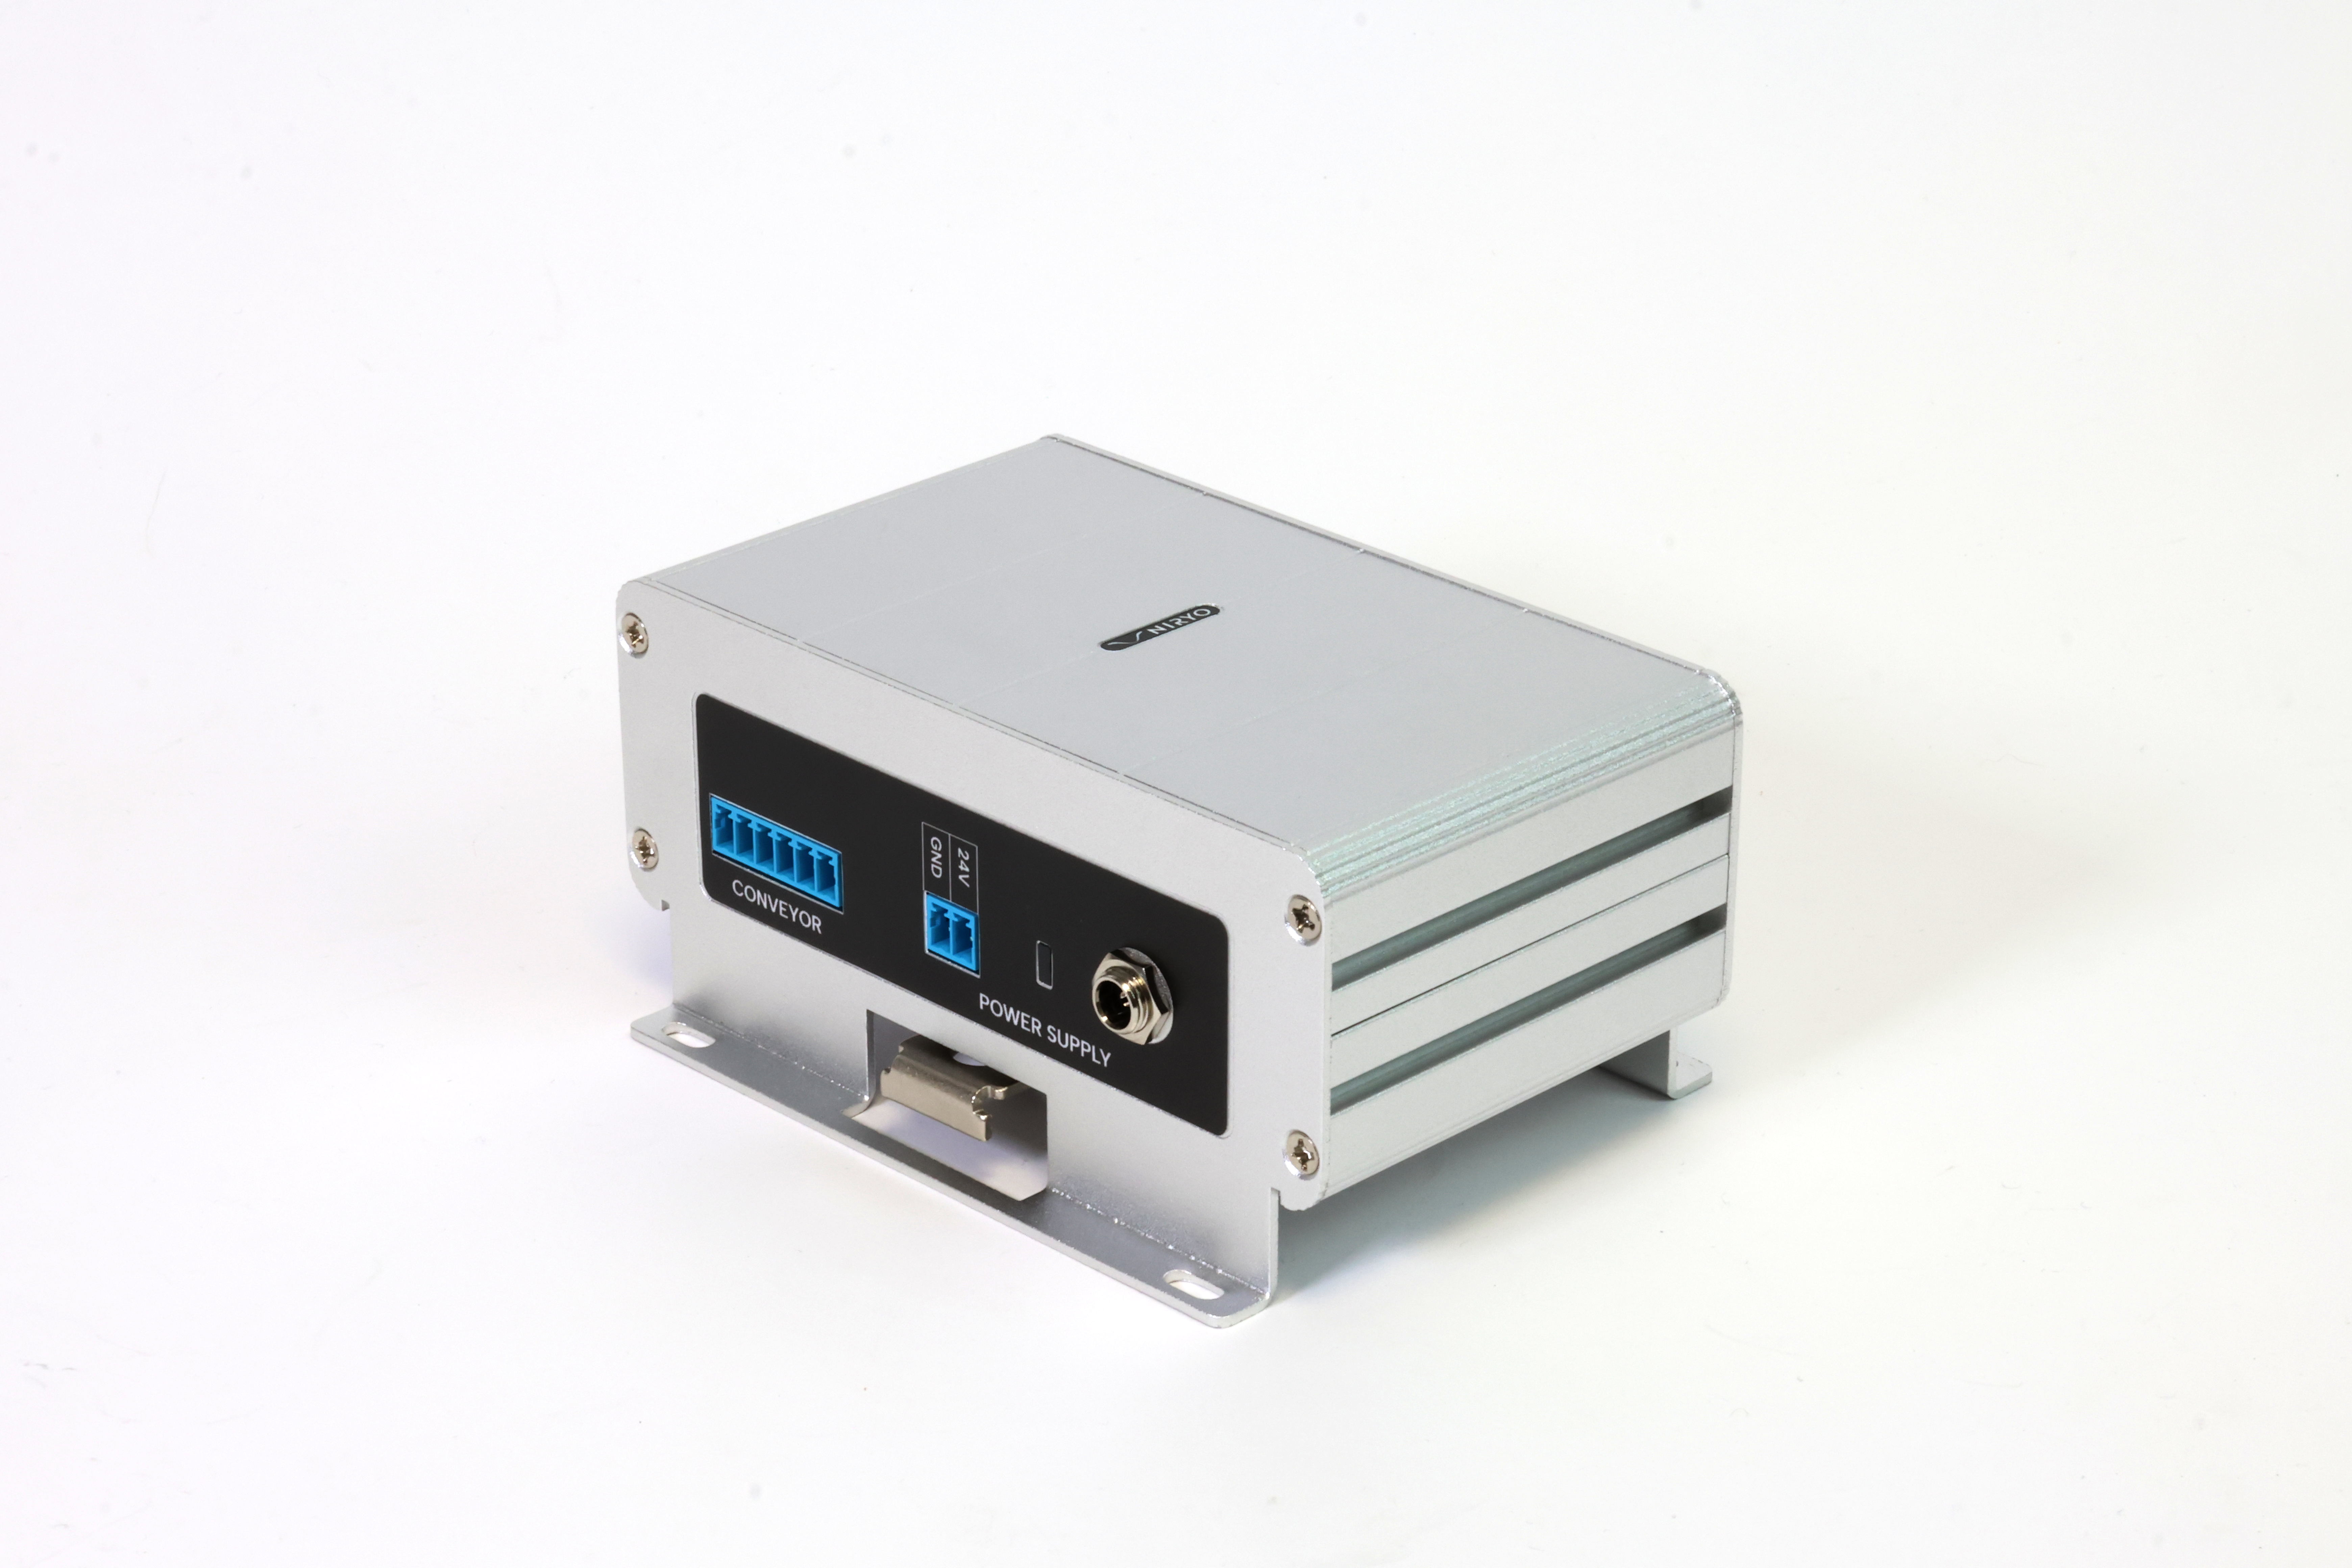
Powering the module
The conveyor module can be powered in two different ways:
- From the mains: using the supplied power adapter.
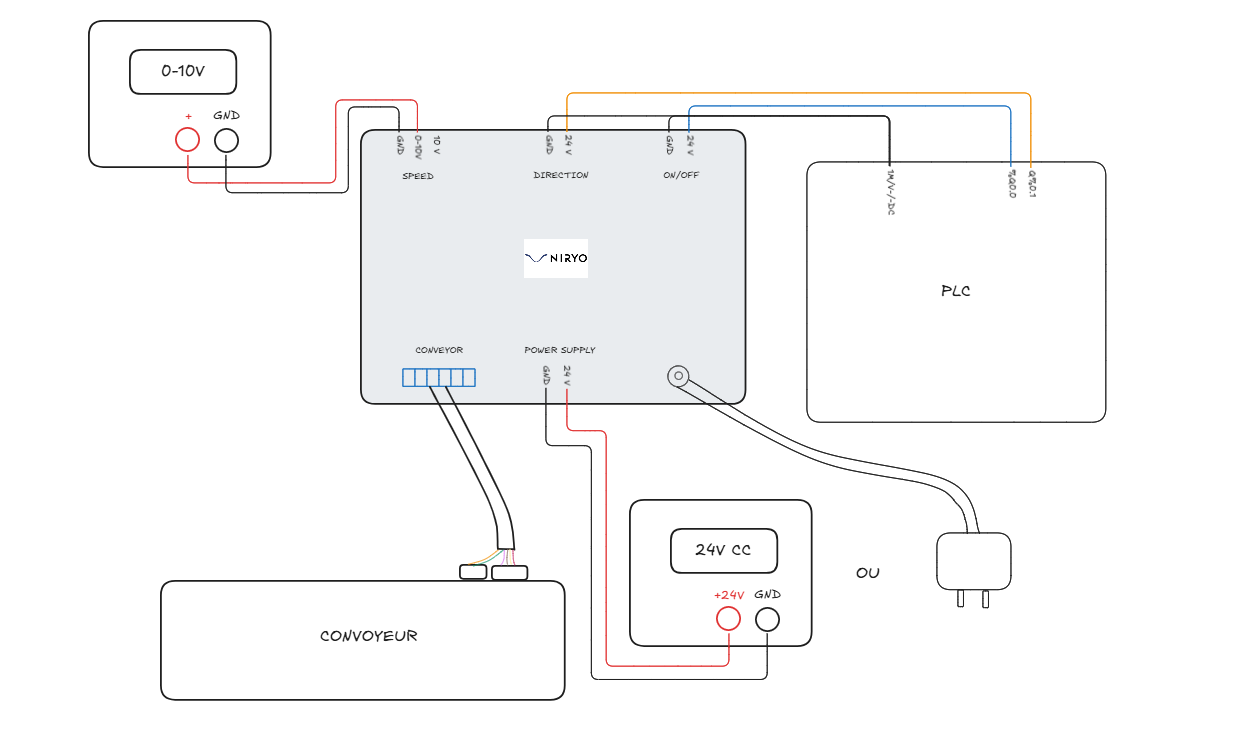
- From an external power supply (e.g. a laboratory power supply): by providing a 24 V DC voltage on the 24 V and GND terminals of the POWER SUPPLY connector.
Module connections and features
The module consists of several terminal blocks and connectors:
- DIRECTION: Controls the conveyor's direction of rotation.
- By default (not powered / 0 V): the conveyor runs forward (FORWARD).
- Powered (24 V): the conveyor runs backward (BACKWARD).
- ON/OFF: Enables or disables the conveyor.
- 24 V: conveyor enabled (ON).
- 0 V: conveyor stopped (OFF).
- SPEED: Sets the conveyor's rotation speed using an analog signal between 0 V and 10 V (0 V → 0 %, 10 V → 100 %).
- Variable speed: the setpoint voltage (0-10 V) can be delivered by an analog output of a PLC or by an external voltage generator.
- Fixed maximum speed (100 %): to run the conveyor directly at its maximum speed without an external setpoint.
- CONVEYOR: Connector dedicated to the physical wiring between the control module and the Niryo conveyor, used to transmit power and control commands.
Usage precautions
Important: For the conveyor to start moving, two essential conditions must be met at the same time:
- The ON/OFF terminal must be enabled (receive a 24 V signal).
- A voltage strictly greater than 0 V must be applied to the SPEED terminal.
Last modified: Friday, 13 November 2026, 3:11 PM