Introduction
Kurse mit 'Introduction' markiert
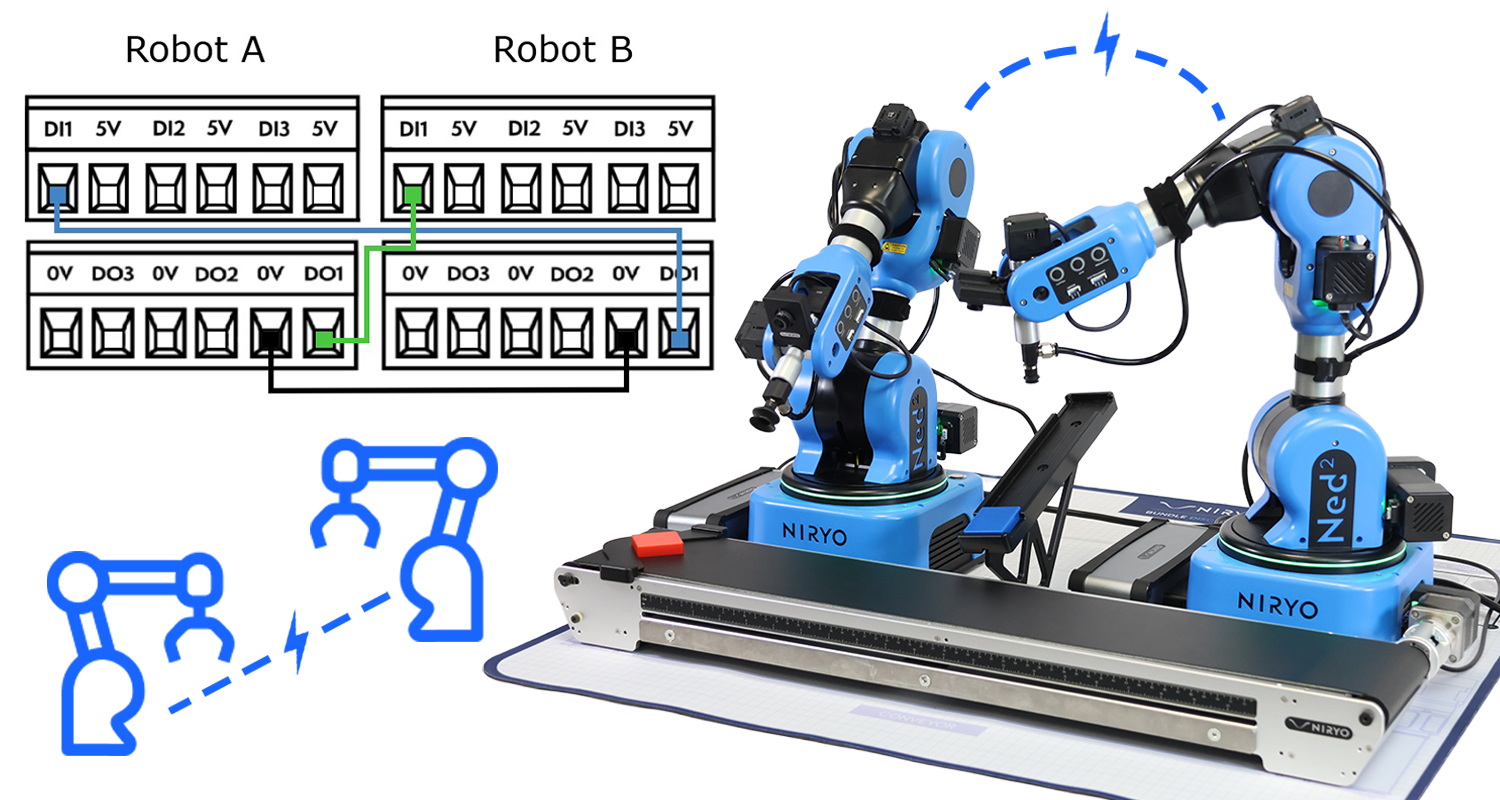
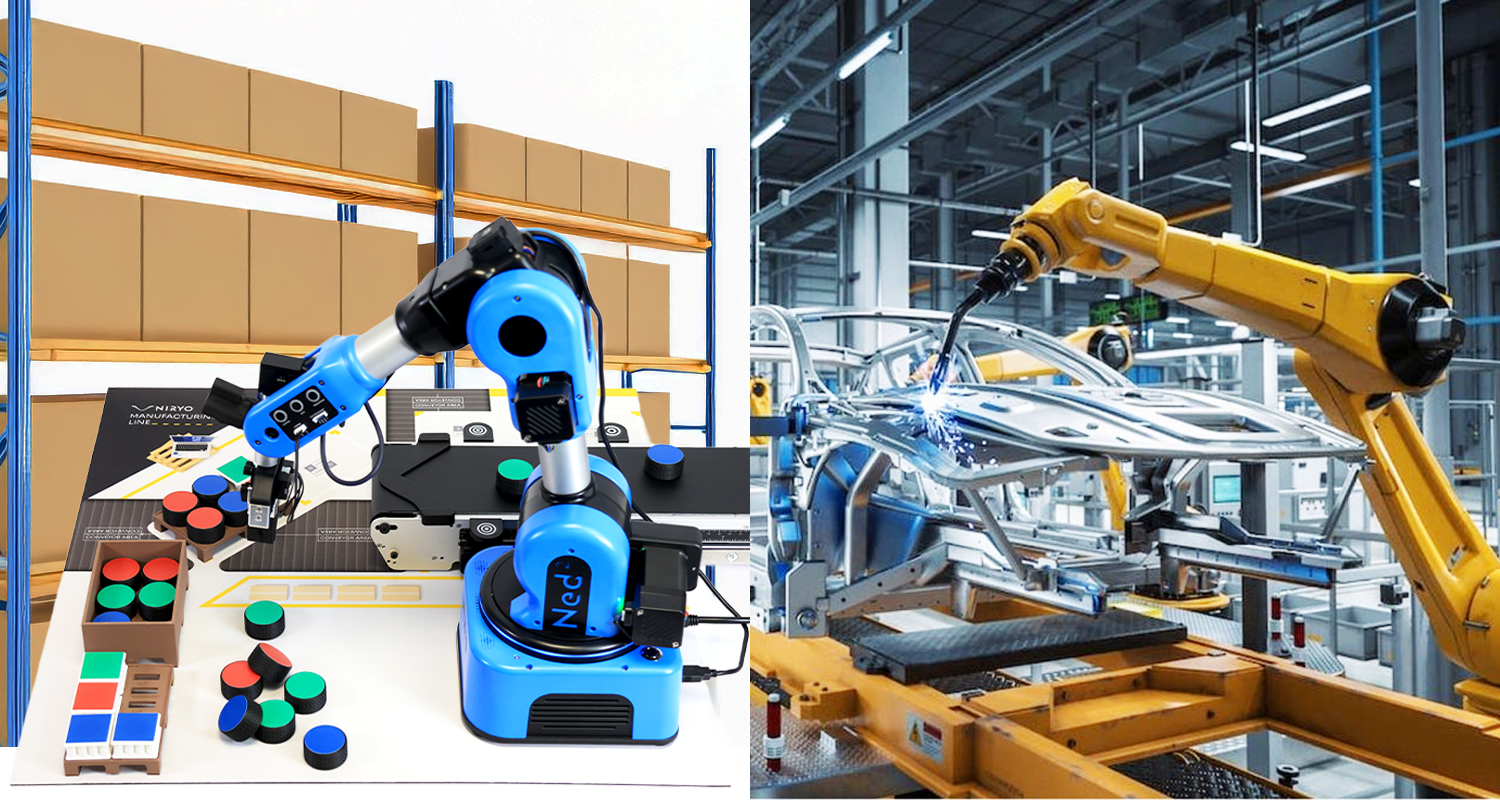
2 Ned2 working in a shared zone
- Content Type: Tutorial
- Equipment: Ned2
- Eingeschriebene Teilnehmer/innen: In diesem Kurs sind noch keine Teilnehmer/innen eingeschrieben.
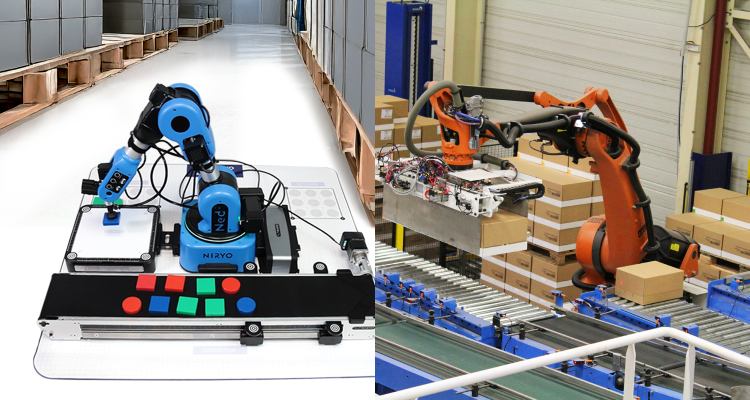
Meine erste Automatisierung mit Blockly
- Content Type: Lab
- Programming: Blockly
- Equipment: Bundle discovery
Lernen Sie Ihre erste Automatisierung mit Blockly
In diesem Kurs programmieren Sie Ihren Ned2-Roboter, damit er Objekte autonom erkennt, aufnimmt und platziert – alles mit Blockly.
Schritt für Schritt lernen Sie, wie Sie Vision, Förderbandsteuerung und Roboterbewegungen kombinieren, um einen vollständigen Automatisierungszyklus zu erstellen.
Voraussetzungen:
- Eingeschriebene Teilnehmer/innen: In diesem Kurs sind noch keine Teilnehmer/innen eingeschrieben.
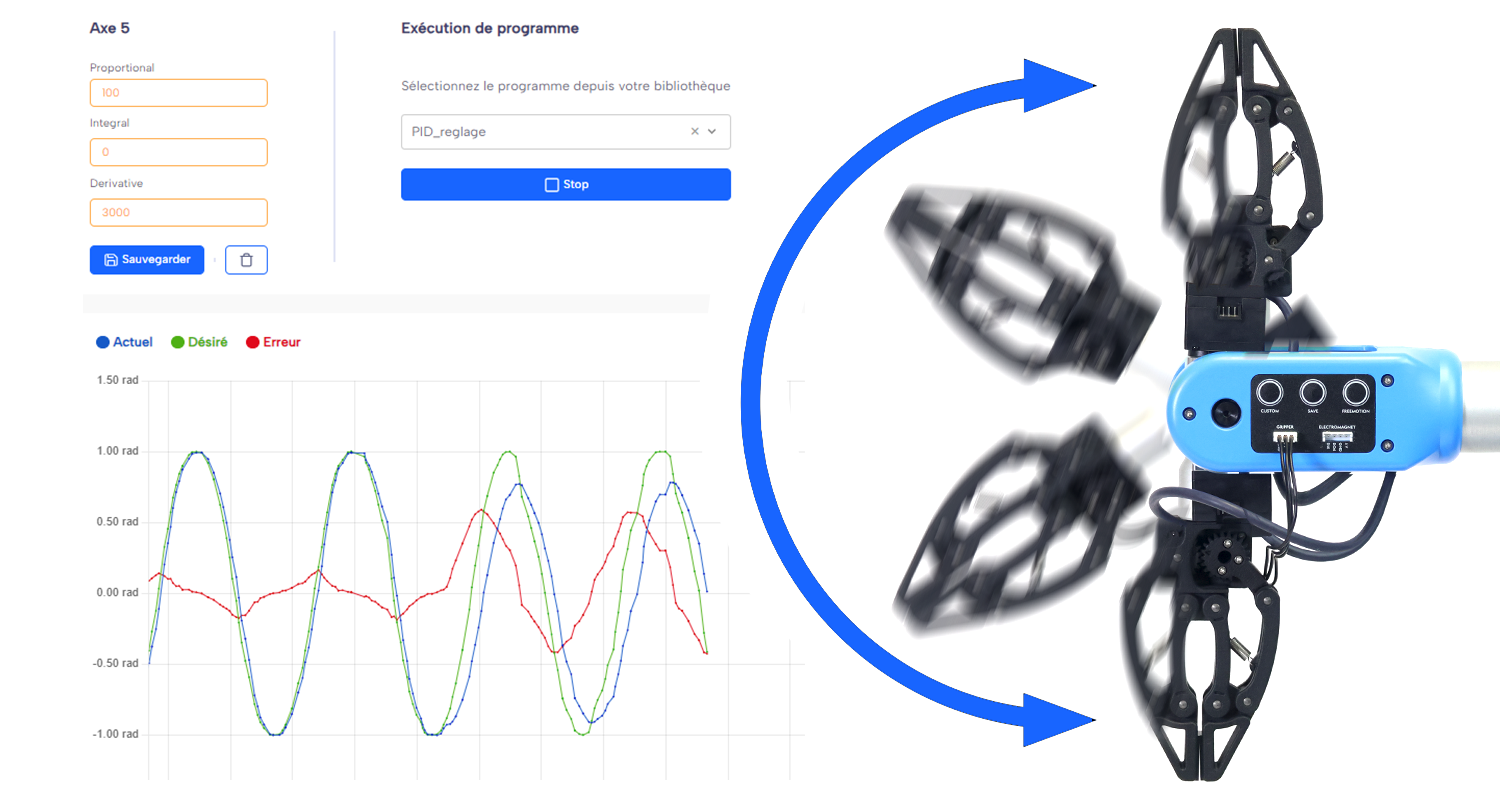
PID Tuning for a Pick & Place
- Length: 4h
- Content Type: Lab
- Programming: Blockly
- Equipment: Ned2
- Eingeschriebene Teilnehmer/innen: In diesem Kurs sind noch keine Teilnehmer/innen eingeschrieben.
De Blockly à Python avec le robot Ned2
- Length: 8
- Content Type: Lab
- Programming: Python
- Equipment: Bundle discovery
À la fin de ce cours, vos étudiants seront capables de :
-
Comprendre les différences entre Blockly et Python.
-
Lire et modifier du code Python généré automatiquement par NiryoStudio.
-
Créer des programmes Python simples contrôlant le Ned2.
-
Utiliser les concepts fondamentaux de Python (variables, boucles, conditions, listes, fonctions).
-
Réaliser un projet robotique complet en Python.
- Eingeschriebene Teilnehmer/innen: In diesem Kurs sind noch keine Teilnehmer/innen eingeschrieben.
Einführung in Robotik, Blockprogrammierung und Automatisierung
- Length: 35h
- Content Type: Curriculum
- Programming: Blockly
- Equipment: Bundle discovery
Entdecke die Welt der Robotik mit unserem umfassenden Lehrplan, der für Studierende und Lehrkräfte entwickelt wurde, die die Grundlagen der Automatisierung, Programmierung und robotischen Anwendungen erforschen möchten. Dieser Kurs führt die Teilnehmenden von der Geschichte der Robotik bis hin zur praktischen Programmierung und industriellen Automatisierung mit dem kollaborativen Roboter NED2 (Cobot) und der Blockly-Programmierung.
Für wen ist dieser Kurs geeignet?
✔️ Studierende in MINT- oder technischen Ausbildungsprogrammen
✔️ Lehrkräfte, die einen strukturierten Robotik-Lehrplan suchen
✔️ Einsteiger:innen, die Robotik und Automatisierung ohne Programmierkenntnisse lernen möchten
✔️ Alle, die sich für industrielle Robotik und Automatisierung interessieren
Melde dich noch heute an und mach den ersten Schritt zum Profi in Robotik und Automatisierung! 🚀
- Trainer/in: Malcom Niryo
- Eingeschriebene Teilnehmer/innen: 127
MINT Lehrplan
- Length: 35h
- Content Type: Curriculum
- Programming: Blockly
- Equipment: Bundle STEM
Speziell für MINT-Programme entwickelt führt dieser Lernplan Schüler*innen und Lehrkräfte durch eine praxisorientierte Erkundung der modernen Robotik.
Durch einen interdisziplinären Ansatz, der Wissenschaft, Technologie, Ingenieurwesen und Mathematik kombiniert, lernen die Teilnehmenden die Grundlagen der Robotik, Automatisierung und visuellen Programmierung kennen.
Dies ist eine ideale Ressource, um junge Menschen an die Schlüsselkompetenzen von morgen heranzuführen und ihnen zu ermöglichen, intelligente robotische Systeme zu verstehen, zu steuern und zu entwerfen.
Für wen ist dieser Kurs geeignet?
✔️ Für MINT-Lehrkräfte (Mathematik, Informatik, Naturwissenschaften, Technik)
✔️ Praktische Anwendung von Robotik-Konzepten
✔️ Spannende und praxisnahe Herausforderungen für Ihren Unterricht, Workshops oder Robotik-Clubs
✔️ Förderung von logischem Denken, Kreativität und Teamarbeit
- Eingeschriebene Teilnehmer/innen: 91
Create your own ROS2 Robotic Stack from scratch
- Length: 25h
- Content Type: Curriculum
- Programming: ROS2
- Equipment: Ned2
🚀 Don’t Just Use Robots... Build Them!
Dive into the world of robotics and learn to design, program, and simulate a Niryo robot in its new ROS2 environment. This course is crafted for college students and tech enthusiasts, opening the door to the latest innovations in robotics.
So, are you ready for the journey? Your adventure starts here!
🎯 Who Is This Course For?
- Bachelor's or Master's students in Robotics, Computer Science, or other STEM-related fields
- Educators looking for a structured, ready-to-use robotics course
- Robotics enthusiasts and fans of the Niryo ecosystem
📚 Course Content
- Setting up your robotics dev environment: Ubuntu 24, ROS2 Jazzy, Gazebo Sim Harmonic
- Modeling a Niryo robot using URDF
- Creating and managing ROS2 packages (with Ament-CMake and colcon)
- Understanding ROS2 architecture and communication protocols
- Installing and configuring the MoveIt2 framework
- Creating a ROS2 Control hardware interface
- Simulating motors and controllers with fake hardware
- Building launch files in Python
- Simulating the complete stack in Gazebo Harmonic
- Enabling ROS2-Gazebo communication via ros-gz bridge
- Intro to motion planning using RRT-Connect with OMPL
Learn by doing. Build real robotic systems. Start mastering ROS2 today!
- Eingeschriebene Teilnehmer/innen: 85
Add-on ROS2 : Perform your first simulated pick and place with the Niryo NED2
- Length: 3h
- Content Type: Add-on
- Programming: ROS2
- Equipment: Ned2 + Vision Set
This add-on introduces a gripper to the simulated robot, enabling basic pick and place functionality. It enhances the realism of the simulation by allowing interaction with objects in the environment.
You will learn how to integrate the gripper, control its motion, and execute simple pick and place tasks using MoveIt2 and Gazebo. This extension is ideal for testing manipulation workflows and preparing for real-world deployment.
Let’s take the simulation a step further.
Course content :
- Adding new components to the robot’s URDF, including the gripper
- Manual setup of ROS2 controllers to control the gripper
- Managing robot poses and action sequences with MoveIt2
- Simulating object physics and interactions in Gazebo
- Using ROS2 services for gripper control and automation
- Eingeschriebene Teilnehmer/innen: 37
Bundle Discovery: Montage und Auftragsvorbereitung
- Length: 6h
- Content Type: Lab
- Programming: Python
- Equipment: Bundle discovery
Szenario
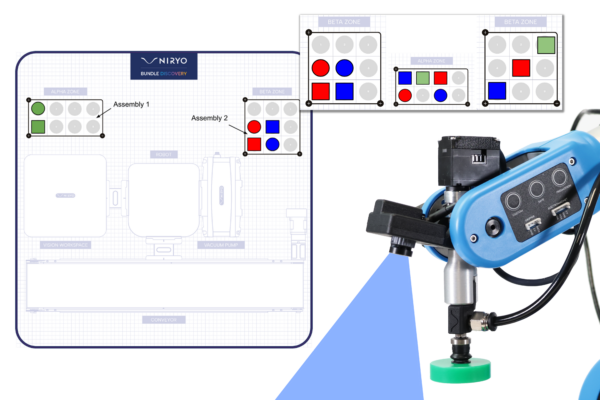
Wir möchten eine Montage durchführen, bei der bestimmte manipulierbare Objekte (Form und Farbe) in den Zonen ALPHA und BETA nach einem vom Benutzer definierten Muster angeordnet werden. Um diese Montage durchzuführen, werden die manipulierbaren Objekte dem Roboterarm NED2 über ein Förderband zugeführt. Der Roboterarm NED2 identifiziert dann die Teile, bevor er sie aufnimmt. Wenn das aufgenommene manipulierbare Objekt nicht für das Muster benötigt wird, wird es im Abfallbereich (Ausschuss) abgelegt, andernfalls wird es in den Zonen ALPHA oder BETA entsprechend dem gegebenen Muster platziert.

Inhalt des Labors
Kapitel 1: Pick and Place
- Definition von Referenzpunkten und Interessenspunkten im Arbeitsbereich des Roboterarms NED2.
- Erstellung der Bewegungsabfolge für eine Pick-and-Place-Operation.
- Durchführung einer Palettier-Operation.
Kapitel 2: Definition eines Musters
- Erstellung einer Eingabefunktion für den Bediener und einer Mustererstellungsfunktion.
- Bestimmung, ob ein manipulierbares Objekt zu einem bestehenden Muster gehört.
- Auslösung der entsprechenden Aktion für ein manipulierbares Objekt gemäß den folgenden Fällen: gehört nicht zu einem Muster, gehört zu einem Muster und wurde bereits verarbeitet, gehört zu einem Muster und wurde noch nicht verarbeitet.
Kapitel 3: Vision
- Zuführung des manipulierbaren Objekts über das Förderband.
- Beherrschung der Ergebnisse der Kameradetektion: Form, Farbe und Position eines manipulierbaren Objekts in einem definierten Arbeitsbereich.
- Aufnahme eines von der Kamera identifizierten manipulierbaren Objekts.
Kapitel 4: Integration
- Automatische Erstellung eines vom Bediener eingegebenen Musters unter Verwendung der vom Förderband gelieferten manipulierbaren Objekte.
Vorausgesetztes Wissen
Python: Grundsyntax + einfache Daten- und Kontrollstrukturen + Schleifen + einfache Funktionsaufrufe
Benötigte Komponenten
- Eingeschriebene Teilnehmer/innen: 90
Erste Schritte mit Blockly Pick and Place
- Length: 2h
- Content Type: Lab
- Programming: Blockly
- Equipment: Bundle STEM
Scenario
Die Studierenden entdecken die Grundfunktionen des Roboterarms NED2. In dieser Übung führt der Roboterarm NED2 mit den Basisblöcken der Blockly „No Code“-Programmierumgebung eine einfache Operation zum Aufnehmen und Ablegen eines Objekts aus.
Inhalt des Labors
Kapitel 1: Einführung in Blockly
- Überblick über Blockly
- Die Programmierumgebung
- Verwendbare Blöcke
Kapitel 2: Erstellung unserer ersten Sequenz
- Erstellung einer ersten Position für den Roboterarm Ned2
- Erstellung mehrerer Positionen mit der „Freemotion“-Taste und der „Speichern“-Taste
- Öffnen und Schließen des Custom-Grippers
- Erstellung einer Schleifen-Sequenz
- Kommentare in der Sequenz hinzufügen
Kapitel 3: Jetzt sind Sie dran!
- Führen Sie eine Pick-and-Place-Sequenz aus
Benötigte Ausrüstung


- Eingeschriebene Teilnehmer/innen: 58
Gestensteuerung des Roboterarms Ned2 mit Arduino
- Content Type: Lab
- Programming: Arduino
- Equipment: Bundle discovery
Szenario :
Der Schüler entdeckt, wie man einfache Anweisungen zwischen einem Arduino und dem Raspberry Pi des Ned2 verbindet und kommuniziert. In dieser Übung führt der Ned2-Roboterarm, abhängig von der vom Bediener ausgeführten Geste, verschiedene Operationen mit Flaschen aus.
Der Roboterarm wird mit Blockly programmiert und der Arduino in C++.
Diese Übung simuliert die Interaktion eines Montagebandarbeiters mit einem Roboter zur Optimierung der „TAKT-ZEIT“.
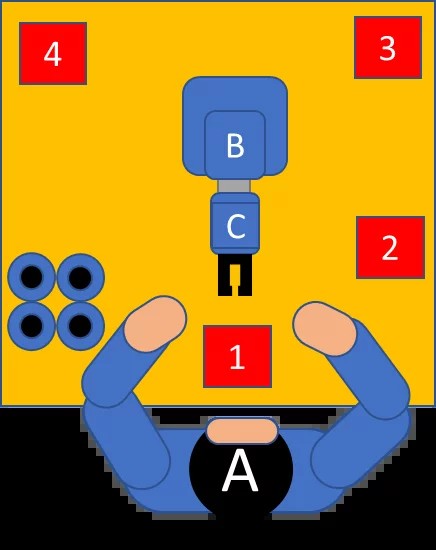
Der Bediener arbeitet an einer Montagelinie, die 3 Produkte vorbereitet: Parfüm, Kölnisch Wasser und Eau de Toilette. Je nach Produkt muss der Ned2-Roboterarm (B):
- Im Fall von Parfüm: die Flasche von Position 1 nehmen und links vom Bediener auf Position 4 platzieren.
- Im Fall von Kölnisch Wasser: die Flasche von Position 1 nehmen, sie von rechts nach links bewegen und mehrmals drehen, dann rechts vom Bediener auf Position 2 platzieren.
- Im Fall von Eau de Toilette: die Flasche von Position 1 nehmen, sie horizontal schütteln und in die rechte hintere Ecke des Tisches auf Position 3 stellen.
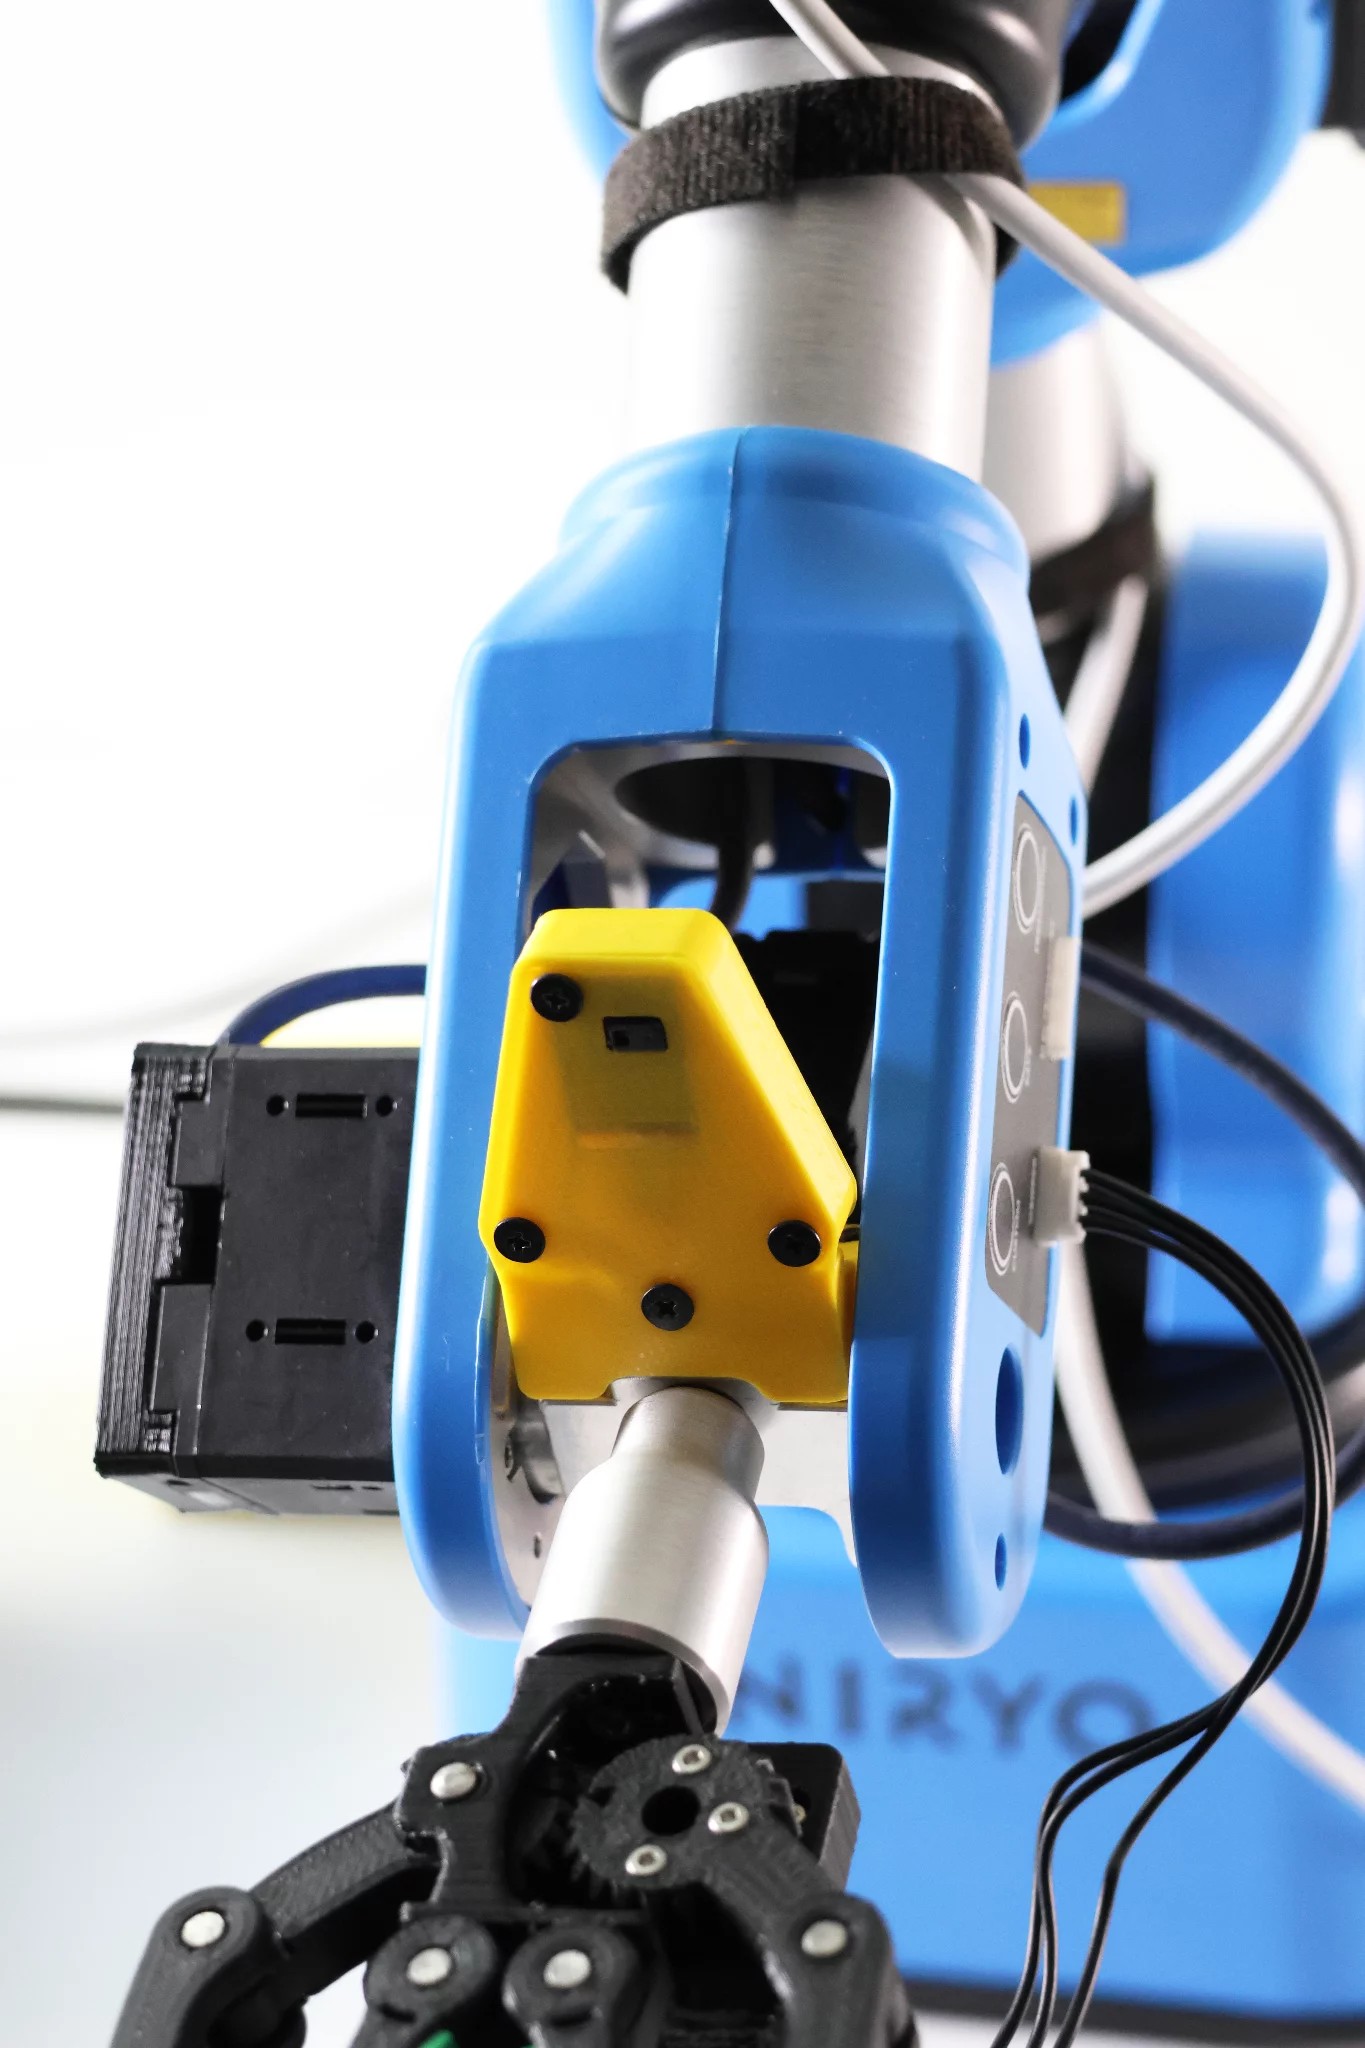
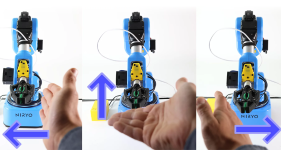
Um dem Ned2-Roboterarm eine der drei Operationen ausführen zu lassen, macht der Bediener eine Handgeste vor dem am Ned2-Roboterarm angebrachten Gestensensor, eine Geste, die vom Ned2-Roboterarm interpretiert wird.
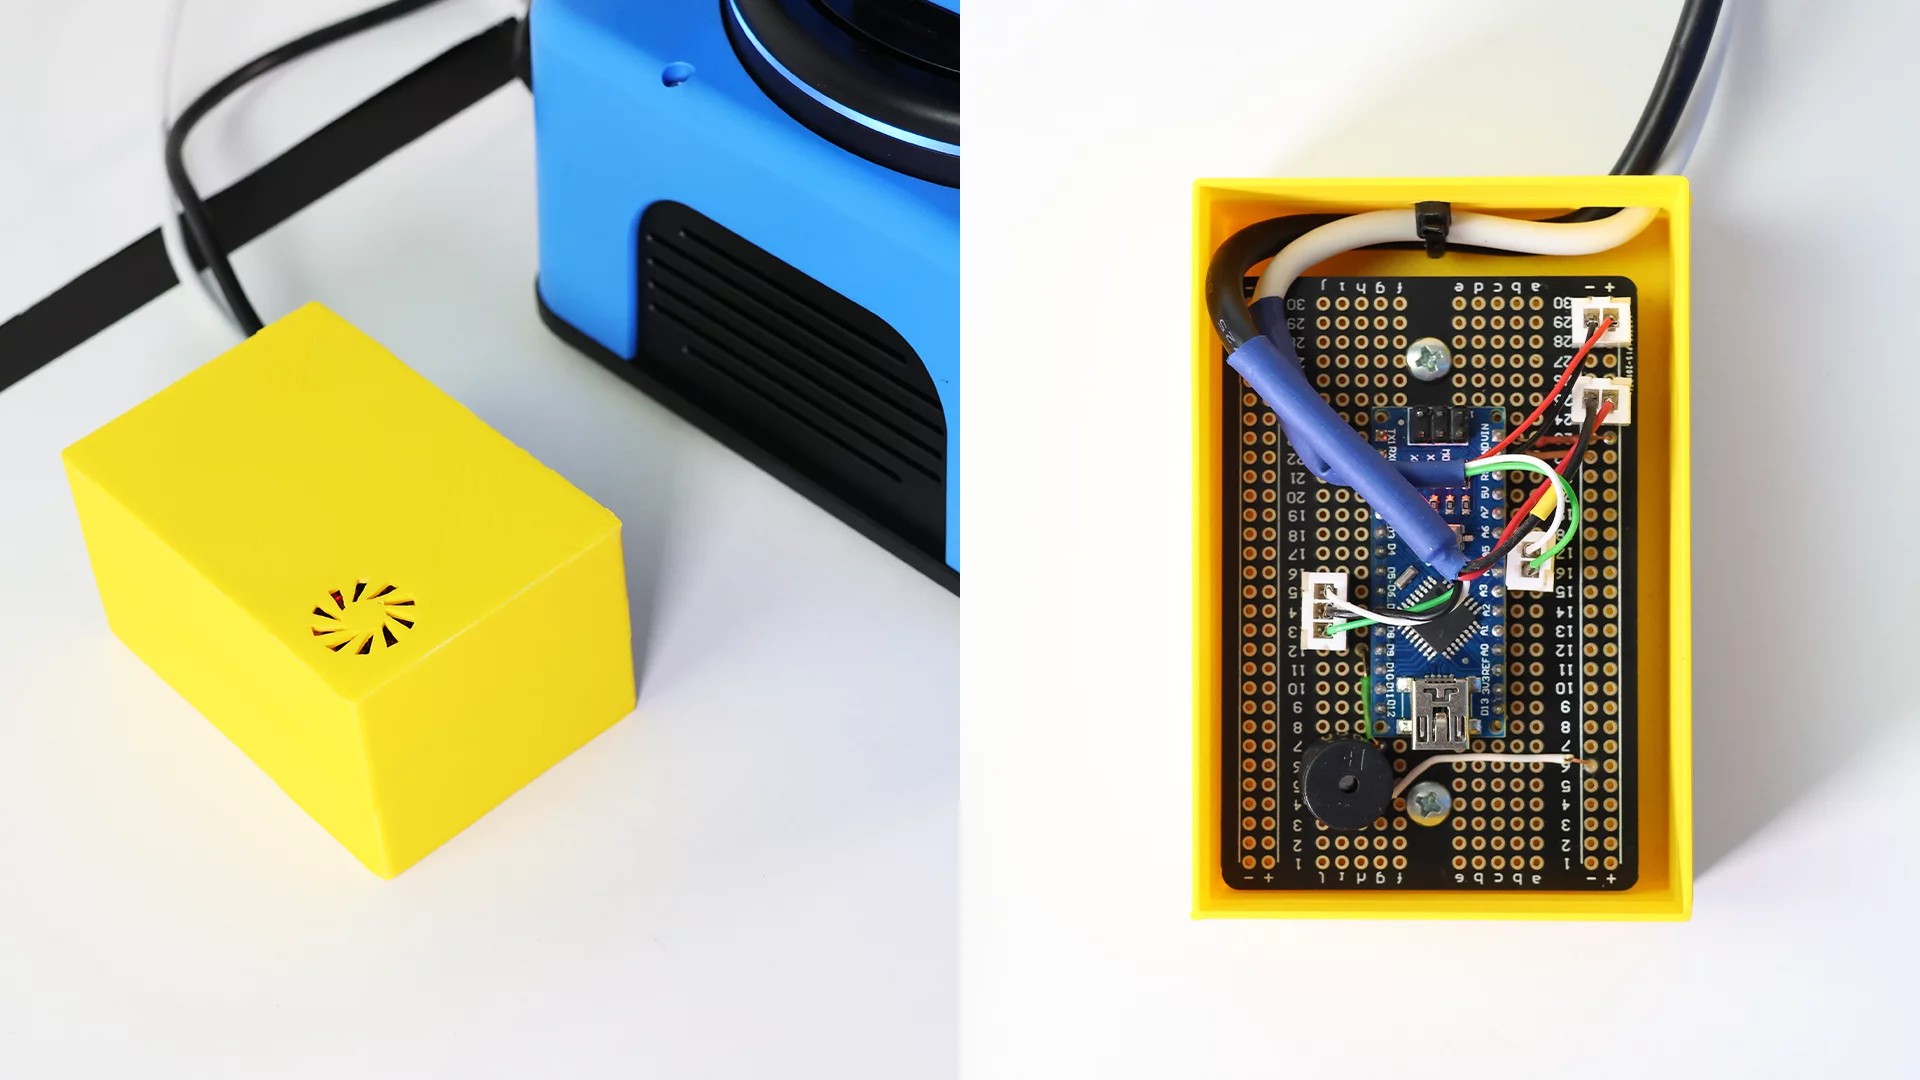
Der Gestensensor ist mit einem Arduino Nano verbunden, und der Arduino Nano ist mit den digitalen Pins auf der Rückseite des Ned2-Roboterarms verbunden.
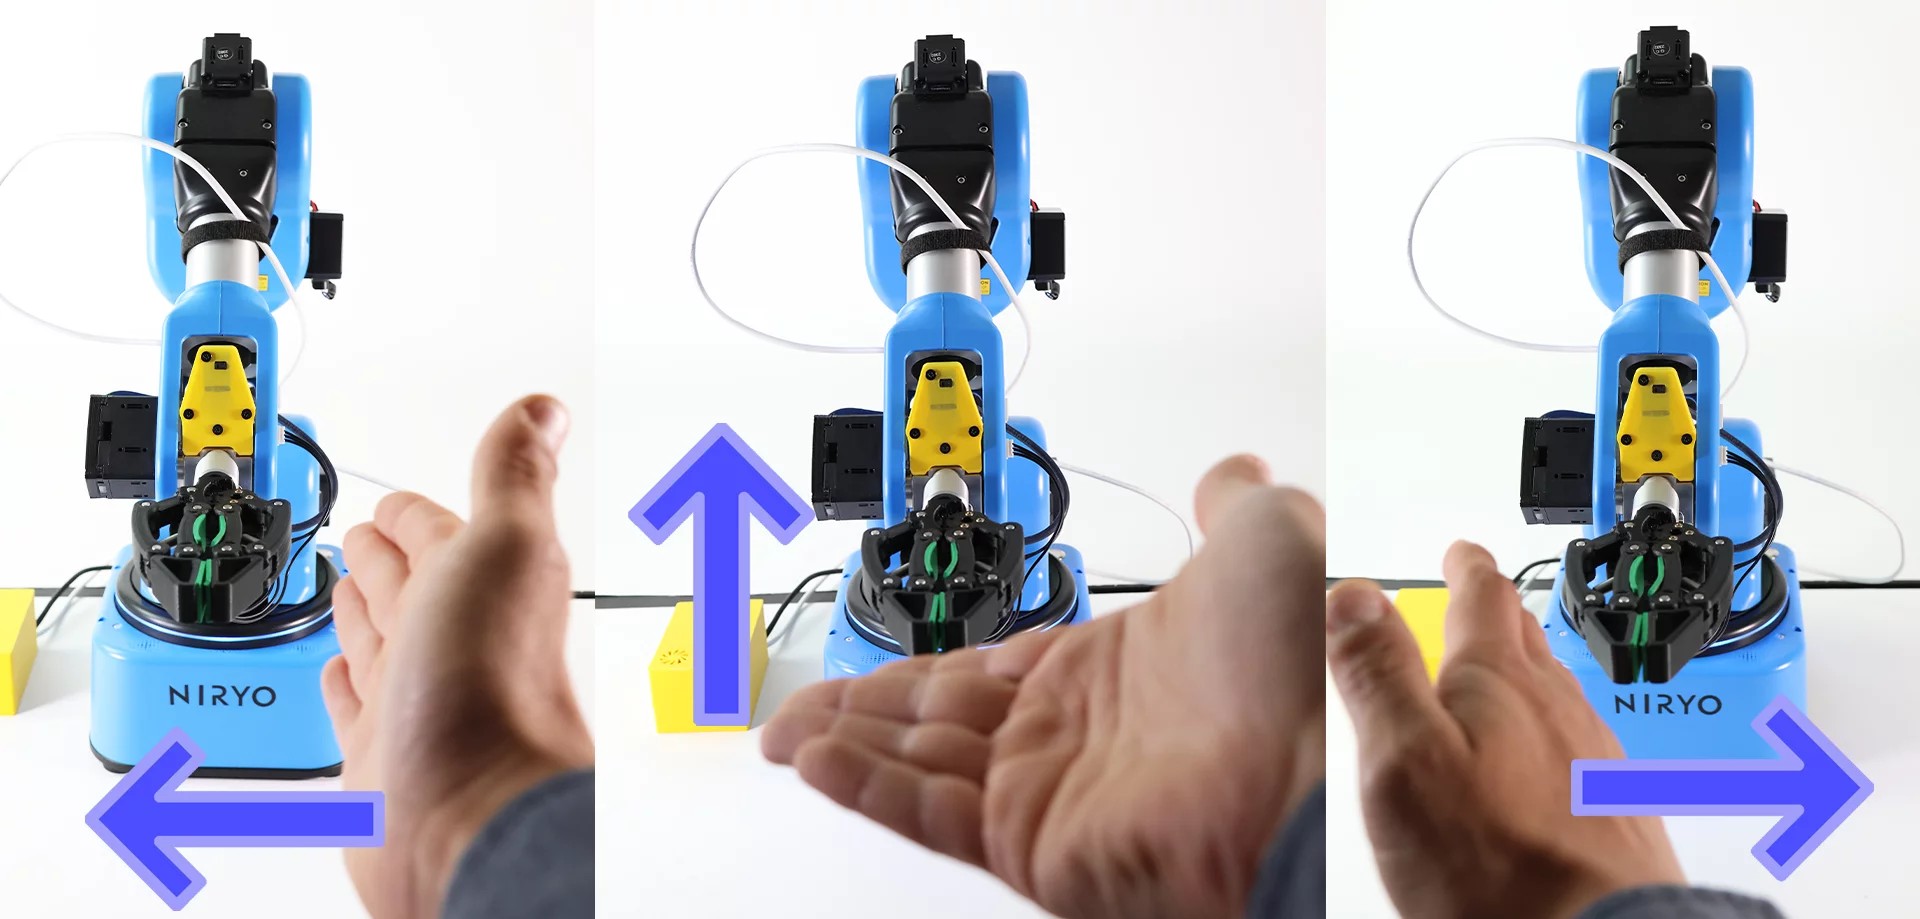
Der Gestensensor kann 9 Gesten erkennen:
- Hoch
- Runter
- Links
- Rechts
- Vorwärts
- Rückwärts
- Uhrzeigersinn Rotation
- Gegen den Uhrzeigersinn Rotation
- Wellenbewegung
In dieser Übung verwenden wir nur 4 Gesten:
- Hoch
- Runter
- Links
- Rechts
Die Gesten Hoch und Runter werden für dieselbe Bewegung des Ned2-Roboterarms verwendet, da die Bediener während der Tests sich nicht sicher waren, ob sie die Hand nach oben oder nach unten bewegen sollten.
Laborinhalte
Kapitel 1: Einführung in Blockly
- Überblick über Blockly
Kapitel 2: Erstellung des Gestenerkennungsmoduls
- Erstellen Sie ein Zubehör für den Ned2-Roboterarm, das Befehle an den Ned2-Roboterarm mit einem Arduino-Mikrocontroller und einem PAJ7620-Sensor geben kann
Kapitel 3: Erstellen von Bewegungssequenzen für den Ned2-Roboterarm
- Erstellen Sie eine Sequenz von Trajektorien
Benötigte Ausrüstung
 Ned 2
Ned 2
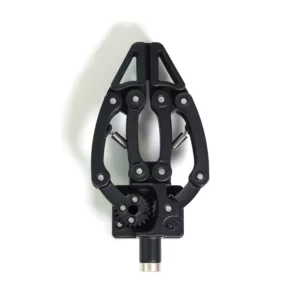 Adaptiver Greifer (oder anderer)
 NiryoStudio
![]() Arduino Nano
Arduino Nano
Weitere Werkzeuge:
- 400-Punkte-Prototypenplatine (30 Reihen)
- Piezo Summer
- PAJ7620 Bewegungssensor
- Männlich-männliche und männlich-weibliche Elektrokabel
Vorausgesetztes Wissen:
Die Installation der Arduino-Programmierumgebung sowie das Hochladen des Arduino-Programms wird in diesem Dokument nicht erklärt.
Es wird dringend empfohlen, das Blockly-Einsteigerlabor und das Ned2-Steuerungslabor mit Arduino-Box vor diesem Labor zu absolvieren, falls man nicht mit Blockly vertraut ist.
Aufbau:
- Stellen Sie den Ned2-Roboterarm auf einen Tisch.
- Der Ned2-Roboterarm benötigt einen hindernisfreien Bereich mit einem Radius von ca. 60 Zentimetern.
- Verbinden Sie den Ned2-Roboterarm mit der Sicherheitsbox des Ned2-Roboterarms.
- Verbinden Sie die Sicherheitsbox des Ned2-Roboterarms mit dem Netzteil des Ned2-Roboterarms.
- Verbinden Sie das Netzteil des Ned2-Roboterarms mit dem Stromnetz.
- Verbinden Sie den Ned2-Roboterarm mit NiryoStudio.
- Verbinden Sie die Arduino-Box mit dem Ned2-Roboterarm (sobald die Box montiert ist).
- Eingeschriebene Teilnehmer/innen: 28
Steuerung des Ned2 mit einer Arduino-basierten Steuerbox
- Content Type: Lab
- Programming: Arduino
- Equipment: Bundle STEM
Szenario
Die Schüler lernen, wie man einfache Anweisungen zwischen einem Arduino und dem Raspberry Pi von Ned überträgt und kommuniziert. In dieser Übung empfängt der NED2-Roboterarm Anweisungen von einem Arduino, um entweder Phiolen zum Bediener zurückzubringen oder Phiolen vom Bediener zu holen, sie zu schütteln und in eine Box zu legen. Der Roboterarm wird mit Blockly programmiert und der Arduino in C++.

Der Bediener muss Phiolen füllen, deren Inhalt durch Schütteln mischen und die Phiolen anschließend in eine Pappschachtel legen.
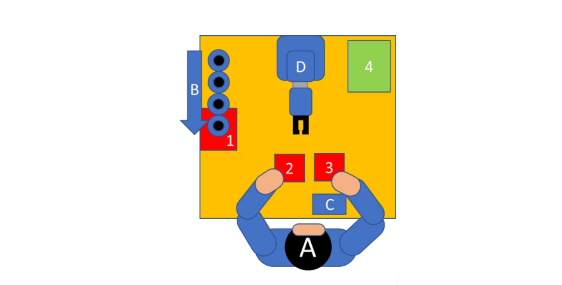
A: Bediener der Montagelinie
B: Förderband für Phiolen
C: Steuerbox für den NED2-Roboterarm
D: NED2-Roboterarm
1: Bereich zum Abstellen der Phiolen
2: Ablagebereich für die Phiole
3: Bereich zum Halten und Schütteln der Phiole
4: Ablagebereich für die geschüttelte Phiole (Pappschachtel)
Wenn der Bediener die Taste 1 an der Steuerbox drückt, nimmt der Roboterarm Phiolen aus Zone 1 und legt sie in Zone 2 ab, bis der Bediener die Taste R drückt.
Wenn der Bediener die Taste 2 an der Steuerbox drückt, nimmt der Roboterarm Phiolen aus Zone 3, schüttelt sie und legt sie in Zone 4 ab, bis der Bediener die Taste R drückt.
Wenn der Bediener die Taste R unmittelbar nach Taste 1 oder Taste 2 drückt, führt der NED2-Roboterarm die gewählte Operation nur einmal aus.
Laborinhalt
Kapitel 1: Einführung in Blockly
Erste Schritte mit Blockly
Kapitel 2: Erstellung der Steuerbox für den NED2-Roboterarm
Montieren einer Steuerbox, die dem NED2-Roboterarm über einen Arduino-Mikrocontroller und 3 kapazitive Tasten Befehle gibt.
Kapitel 3: Erstellung von Bewegungsabläufen für den NED2-Roboterarm
Erstellung einer Bewegungssequenz mit Blockly
Erstellung der Schnittstelle zwischen Arduino und Ned2.
Benötigte Ausrüstung
 Ned 2
Ned 2
 Adaptiver Greifer (oder anderer)
 NiryoStudio
![]() Steuerbox (zu montieren)
Steuerbox (zu montieren)![]() Arduino Nano
Arduino Nano
Steuerbox (zum Zusammenbauen)
Arduino Nano
Steuerbox
Arduino Nano (derselbe Code funktioniert auch mit Arduino UNO oder MEGA)
400-Punkt-Prototyp-Platine (30 Reihen)
Piezo-Buzzer
Grüne LED
Rote LED
Zwei 220k Widerstände
3 kapazitive TTP223B-Sensoren
Männlich-männlich und männlich-weiblich Kabel
3D-gedrucktes Gehäuse (optional, Modell unter docs.niryo.com verfügbar)
Vorausgesetztes Wissen
Grundlagen zum Aufbau elektronischer Schaltungen.
Die Arduino-Programmierumgebung sowie das Hochladen von Programmen auf das Arduino-Board werden in diesem Dokument nicht erklärt.
Es wird dringend empfohlen, das Blockly-Einführungslabor zu absolvieren, bevor man dieses Labor durchführt, wenn man Blockly noch nie verwendet hat.
Einrichtung
- Stellen Sie den Ned2-Roboterarm auf einen Tisch.
- Der Ned2-Roboterarm benötigt einen hindernisfreien Bereich mit einem Radius von ca. 60 cm.
- Verbinden Sie den Ned2-Roboterarm mit der Sicherheitsbox des NED2.
- Verbinden Sie die Sicherheitsbox des NED2-Roboterarms mit dem Netzteil des NED2.
- Schließen Sie das Netzteil des NED2-Roboterarms an das Stromnetz an.
- Verbinden Sie den Ned2-Roboterarm mit NiryoStudio.
- Schließen Sie die Arduino-Box an den Ned2-Roboterarm an (nachdem die Box zusammengebaut wurde).
- Eingeschriebene Teilnehmer/innen: 22
Entdeckung der 6 Achsen des NED2-Roboterarms
- Content Type: Lab
- Programming: Blockly
- Equipment: Bundle STEM
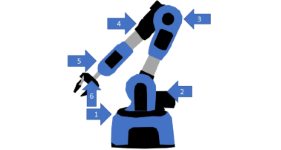
Der Schüler entdeckt das Konzept der 6 Achsen und wie es auf den Ned2 angewendet wird.
In dieser Übung wird der Ned2-Roboterarm verwendet, um ein Objekt zu bewegen und anschließend in eine Singularität zu positionieren.
Inhalt der Übung
Kapitel 1: Der Sechs-Achsen-Roboterarm: Eine Nachahmung des menschlichen Arms
- Das Konzept der 6 Achsen verstehen und wie es auf den Ned2 angewendet wird.
Kapitel 2: Aktivitäten: Die 6 Achsen des Ned2-Roboterarms
- Direkte Bewegungen entdecken
Kapitel 3: Arbeitsraum und Singularitäten
- Die Konzepte Arbeitsraum und Singularität entdecken.
Kapitel 4: Aktivität: Erzeugung einer Singularität
- Eine „nutzlose“ Bewegung mit dem NED2-Roboterarm ausführen.
Benötigte Ausrüstung
 Ned 2
Ned 2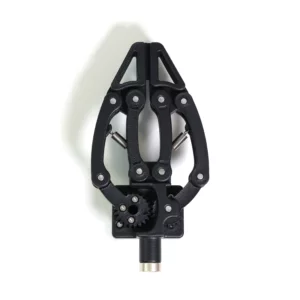 Adaptiver Greifer (oder anderer)
 NiryoStudio
Installation
- Den Ned2-Roboterarm auf einem Tisch platzieren. Der Arbeitsbereich um den Roboterarm sollte einen Radius von etwa 60 Zentimetern frei von Hindernissen sein.
- Den Ned2-Roboterarm mit dem Sicherheitskasten des NED2-Roboterarms verbinden.
- Den Sicherheitskasten des NED2-Roboterarms an die Stromversorgung anschließen.
- Die Stromversorgung des NED2-Roboterarms an das Stromnetz anschließen.
- Den Ned2-Roboterarm mit NiryoStudio verbinden.
- Eingeschriebene Teilnehmer/innen: 45
Sprachsteuerung des Ned2 mit Arduino
- Length: 4h
- Content Type: Lab
- Programming: Arduino
- Equipment: Bundle STEM
Szenario
Der Schüler entdeckt, wie man einfache Anweisungen zwischen einem Arduino und dem Raspberry Pi des Ned2 verbinden und kommunizieren kann. In dieser Übung bringt der Ned2-Roboterarm, je nach dem vom Bediener ausgesprochenen Wort, Behälter mit Bauteilen in Reichweite des Bedieners. Der Roboterarm wird mit Blockly programmiert und der Arduino mit C++.
Diese Übung simuliert die Interaktion eines Bedieners an einer Montagelinie mit einem Cobot zur Optimierung der TAKTZEIT.
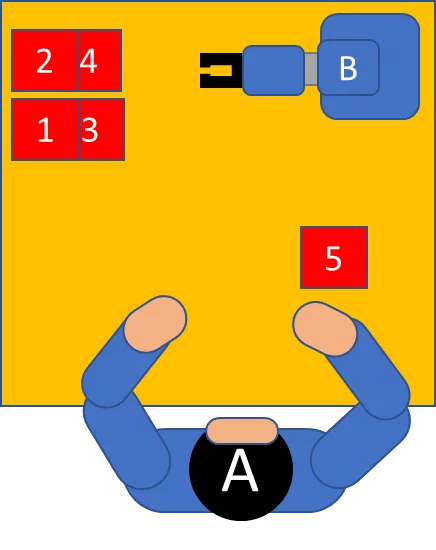
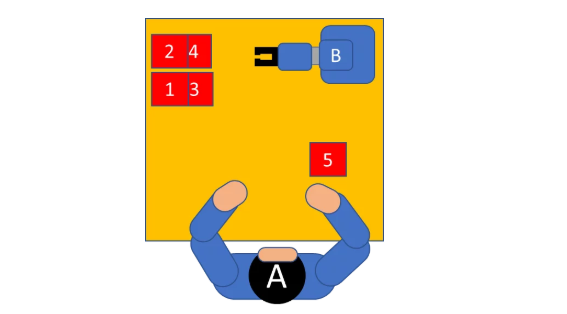
Der Bediener (A) arbeitet an einer Montagelinie, die kleine Haushaltsgeräte herstellt. Dieser Bediener befindet sich am Ende der Linie und testet die fertigen Produkte. An dem Produkt können 4 Elemente defekt sein. Wenn der Bediener ein Problem feststellt, fordert er den Roboterarm auf, ihm ein Ersatzteil zur Verfügung zu stellen.
Die 4 ersetzbaren Elemente befinden sich in Behältern an den Positionen 1, 2, 3 und 4. Wenn der Bediener ein defektes Bauteil nennt (z. B. Taste, Lüfter, Schalter, Kabel), nimmt der NED2-Roboterarm (B) den Behälter mit dem gewünschten Bauteil und positioniert ihn für 5 Sekunden in Position 5, damit der Bediener das Teil entnehmen kann.
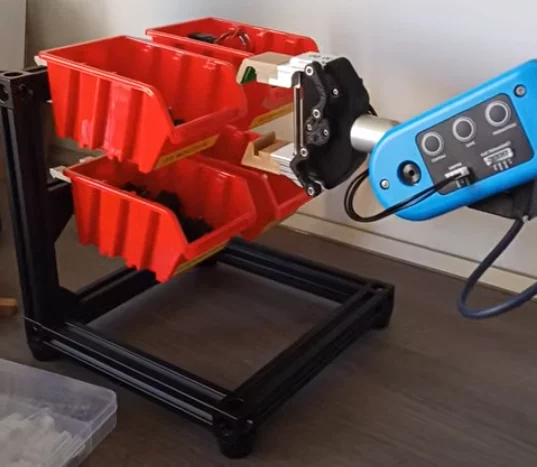
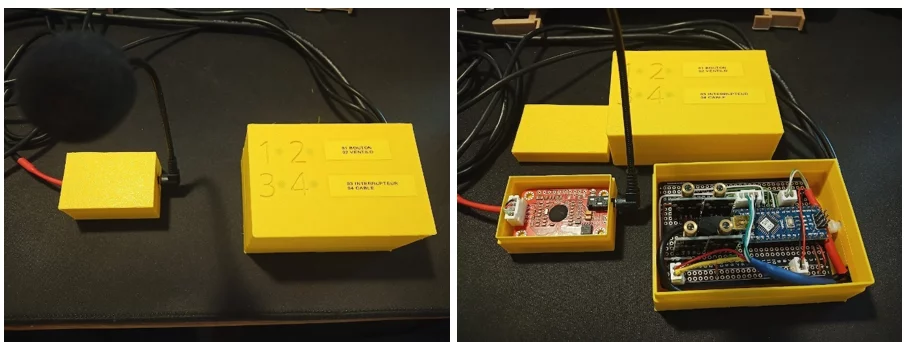
Das Spracherkennungsmodul ist mit einem Arduino Nano verbunden, und dieser ist mit den digitalen Pins auf der Rückseite des Ned2-Roboterarms verbunden.
Das Spracherkennungsmodul muss mit der Stimme des Bedieners trainiert werden. Dazu fordert das mit dem ELECHOUSE v3-Modultreiber gelieferte Trainingsprogramm den Bediener über ein Mikrofon auf, jedes Wort zur Identifikation eines Behälters mehrfach auszusprechen.
Laborinhalt
Kapitel 1: Einführung in Blockly
- Überblick über Blockly
Kapitel 2: Erstellung des Spracherkennungsmoduls
- Erstellen Sie ein Zubehörteil für den NED2-Roboterarm, das in der Lage ist, dem NED2-Bot mithilfe eines Arduino-Mikrocontrollers und eines ELECHOUSE v3-Spracherkennungsmoduls Befehle zu erteilen.
Kapitel 3: Erstellung von Bewegungssequenzen für den NED2-Roboterarm
- Führen Sie eine Pick-and-Place-Sequenz durch
Benötigte Ausrüstung
 Ned2
Ned2
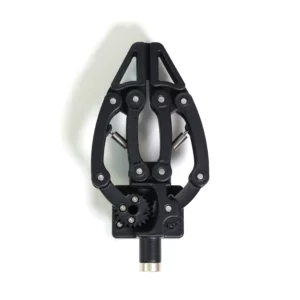 Adaptiver Greifer
 NiryoStudio
![]() Arduino Nano
Arduino Nano
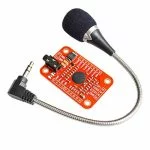 ELECHOUSE v3
Vorausgesetzte Kenntnisse
- Die Installation der Arduino-Programmierumgebung sowie das Hochladen des Arduino-Programms werden in diesem Dokument nicht erklärt.
- Es wird dringend empfohlen, vor dem Durchführen dieses Labors das Blockly-Einsteigerlabor und das Arduino-Steuerungslabor für Ned2 abzuschließen, wenn Sie Blockly nicht gewohnt sind.
Einrichtung
- Platzieren Sie den Ned2-Roboterarm auf einem Tisch.
- Der Ned2-Roboterarm benötigt eine hindernisfreie Fläche mit einem Radius von ca. 60 cm.
- Verbinden Sie den Ned2-Roboterarm mit der Sicherheitsbox des NED2-Roboterarms.
- Verbinden Sie die Sicherheitsbox mit der Stromversorgung des NED2-Roboterarms.
- Verbinden Sie die Stromversorgung des NED2-Roboterarms mit dem Stromnetz.
- Verbinden Sie den Ned2-Roboterarm mit NiryoStudio.
- Verbinden Sie die Arduino-Box mit dem Ned2-Roboterarm (sobald die Box montiert ist).
- Eingeschriebene Teilnehmer/innen: 11


